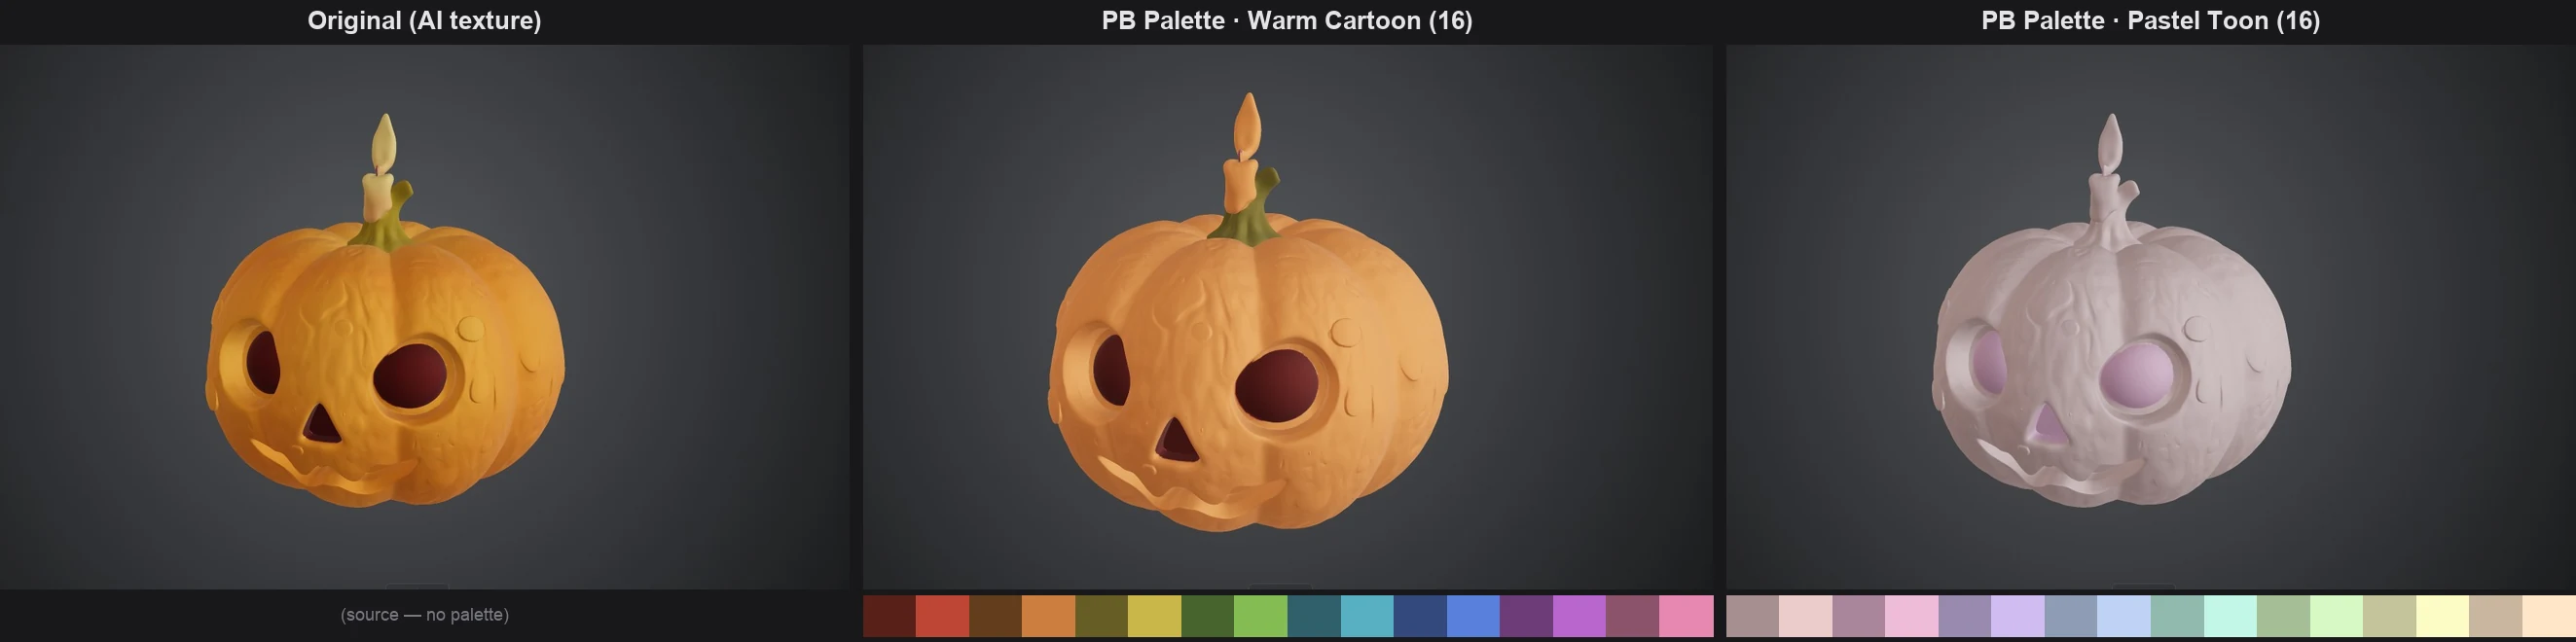
PB Palette is one of the engines inside the Texture tool (alongside Tripo and Meshy). Instead of generating a new texture, it recolors the model's existing texture — mapping its colors to a palette you choose. It never touches the shape or the UVs.
Its biggest use is unifying the colors across many assets. When you generate a barrel, a sword, a tree, and a character separately with AI, their color moods don't match and they don't read as one game. Apply the same palette to all of them and they snap together as a set. It's also great for a limited-color flat / low-poly look or a retro aesthetic.
How it works
PB Palette maps every pixel of the texture to the nearest color in the palette. It matches by how different colors look to the human eye — so a pixel lands on a color that looks natural, not just one that's numerically close. There's no dithering, so surfaces come out clean and flat.
- No shape or UV change — the mesh and UV coordinates stay exactly as they were; only the colors change.
- Base color (Albedo) only — the result is an unlit, stylized look without the metallic / roughness / normal maps. That's an intended look, not a loss of quality.
How to use it
- Open the model you want to recolor from your library and switch to the Texture tool.
- Pick PB Palette as the engine.
- Choose a palette source (the four options below).
- Set the color count.
- Check the final color set in the Result palette preview on the left.
- Press Generate.
Four palette sources
- PB Preset — palettes curated by PicoBerry (e.g. Warm Cartoon, Pastel Toon, Muted Noir). Just pick one and go.
- My Palette — choose from palettes you've saved. (See "Make a palette from an image" below.)
- Image — pull colors from a single reference image and use them as the palette. Great for stamping the color mood of your concept art or mood board onto your assets.
- Auto — build the palette automatically from the model's own texture colors. Use this when you just want to reduce that model's colors to a fixed count.
Color count
Set how many colors go into the palette. Pick from the 16 / 64 / 128 / 256 buttons, or use Custom to open a slider and dial in any number (up to 512).
- Fewer (e.g. 16–32) — a flatter, more stylized look with simpler colors.
- More (e.g. 128–256) — more faithful to the original colors, with smoother transitions.
Change any input and the Result palette preview updates instantly, so you can eyeball and tune the color set before generating.
Make a palette from an image (Image feed)
You can also pull a palette out of a generated image. A palette extracted from an image in the feed rides along on the card as a small color-grid thumbnail, and it's saved into My Palette so you can reuse it on any model.
Click that palette thumbnail and a menu appears.
- Send to PB Palette — jumps straight to the Texture tool's PB Palette (My Palette) with that palette pre-selected.
- Delete — removes the palette.
Use palettes made this way as your own "art palette" to give the same color mood to many models.
Result palette preview
The Result palette on the left panel shows, as a grid, the exact color set that will be applied with your current settings (source + color count). Similar colors are arranged next to each other, so you can judge the final look before generating. There's no separate "build palette" button — the preview follows your inputs live.
The credits required are shown on the Generate button once you pick the engine.
Next steps
A recolored model can be downloaded via Export or sent to Animation. For polygon cleanup or other texturing approaches, see Remesh & Retexture.