The Blender Bridge is a free Blender add-on that sends a 3D asset from your PicoBerry workspace straight into Blender — one click, no file to download and re-import. It runs entirely on your own machine: there's no API key and no paid lock, so anyone on any plan can use it.
Install the add-on
- Download the add-on (a
.zipfile). You don't need to unzip it. - In Blender, open Edit → Preferences → Add-ons.
- Click Install (or Install from Disk), choose the
.zipyou downloaded, and confirm. - Find PicoBerry Bridge in the list and tick the checkbox to enable it.
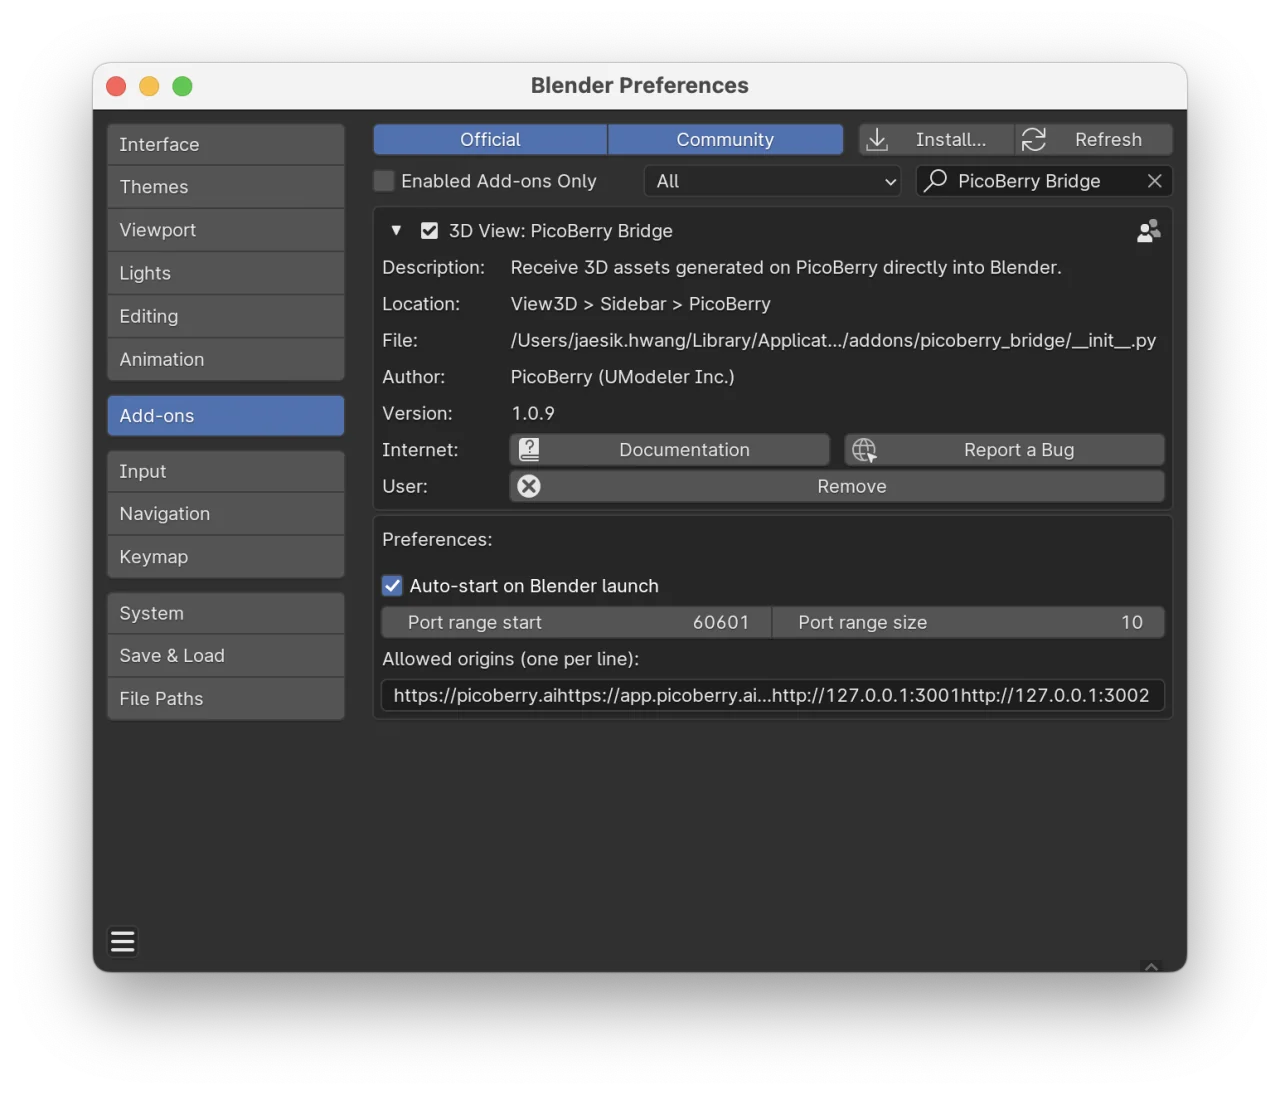
Connect Blender to PicoBerry
The add-on starts automatically when you enable it, so it's usually ready right away.
- In Blender — in the 3D Viewport header (next to the View · Select · Add · Object menus) you'll see a PicoBerry chip. Click it to open a panel whose status line reads Ready or Listening on port 60601. If it says Stopped, press Start.
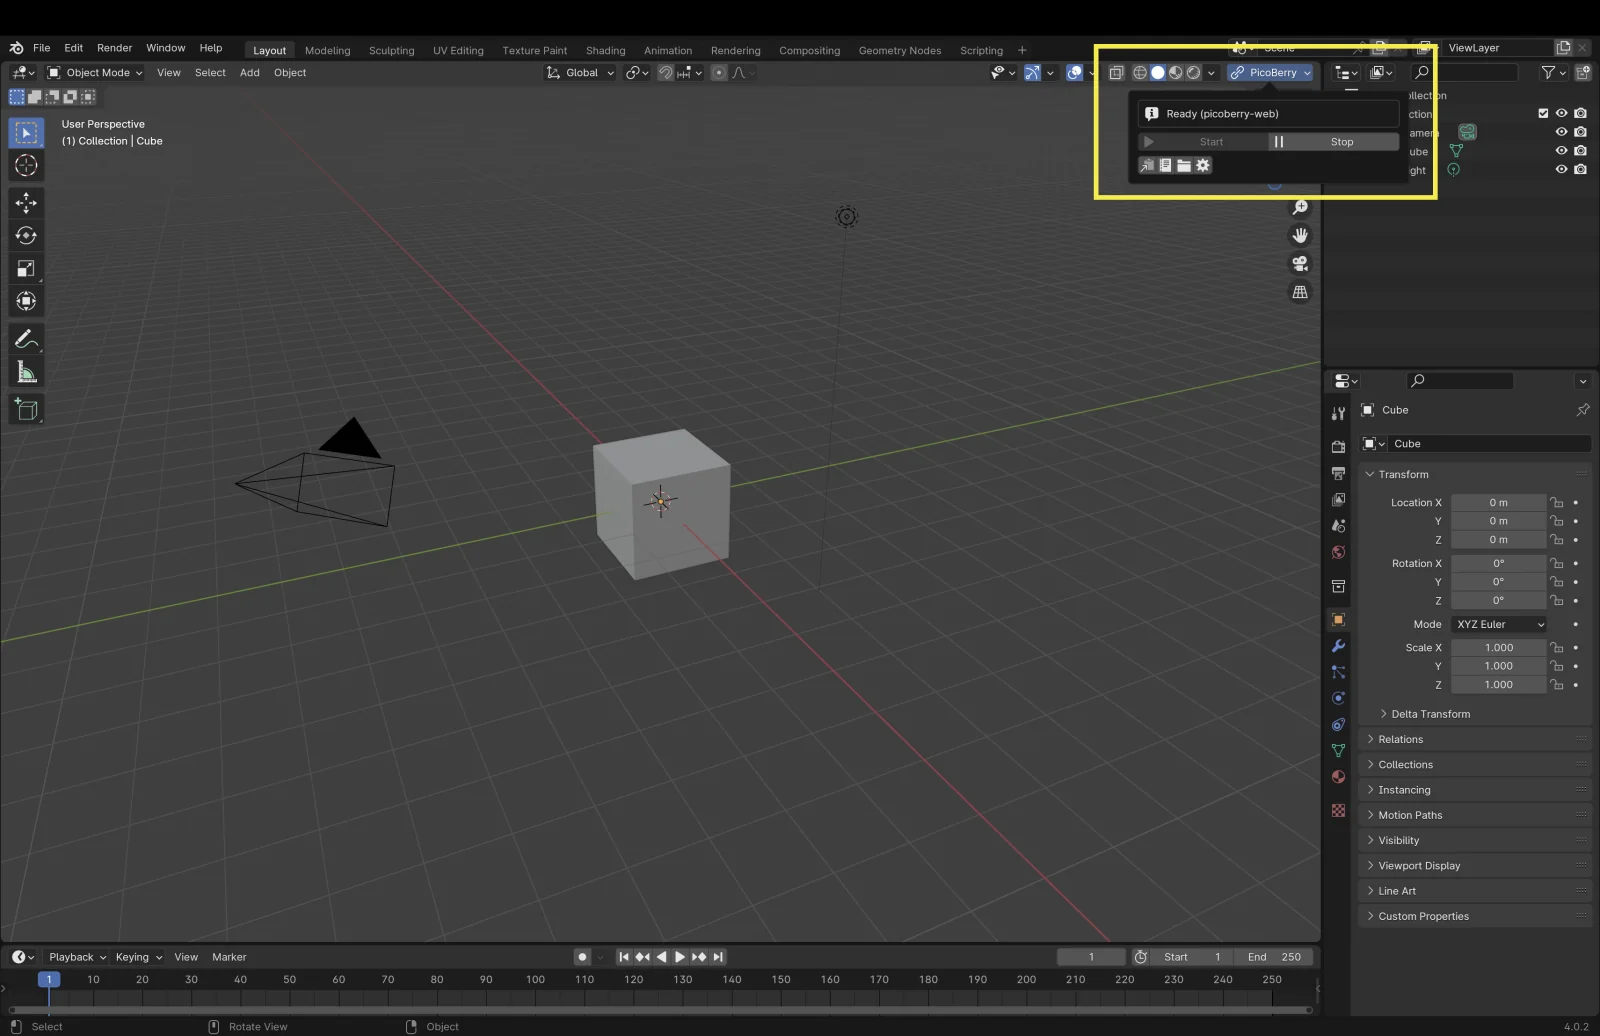
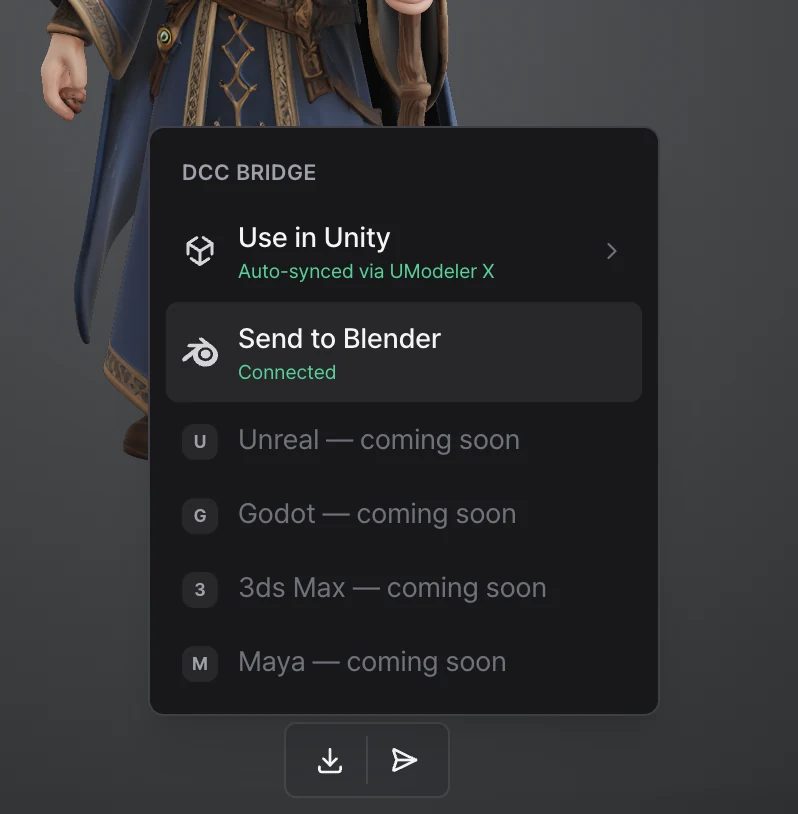
- In PicoBerry (your browser) — open a 3D asset in your workspace and click Send to a 3D tool (the paper-plane icon) in the toolbar under the 3D viewer to open the DCC Bridge menu. When the Blender row reads Connected in green, you're ready to send.
Send an asset to Blender
- Open a finished 3D model in your PicoBerry workspace.
- Click Send to a 3D tool (the paper-plane icon) in the toolbar under the 3D viewer to open the DCC Bridge menu.
- When the Blender row reads Connected, click that row (or the paper-plane on its right).
- A progress toast appears while the asset downloads and imports.
- In Blender's Outliner, the model shows up inside a new PicoBerry / <name> collection — textures and all.
The Blender panel
Clicking the PicoBerry chip in the 3D Viewport opens a panel with everything in one place:
- Status — shows the latest status message (e.g. Listening on port 60601, Ready). It reads Stopped when the connection is off, or shows an error message if something went wrong.
- Start / Stop — turn the local connection on or off.
- Copy URL — copy the
ws://address (handy when checking the connection in your browser's developer tools). - Open Log — open the add-on's log file.
- Open Discovery Folder — reveal the folder the add-on uses to advertise itself.
- Preferences (the gear) — jump straight to the add-on settings below.
Settings
Open Edit → Preferences → Add-ons → PicoBerry Bridge, or click the gear in the panel. Most people never need to change anything here.
- Auto-start — start the connection automatically when Blender opens (on by default).
- Port — the local port the add-on listens on (
60601, with room to fall back to the next few if it's busy). - Allowed origins — the sites permitted to connect.
picoberry.aiis already included.
Troubleshooting
The send menu never shows Connected / it won't connect.
- Make sure the connection is running in Blender — click the PicoBerry chip and press Start if it says Stopped.
- If you opened PicoBerry before Blender, the page may take a moment to find it on its own. Switch to another tab and back, or reload the page, to rescan right away.
- Confirm you're on Blender 4.1 or newer.
- Check that no other program is using port
60601.
Until it connects, the Blender row reads Not connected, and the Install link on its right downloads the add-on. The document icon (View manual) links to this page.
The site can't reach Blender.
- Open Preferences → Allowed origins and make sure the site you're using (e.g.
picoberry.ai) is listed. - Keep your browser up to date — connecting to your own machine over
httpsrelies on a modern‑browser exception.
Still stuck?
- Open the panel and click Open Log to see what the add-on recorded, then reach out to support with that file.