Launch Event50% off annual plans · free Nano Banana imagesSee the offer
New modelsGPT Image 2.5 · Meshy 7Make one
Image to 3D · Concept art to asset candidate
Image to 3D Model for Game Developers — convert visual references into 3D candidates
Use the images your team already has, from sketches and concept art to AI-generated references or multi-view sheets, as the starting point for 3D asset exploration in PicoBerry.
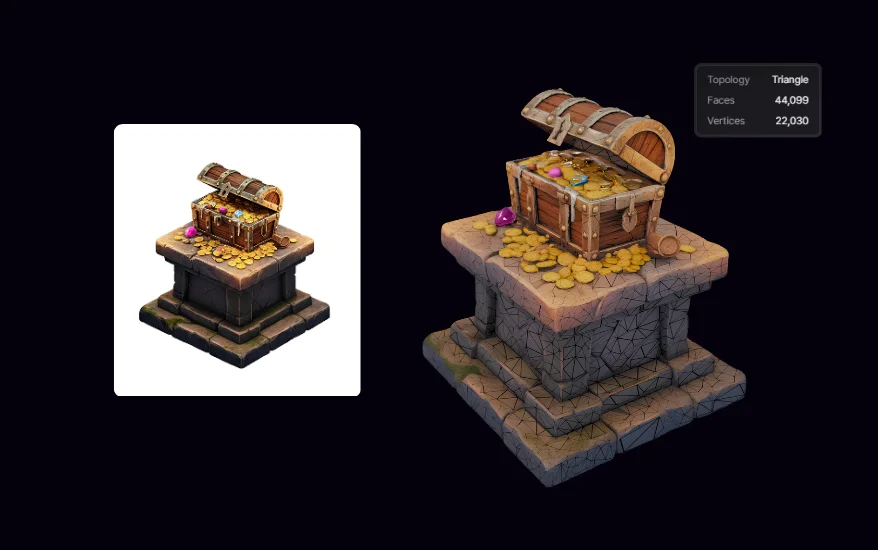
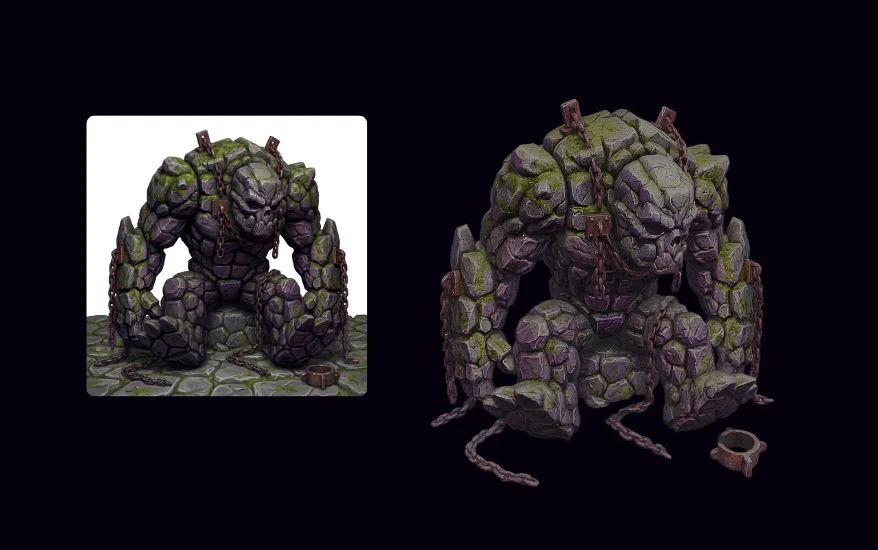
Image to 3D in PicoBerry: a reference image becomes a 3D candidate for review.
Built forGame DevelopersUnityUnrealGodotBlenderPicoBerry
How do you turn a concept image into a 3D model?
Start from an image with a readable silhouette, the whole object visible, and little occlusion. Choose single-image, multi-view, or batch input in PicoBerry depending on the references you have, then check whether the result preserves the silhouette, volume, and proportions of the original. Refine with Remesh, Texture, Parts Breakdown, UModeler X, or Blender before it enters your engine.
A clear concept image is still an incomplete 3D specification
A single image can hide thickness, back-side structure, joints, scale, and material separation. A good Image to 3D workflow helps teams choose better inputs and understand which parts still require artist judgment.
Start from visual direction
Use concept art, sketches, AI images, or references to preserve the asset’s intended silhouette and style.
Choose the right input mode
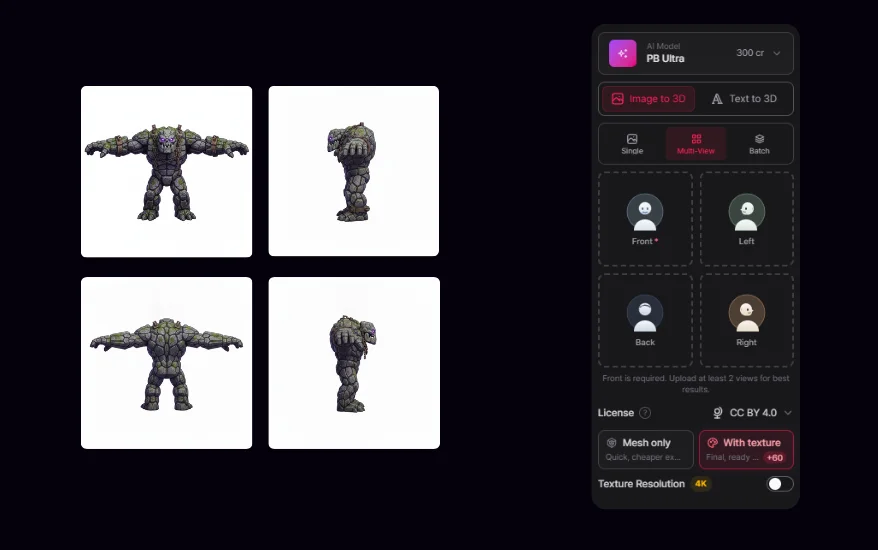
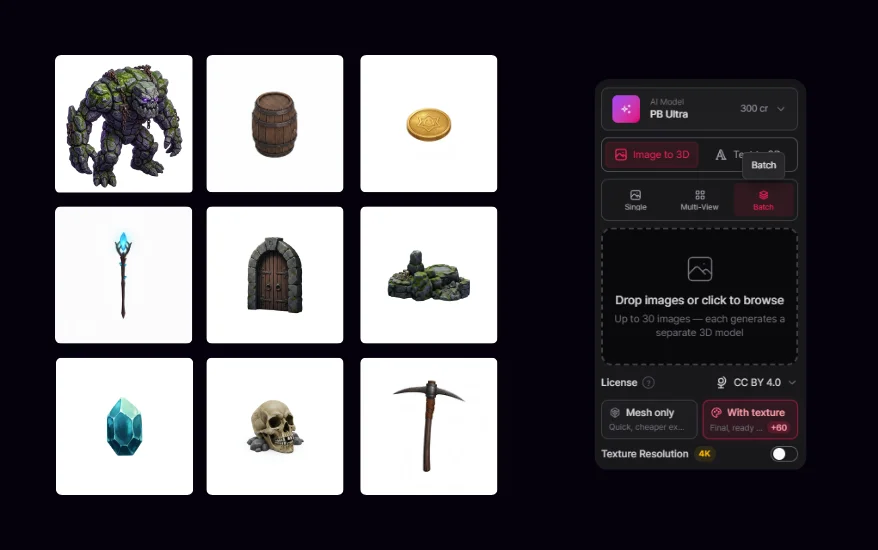
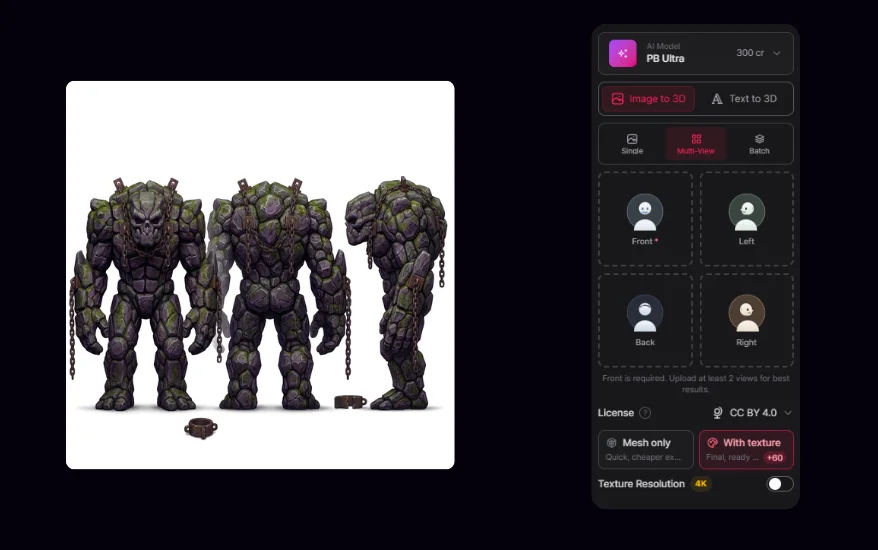
Single image is fast for exploration. Multi-view helps when front, side, or back structure matters. Batch supports multiple separate assets.
Review the interpretation
Treat the generated model as a 3D interpretation of the image, then inspect geometry, scale, and materials before using it.
Where teams use image-to-3D
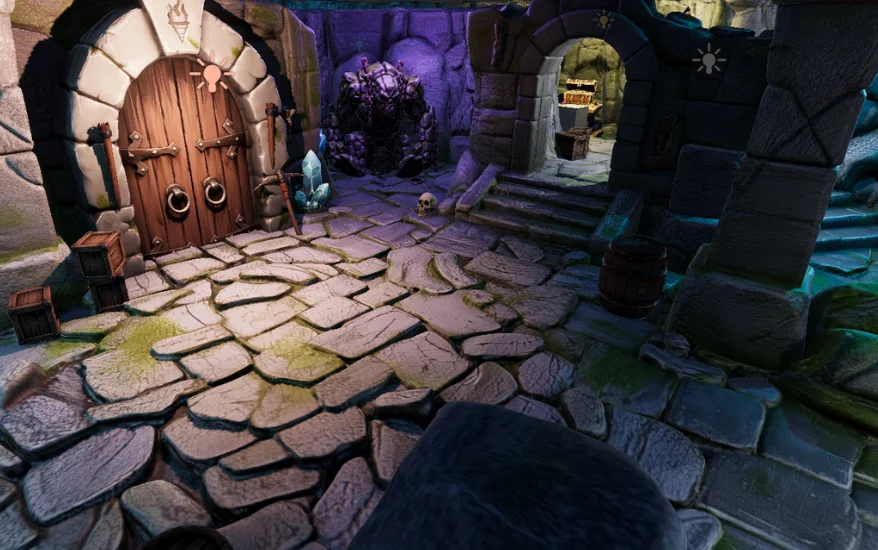
Use visual references to move from concept direction to a 3D model candidate that can be inspected in context.
Concept prop conversion
Turn a weapon, item, vehicle, or object concept into a model candidate for review.
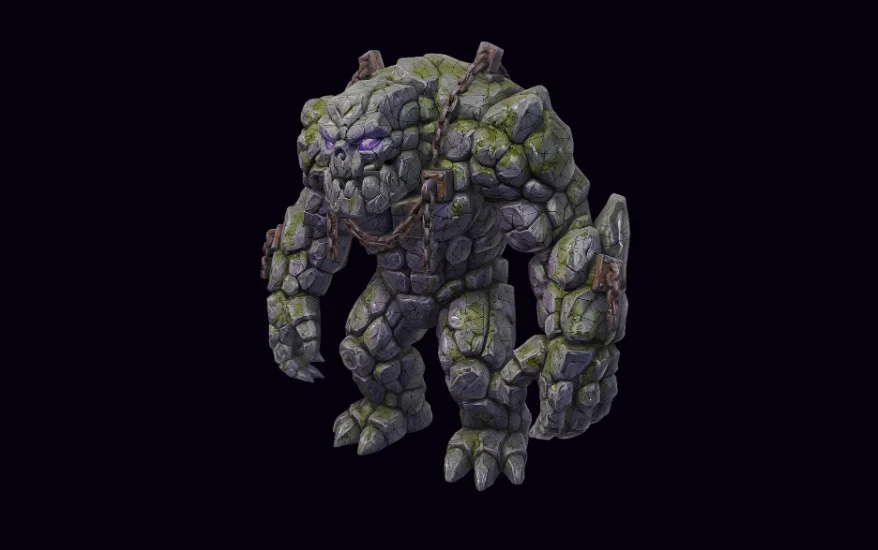
Character and creature exploration
Use character references to explore volume and silhouette before deeper modeling or rigging work.
Multi-view reference support
Use front, side, back, or right references when a single image cannot show enough structure.
Batch asset exploration
Convert several reference images into separate model candidates for prop sets or style exploration.
Practical workflow
Start with the strongest visual reference, choose the right input mode, then inspect the 3D interpretation before refinement.
STEP 01
Prepare the image
Choose a clear subject with readable silhouette, full object visibility, and minimal occlusion.
STEP 02
Select input mode
Use single image, multi-view, or batch depending on the asset and the available references.
STEP 03
Generate and inspect
Review whether the model preserves the reference’s silhouette, volume, proportions, and key visual features.
STEP 04
Refine the candidate
Use Remesh, Texture, Parts Breakdown, UModeler X, Blender, or engine-specific review where needed.
Where this fits in a game-asset pipeline
Use the workflow where it speeds up decision-making, and review carefully where production constraints are strict.
Heavy occlusion, extreme perspective, cropped subjects, noisy backgrounds, or designs defined by tiny hidden details.
Review before use
Front/back consistency, thickness, hidden surfaces, material separation, pivots, topology, UVs, and scale.
Workflow proof examples
See the source image, generated model, and follow-up review side by side so the conversion quality is easy to judge.
Source-to-result pair
A reference image appears next to the generated 3D model candidate for direct visual comparison.
Multi-view workflow
Front, side, and back references appear with the resulting model when multi-view input is available.
Pipeline continuation
The generated model continues into remesh, texture review, or engine placement for project evaluation.
Frequently asked questions
What images work best for Image to 3D?
Images with clear silhouettes, full object visibility, consistent lighting, and minimal occlusion usually work best. Multi-view references are stronger when the asset has important back, side, or hidden structure.
Can I use AI-generated images as Image to 3D input?
Yes. AI-generated concept images can be useful seeds for Image to 3D exploration. The output should still be reviewed for geometry, scale, materials, and project-specific requirements.
When should I use multi-view input?
Use multi-view input when the asset has important structure that a single image cannot show, such as front, side, back, or right-side details.
When should I use Parts Breakdown first?
Use Parts Breakdown first when the image contains a character, mech, vehicle, outfit, or complex prop where component structure matters. The exploded parts board can make the Image to 3D step easier to interpret.
Does Image to 3D replace manual modeling?
No. It accelerates the starting point. Artists still make judgment calls about topology, proportions, UVs, materials, rigging, engine performance, and final style consistency.
Can Image to 3D support sets of multiple assets?
Yes. With Batch input, you drop in several images and each one becomes its own 3D model, run with the same settings. It's handy for prop sets or style exploration, and you can queue up to your plan's concurrent generation limit at once.
Turn the strongest visual reference into a 3D candidate your team can inspect.
PicoBerry turns a strong reference into a reviewable 3D candidate that continues into remesh, texture, or engine review.