Launch Event50% off annual plans · free Nano Banana imagesSee the offer
New modelsGPT Image 2.5 · Meshy 7Make one
Parts Breakdown · Exploded board to 3D
3D Generation from 2D Parts Breakdown — clarify complex designs before 3D conversion
Characters, mechs, vehicles, and layered props tend to pack their important structure into a single image. Parts Breakdown surfaces those components first, so Image to 3D can turn the exploded board into a model candidate that keeps its parts separate.
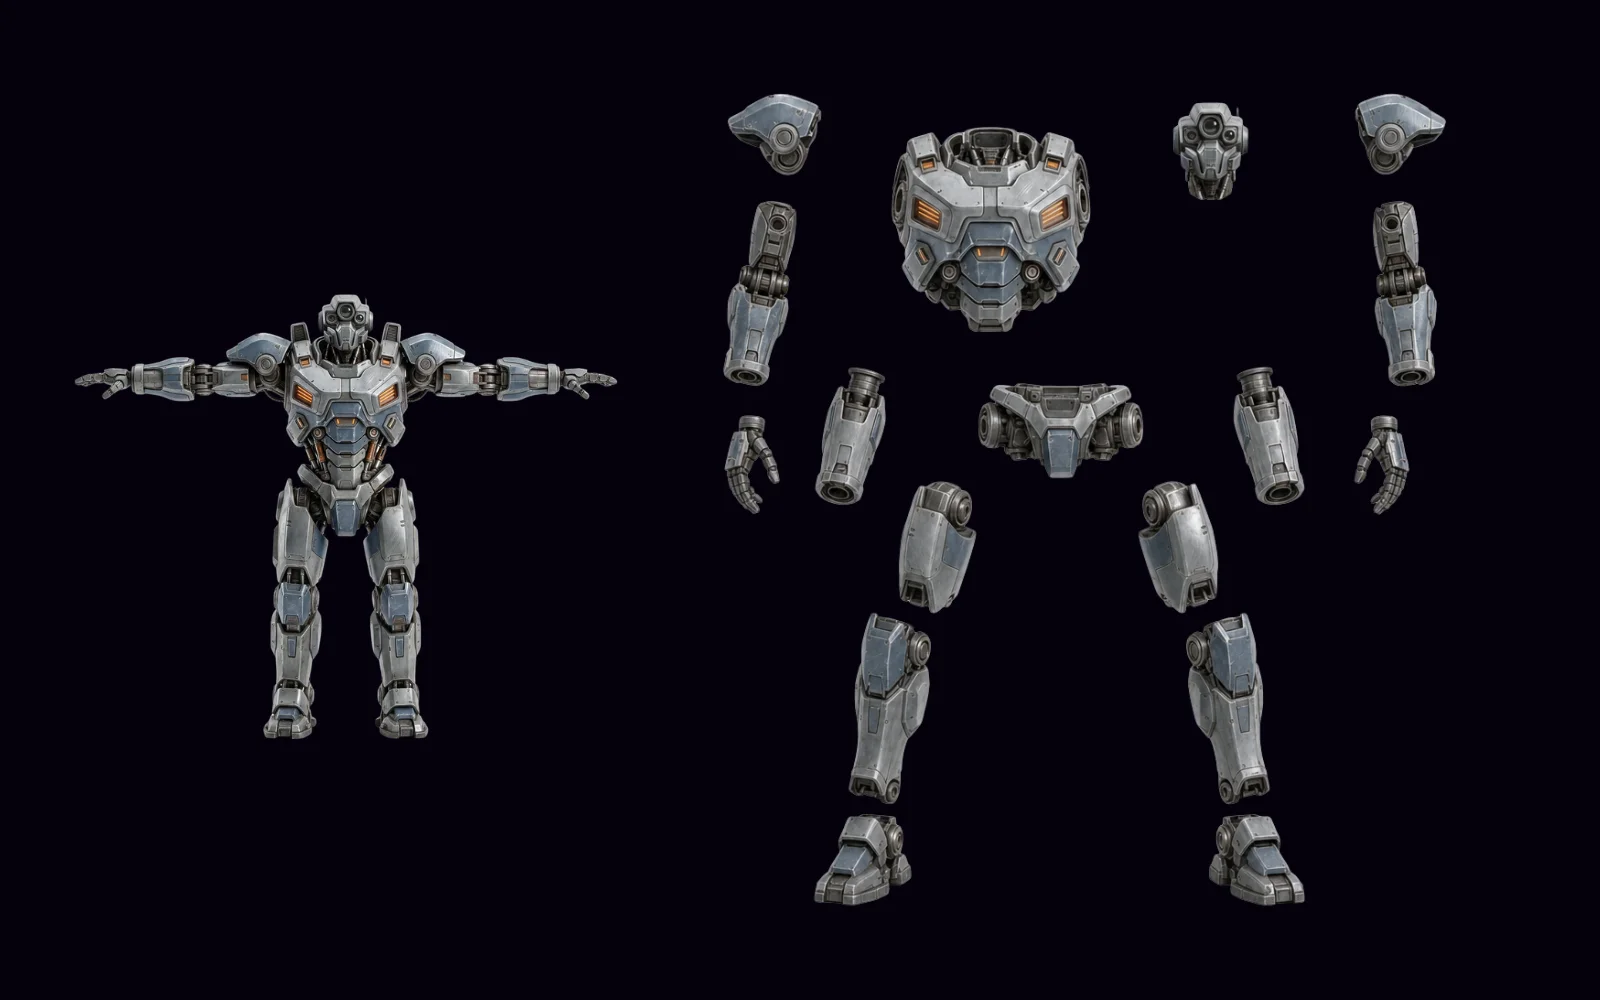
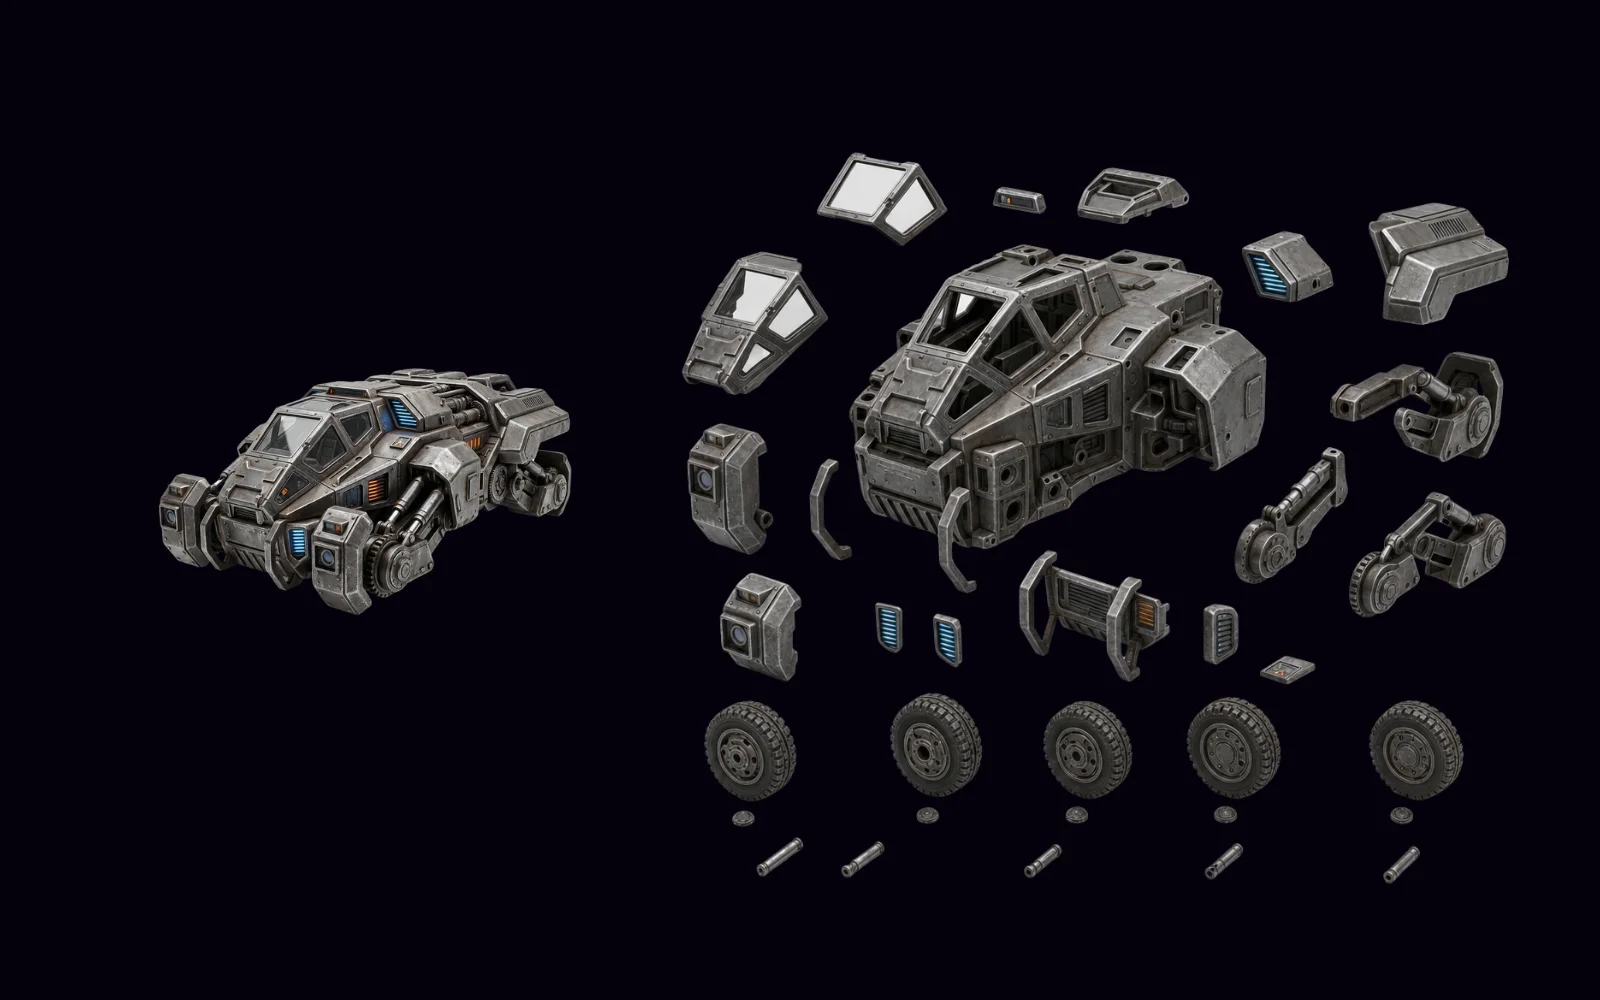
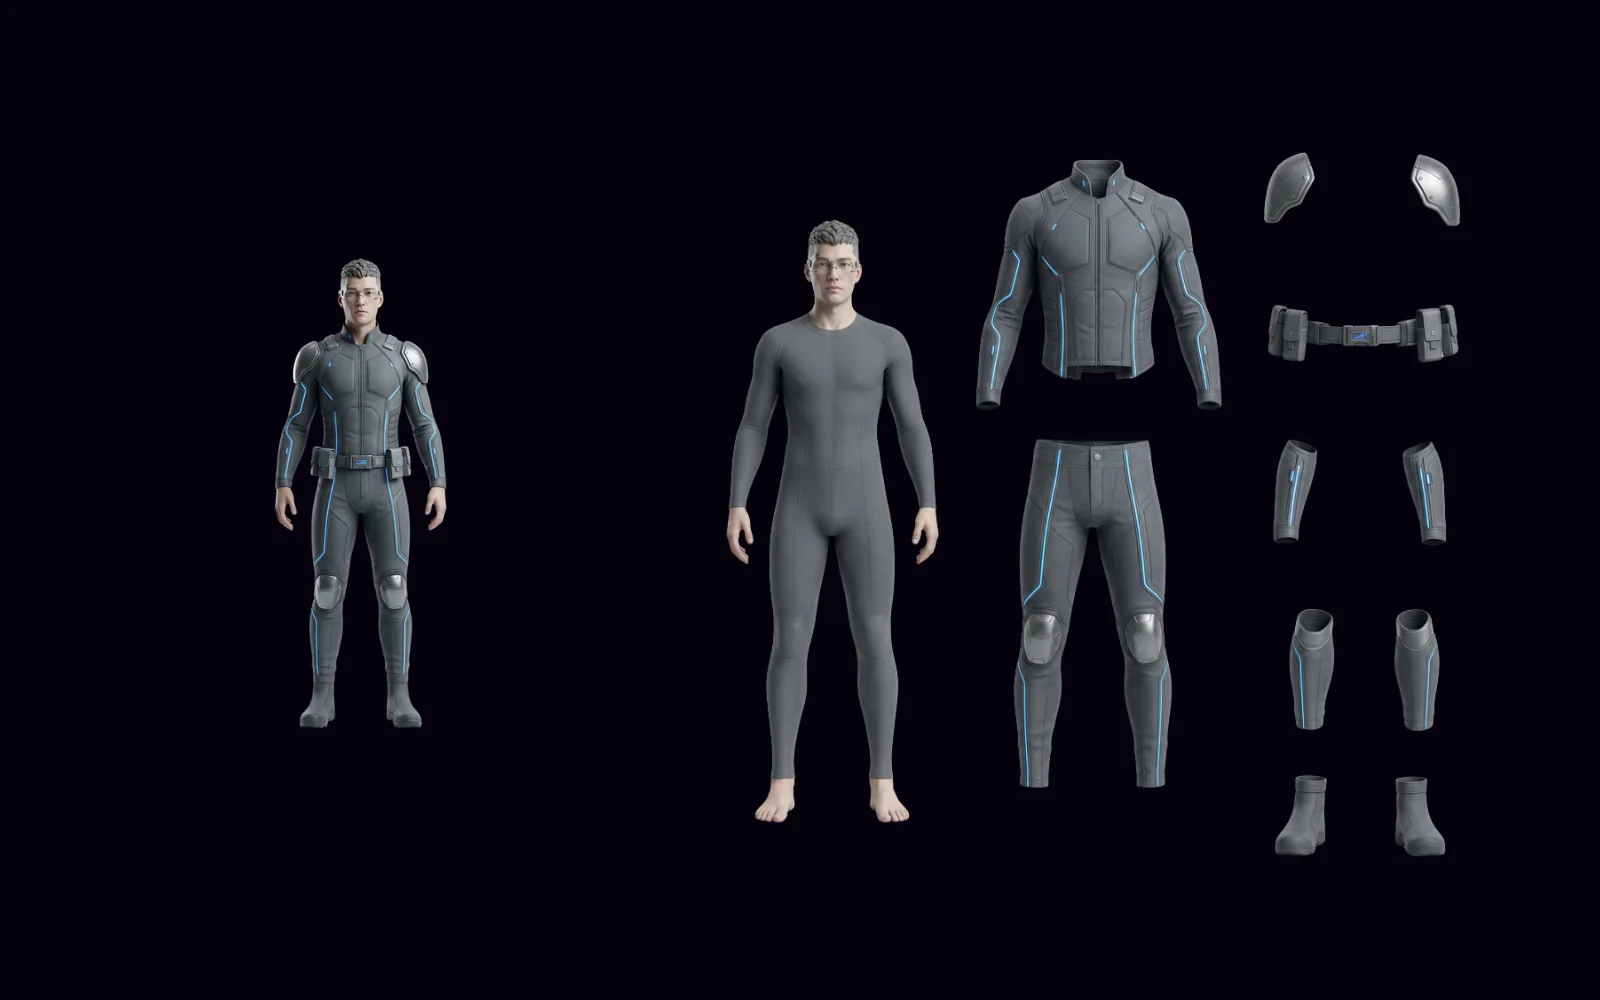
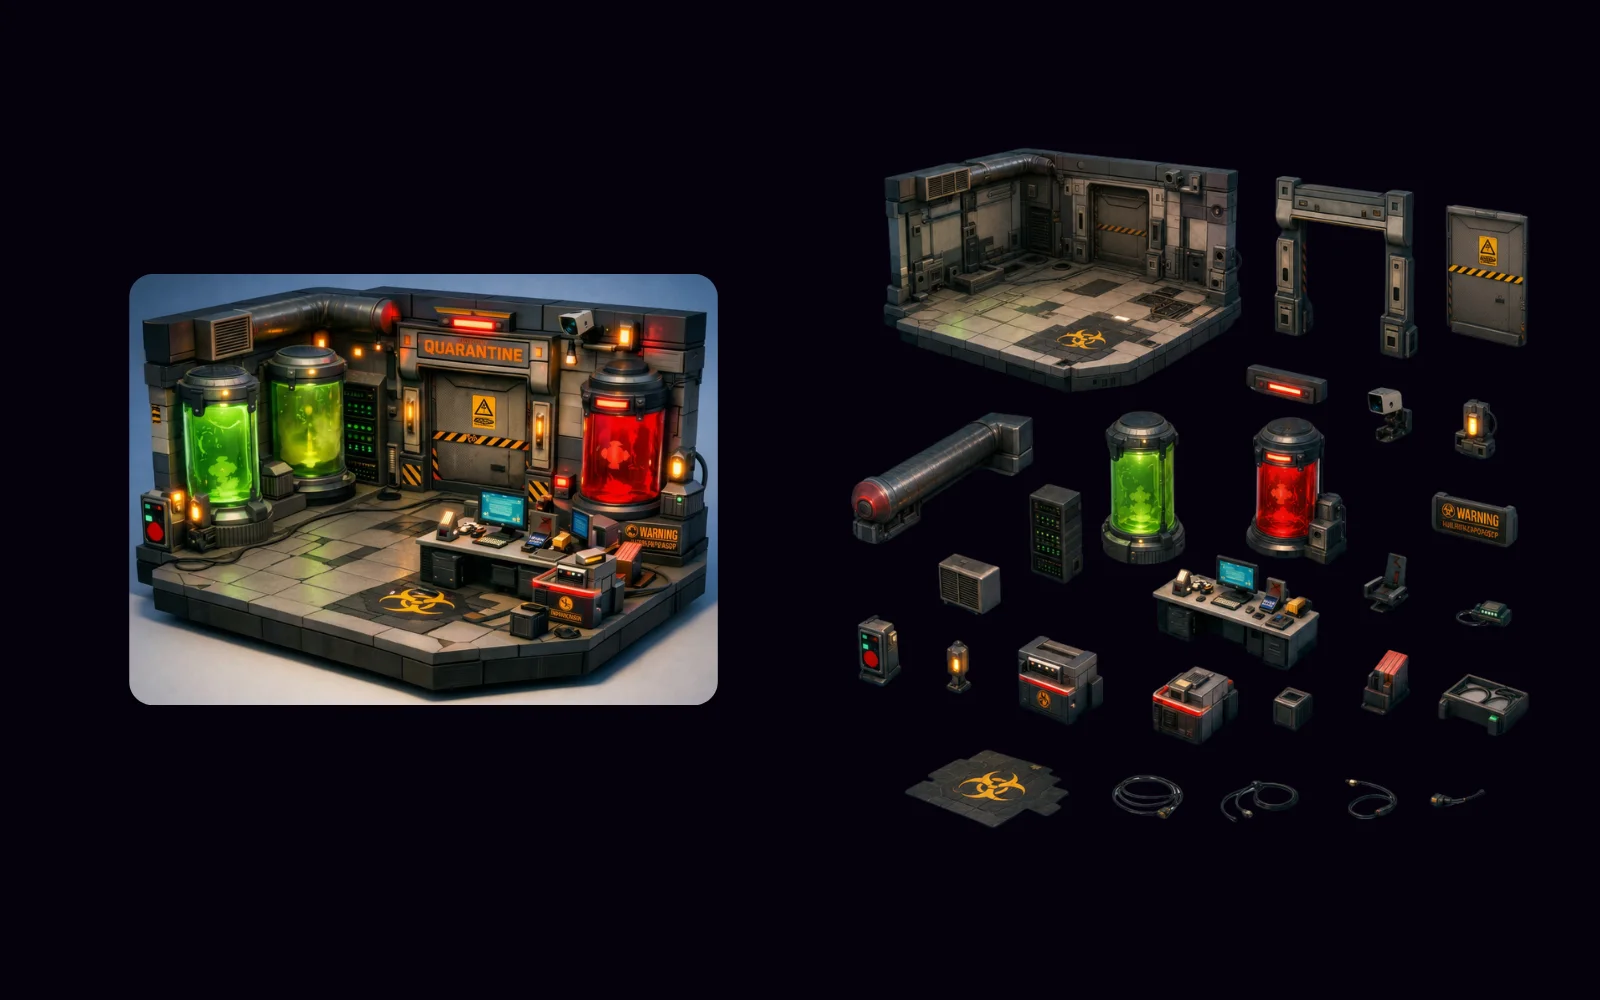
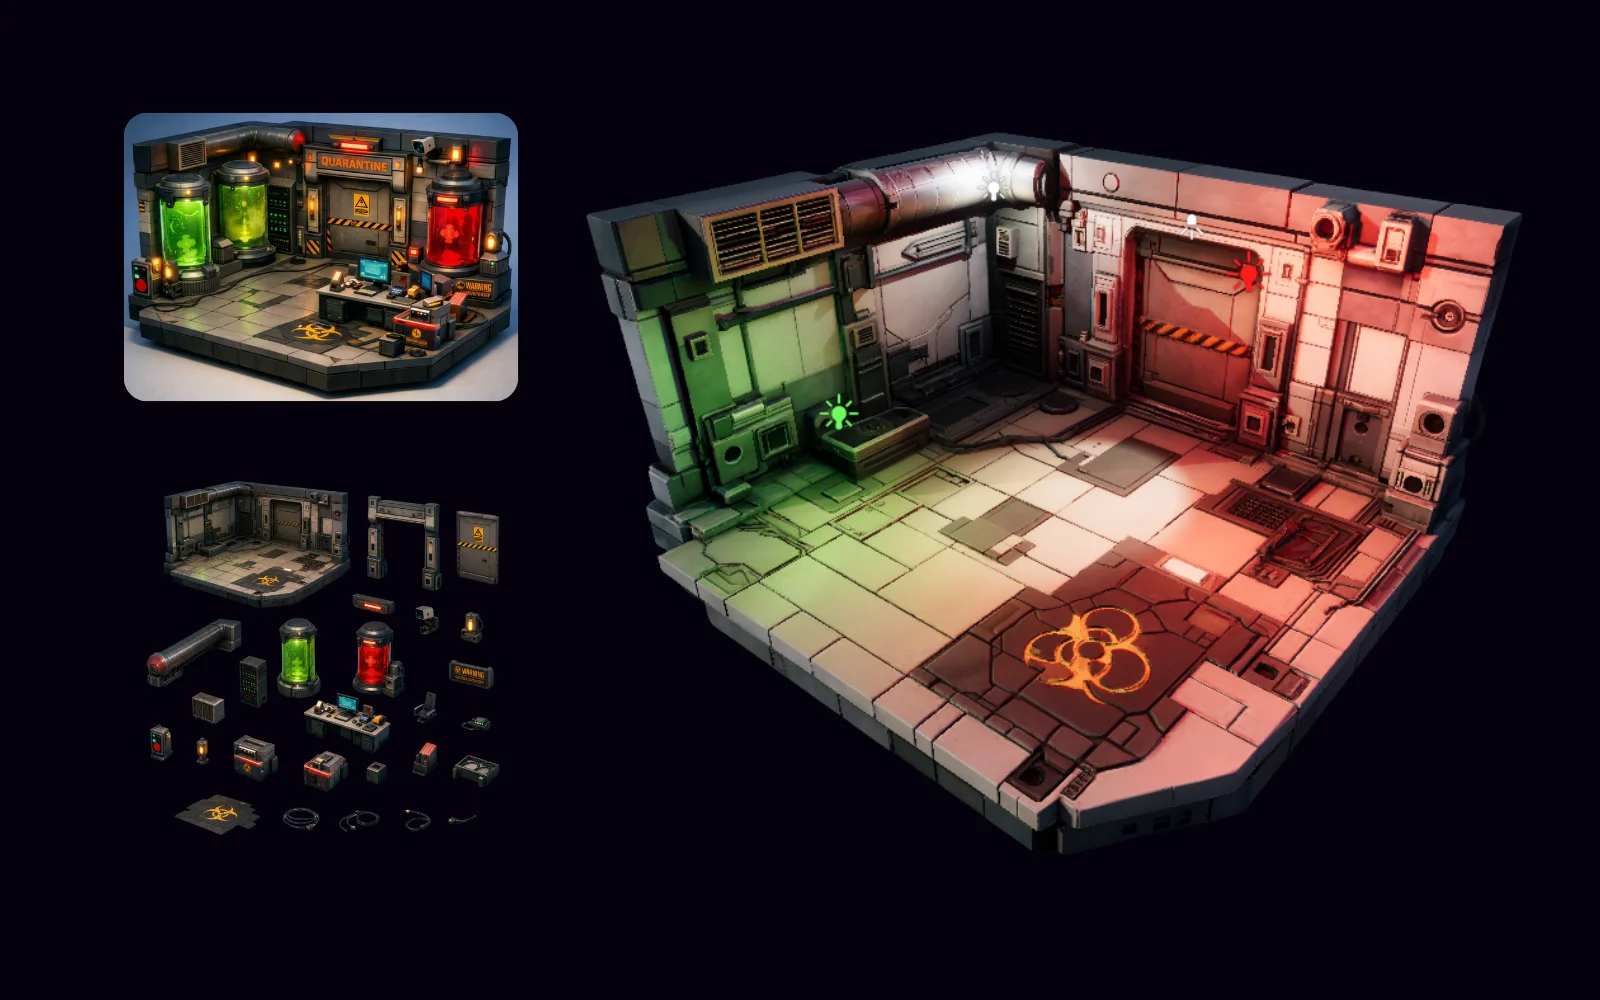
Parts Breakdown in PicoBerry: a busy reference becomes an exploded board, then a 3D model candidate.
Built forGame DevelopersUnityUnrealGodotBlenderPicoBerry
How do you generate a 3D model from a 2D parts breakdown?
Upload a reference where the part structure matters — a character, mech, vehicle, outfit, or complex prop — and generate an exploded parts board that separates the major visible components. Feed that board into Image to 3D for a model that keeps the parts separated, or pick Generate all as 3D to turn each component into its own asset. Then review topology, seams, and proportions before rigging or manual assembly.
Complex assets need their parts in view before the 3D step can read them
Direct Image to 3D handles simple subjects well. But characters, mechs, vehicles, armor, and layered props usually need their major components exposed first, so the 3D step has a clear read on how the design is put together.
Build an exploded parts board
Parts Breakdown takes a busy reference image and lays its major components out where you can actually see them.
Feed it in as a cleaner input
An exploded board hands Image to 3D far more visible structure to work from than one overlapping concept image.
Inspect the result part by part
Check the generated model for part boundaries, proportions, seams, and assembly logic before you start cleanup.
Where teams reach for Parts Breakdown
Use it whenever component structure matters more than a single flat concept image can carry.
Mech and armor concepts
Pull apart plates, limbs, joints, body sections, and add-ons for a cleaner 3D read.
Vehicle designs
Split out wheels, panels, cockpit, attachments, and body forms before you convert.
Character outfits
Surface clothing, hair, armor, props, and the silhouette-defining pieces for review.
Complex props
Reach for an exploded board when one image buries the geometry or how the parts relate.
Practical workflow
Start from a complex reference, build the exploded board, then run Image to 3D for a cleaner part-level candidate.
STEP 01
Upload the reference
Start with a character, mech, vehicle, outfit, or complex prop where the part structure matters.
STEP 02
Generate Parts Breakdown
Produce an exploded parts board that separates the major visible components.
STEP 03
Convert with Image to 3D
Feed the exploded board into Image to 3D for a model candidate with separated parts — or pick Generate all as 3D to turn each component into its own 3D model.
STEP 04
Review assembly and cleanup
Check topology, seams, proportions, and texture direction, and decide whether it still needs rigging or manual assembly.
Where this fits in a game-asset pipeline
Lean on it where it speeds up a decision, and review closely where production constraints are tight.
Best fit
Mechs, vehicles, armored characters, outfit-heavy characters, weapons with attachments, and complex props.
Go straight to Image to 3D
Simple props, rocks, crates, and single-shape objects — one image already tells the whole story.
Review before use
Part count, part boundaries, missing back-side structure, seams, overlap, scale, topology, and what it means for rigging.
Workflow proof examples
See the reference, the exploded board, and the resulting 3D model together to judge how well the structure carries through.
Three-step sequence
The original reference, exploded parts board, and generated 3D result, side by side.
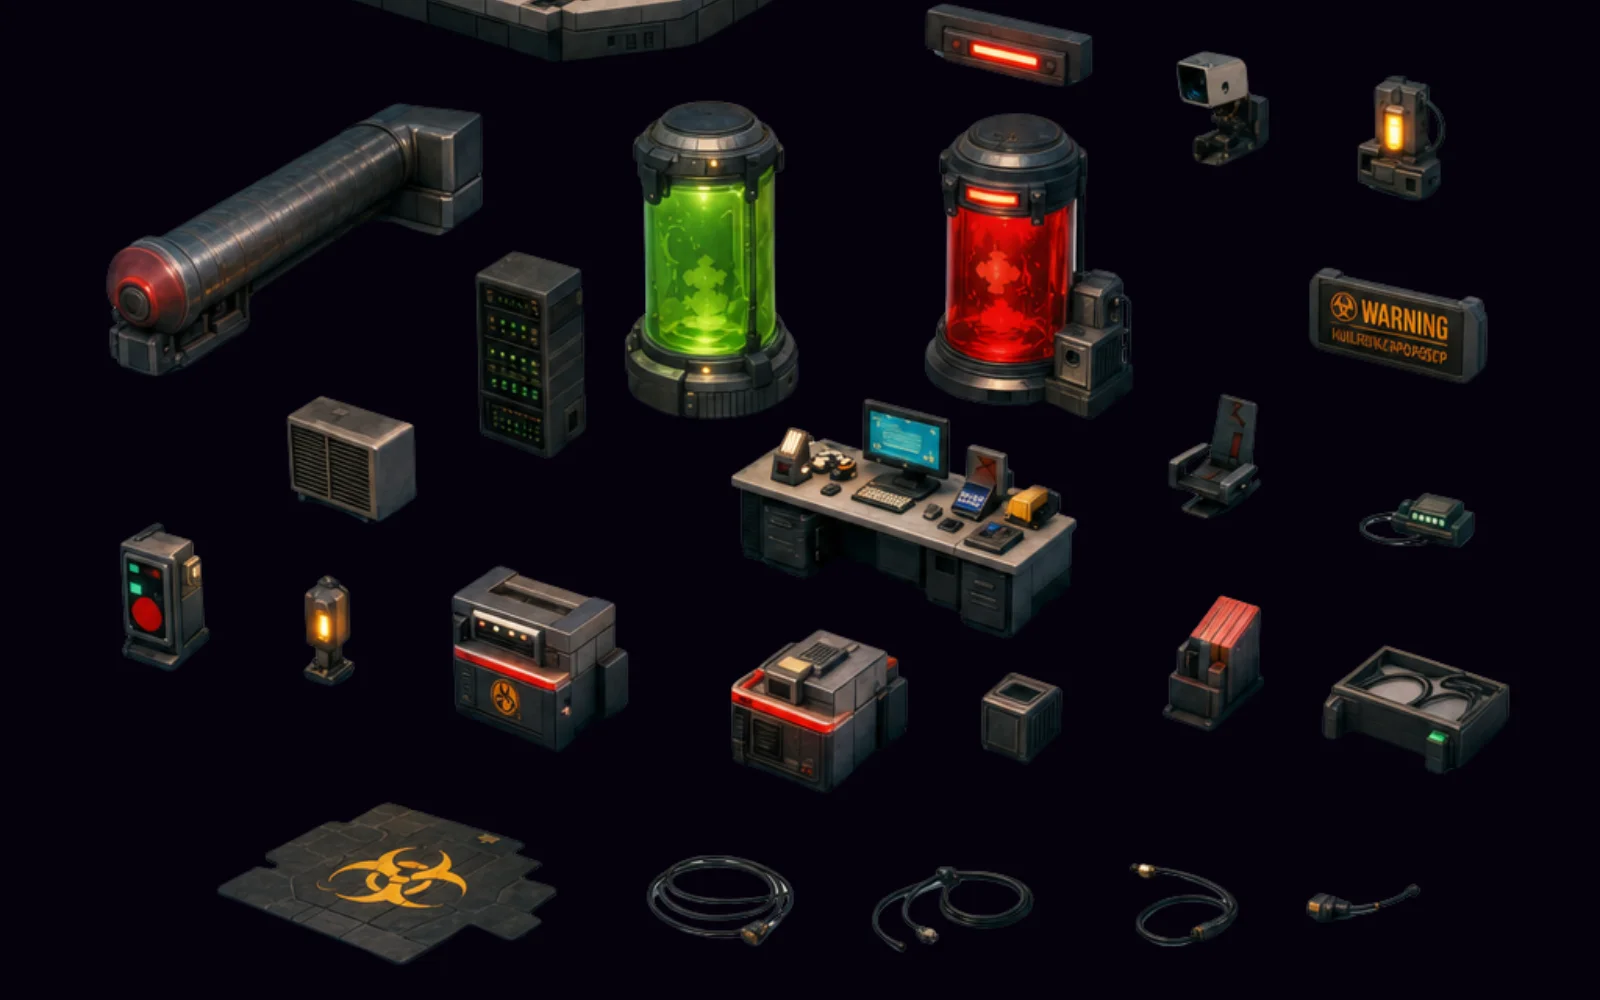
Parts board close-up
The exploded board brings out components that were hidden or ambiguous in the original image.
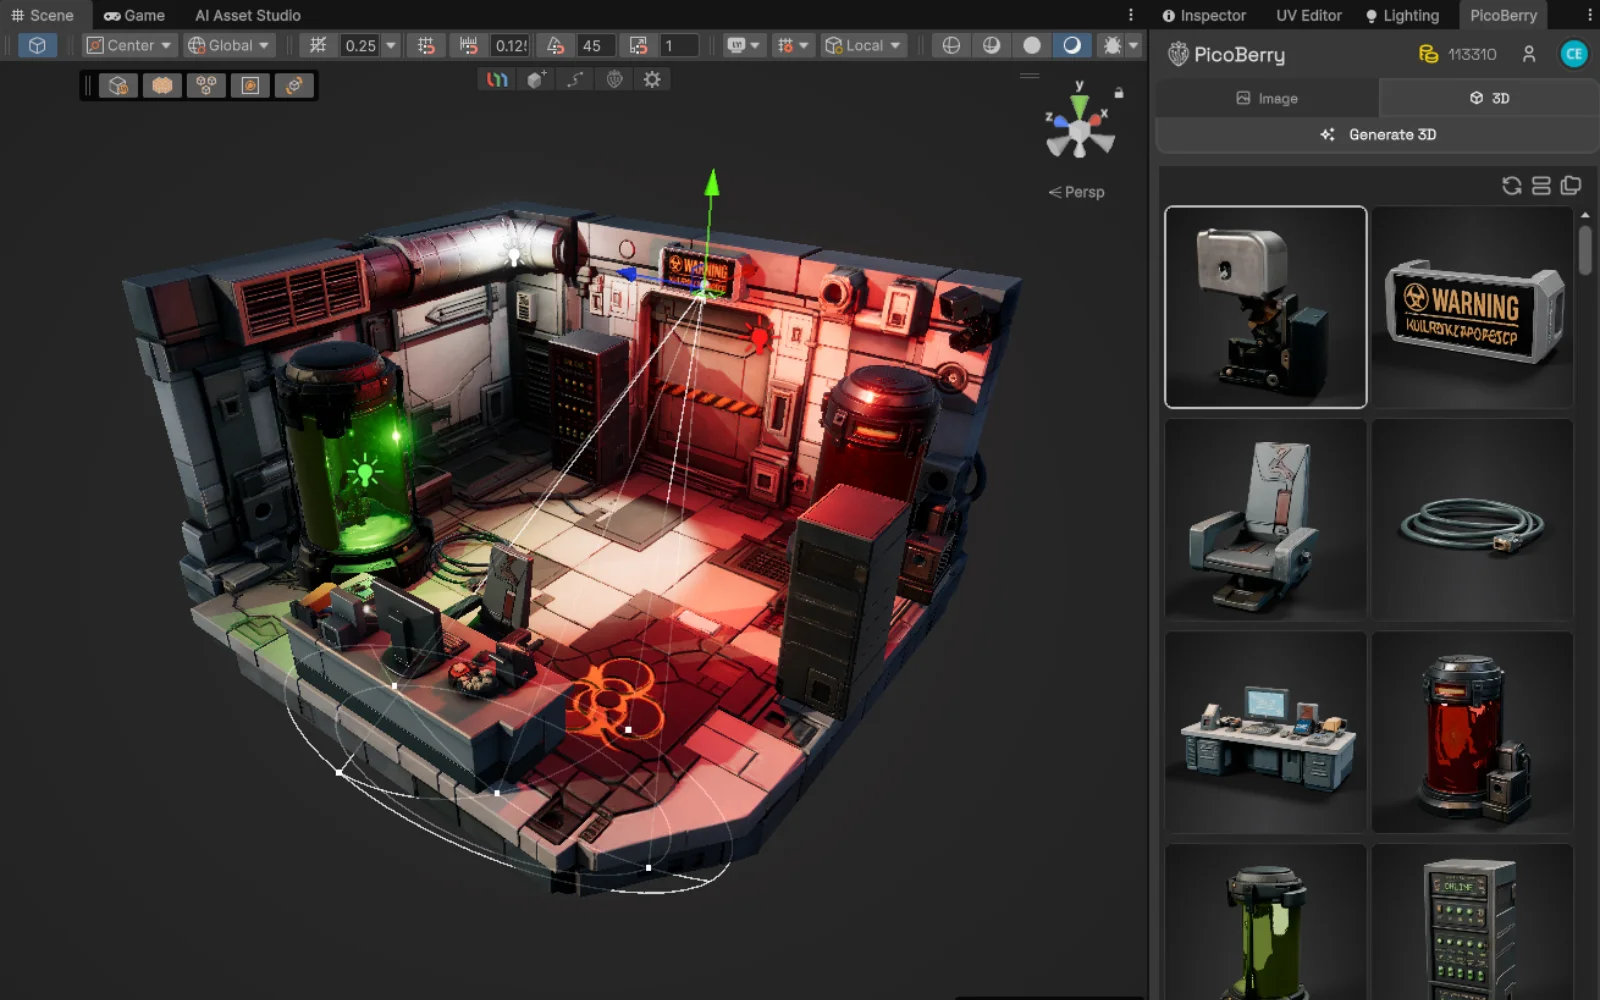
Separated-parts inspection
The finished model, opened in a viewer or engine with each component visible on its own.
Frequently asked questions
What is a Parts Breakdown?
Parts Breakdown is a PicoBerry workflow that builds an exploded parts board from a character, mech, vehicle, or complex prop image, so the major components are easy to see before you run Image to 3D.
What is an exploded parts board?
It’s a 2D layout that separates the subject’s visible components — armor plates, limbs, panels, wheels, hair, clothing, accessories, and so on.
Why run Parts Breakdown before Image to 3D?
Use it when a single image hides important component structure. The board hands Image to 3D a clearer input to interpret part by part.
Does Parts Breakdown produce the final 3D model on its own?
No. Parts Breakdown makes the exploded board. The 3D model comes from converting that board with Image to 3D, then reviewing and refining the result.
Will the model come out with perfectly production-separated parts?
No. The workflow can give you a candidate with separated parts, but artists still need to check topology, proportions, seams, texture quality, rigging, and engine requirements.
Which assets get the most out of it?
Mechs, vehicles, armored characters, outfit-heavy characters, weapons with attachments, and complex props — anything whose component structure drives the 3D result.
Can I generate each part as its own 3D model?
Yes. After Parts Breakdown you can convert the board into one model with separated parts, or use Generate all as 3D to make a separate model for every component at once, so parts can be reused on their own.
Break complex 2D designs down before you turn them into 3D candidates.
Use PicoBerry Parts Breakdown to make sense of a busy design first, then convert it with Image to 3D.