Launch Event50% off annual plans · free Nano Banana imagesSee the offer
New modelsGPT Image 2.5 · Meshy 7Make one
Godot workflow · three engines in, one res:// out
AI 3D Generator for Godot Workflows — generate with any engine, ship it in Godot
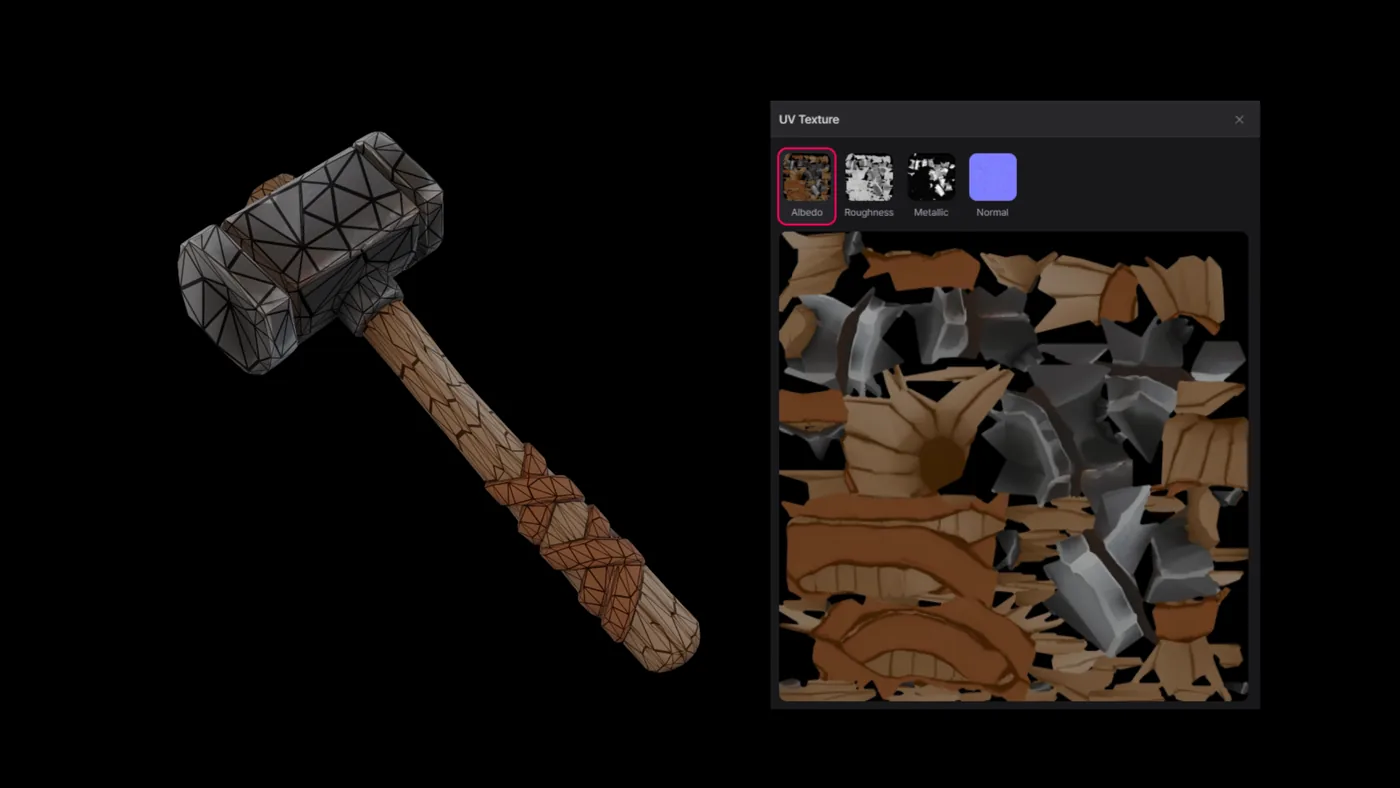
Most AI 3D tools give you one model: their own. PicoBerry runs Tripo, Hunyuan, and Meshy side by side, so the crystal cluster and the mine cart can each come from whichever engine reads best — and then you fix what generation leaves behind, with remeshing, a cleaner UV layout, and collision. What lands in res:// is glTF 2.0, the format Godot recommends, so it imports as a scene you can instance, light, and ship.
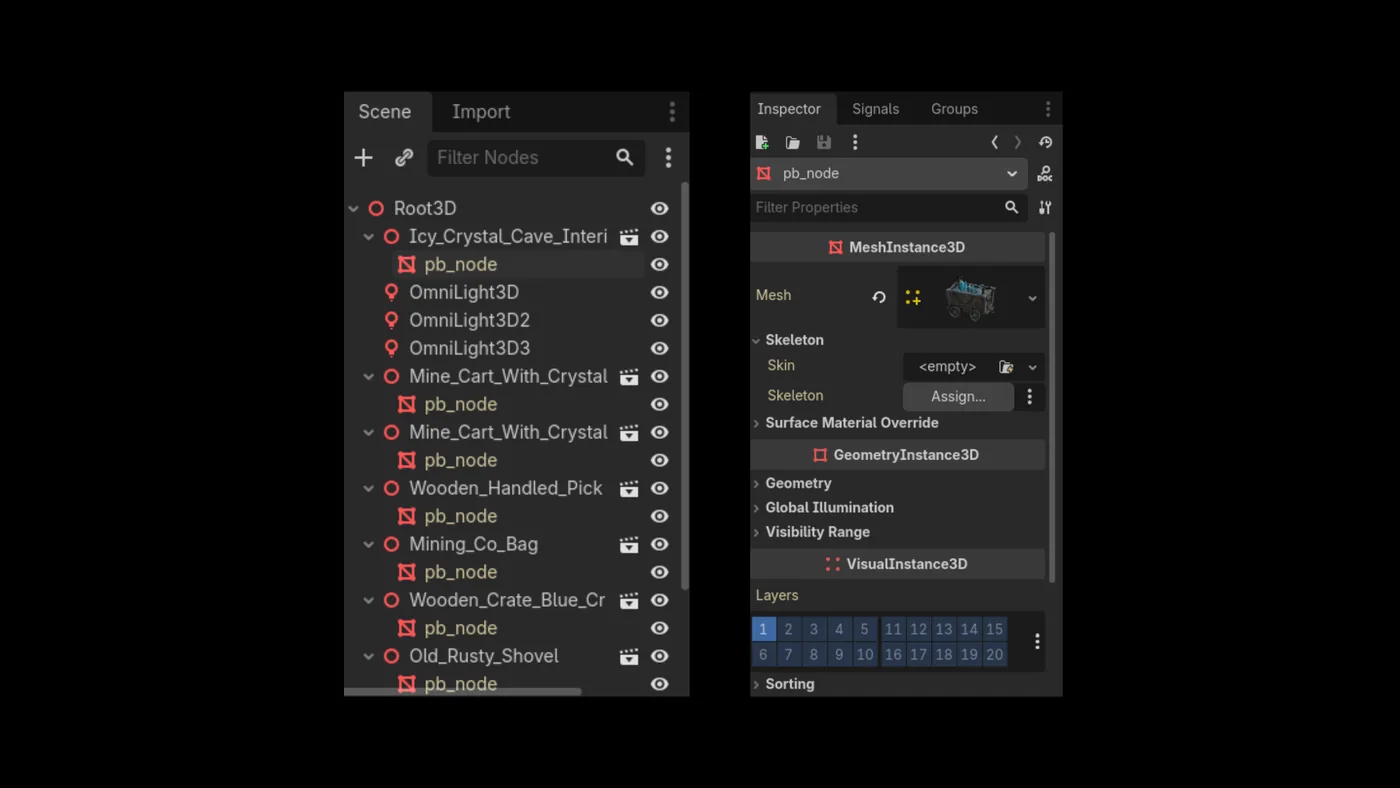
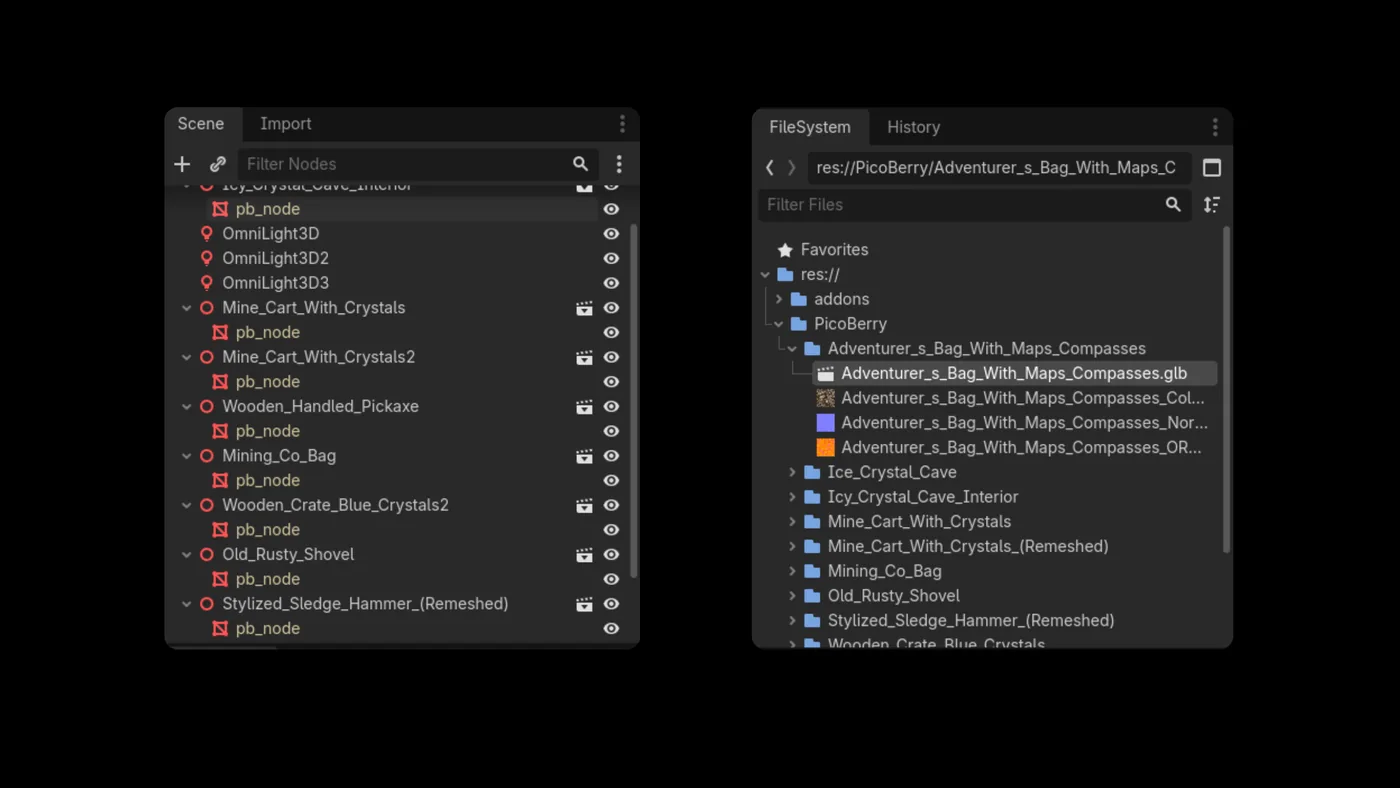
Drop the GLB into res:// and Godot imports it on its own — a Node3D root with a MeshInstance3D child, ready to instance.
Built forGodot usersIndie & solo devsUnityUnrealGodotPicoBerry
How do you make 3D assets for a Godot game with AI?
Pick an engine — PicoBerry runs Tripo, Hunyuan, and Meshy in one workspace — and generate a GLB draft from a prompt or a reference image. Before it leaves, remesh it and unwrap a cleaner UV layout, since that is what separates a render from a mesh you can light, collide, and edit. Then drag the .glb into the FileSystem dock under res://: glTF 2.0 is the format Godot recommends, so it imports as a PackedScene with a Node3D root and MeshInstance3D children. Turn on Trimesh or Convex collision in the Import dock for a StaticBody3D, and rigged drafts arrive with a Skeleton3D and an AnimationPlayer. Godot and glTF both use metres, so the scale lines up.
You chose Godot to ship without a big team. The props still have to come from somewhere.
Godot is free, small, and stays out of your way — which is why so many solo and indie developers pick it. The one thing an open-source engine cannot hand you is a 3D artist. Blocking out props, containers, signage, and environment pieces by hand keeps a scene empty for weeks. Generating candidates first lets a one- or two-person team dress a whole scene, then spend Godot time on collision, materials, and the pieces that actually deserve it.
The art gap, closed
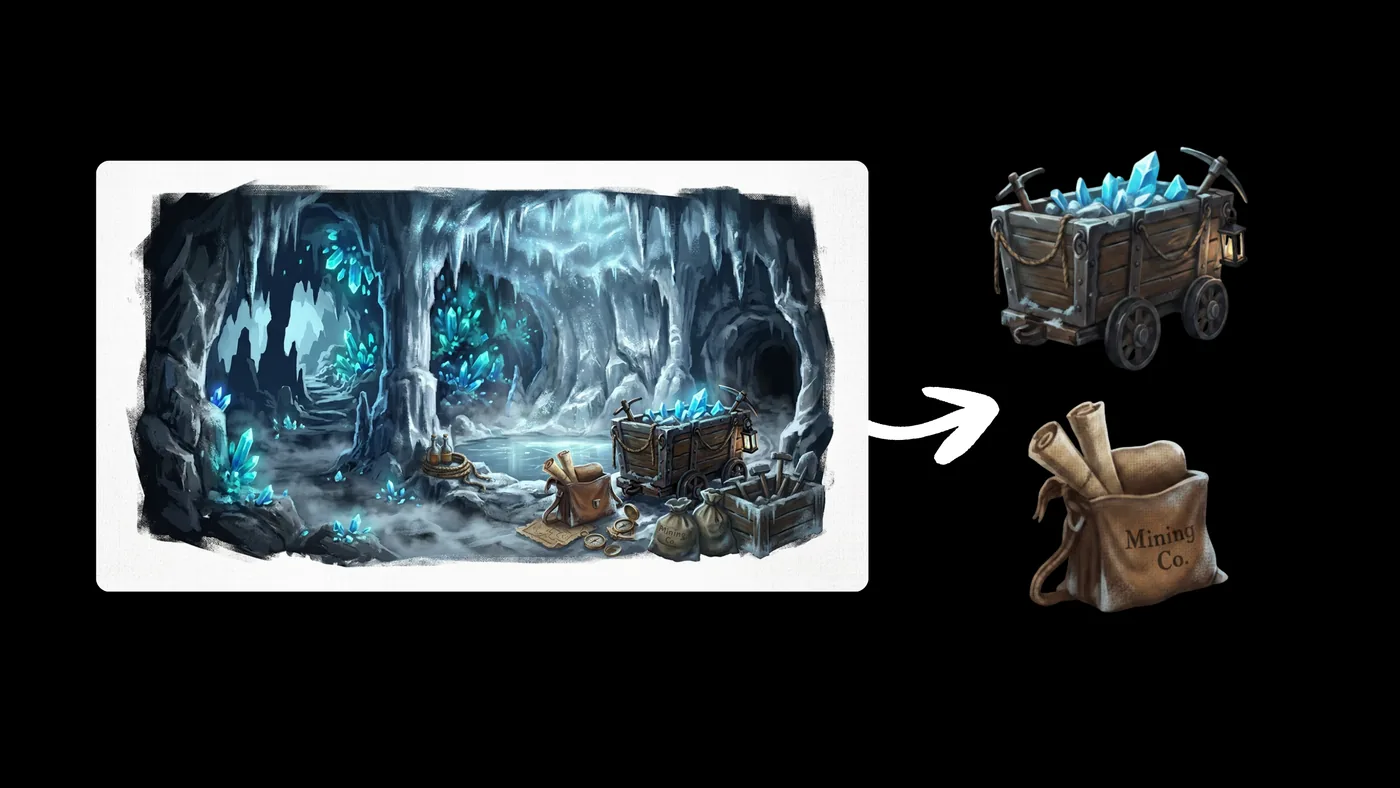
Generate a whole set of props at once — the exact gap a small Godot team feels before it can afford an artist.
Judge the node, not the mood board
A generated GLB lands in res:// as a scene you can instance and light, instead of a reference picture you still have to build.
The engine still decides
Collision shapes, StandardMaterial3D, tri budget, and how it reads in Forward+ only answer for real once the asset is a node in your scene.
Why generate in more than one engine?
Most AI 3D tools are a front end for a single model. When that model misreads your prompt, the run is simply lost. PicoBerry is a workspace over several vendors, so the fallback is another engine rather than another day.
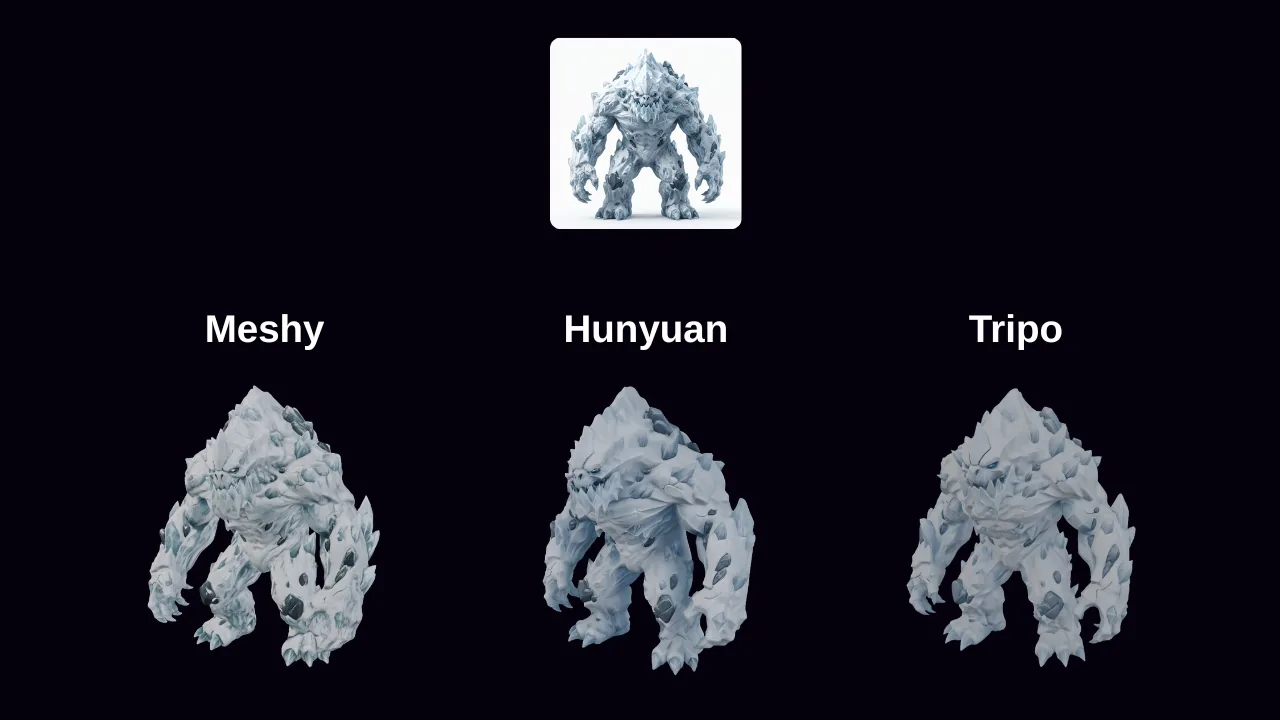
The same prompt, read three ways
Meshy, Hunyuan, and Tripo each take the same snow-mountain monster prompt and read it differently — silhouette, surface, and detail all shift. Keep the one that fits your scene.
Choosing happens before generating
Pick the engine before you generate: swap between Meshy, Hunyuan, and Tripo in the workspace and run the same monster prompt through each, so a weak result is one click from another take.
One prompt, three vendors
Tripo, Hunyuan, and Meshy run in the same workspace on the same credits. Generate a prompt on more than one and keep whichever result reads best in your scene, instead of accepting whatever a single vendor returned that day.
Choose per asset, not per project
A hero crystal and a background crate do not need the same engine. Meshy 6 Low Poly aims at a light silhouette for tiles and set dressing, Hunyuan 3.1 Lite is the lower-cost tier for volume, and Tripo's 3.1 Ultra targets the most detail. The pick is per generation, not a commitment.
The mesh work lives here too
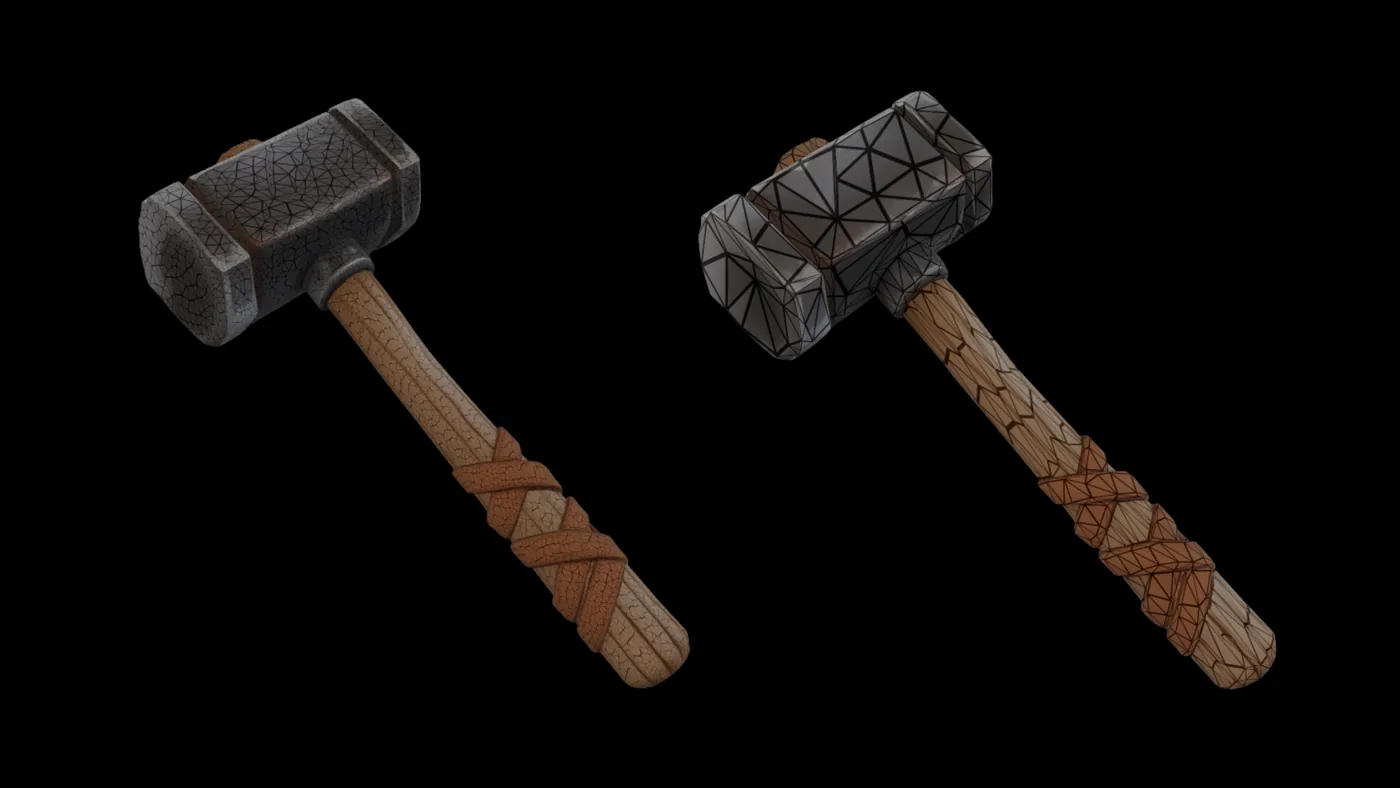
Remeshing, UV unwrapping, texture repaint, and rigging run on the asset after generation, in the same place. A draft becomes a mesh you can light, collide, and edit without a round trip through another tool.
Where Godot devs use PicoBerry
This is not the place for one hand-crafted hero mesh. It is the place for filling a scene, a MeshLibrary, or a jam build fast.
Stylized props as scenes
Props, pickups, containers, and signage that instance straight into your scenes as PackedScenes.
GridMap & MeshLibrary
Turn generated modular pieces into a MeshLibrary and paint 3D levels with GridMap on a fixed cell size.
Instance from code
Call load("res://props/x.glb").instantiate() to place generated assets procedurally at runtime.
Ship to any target
Low-poly and remeshed output that fits Godot's Android, iOS, and HTML5 exports and the Mobile renderer.
From a draft to an instanced scene
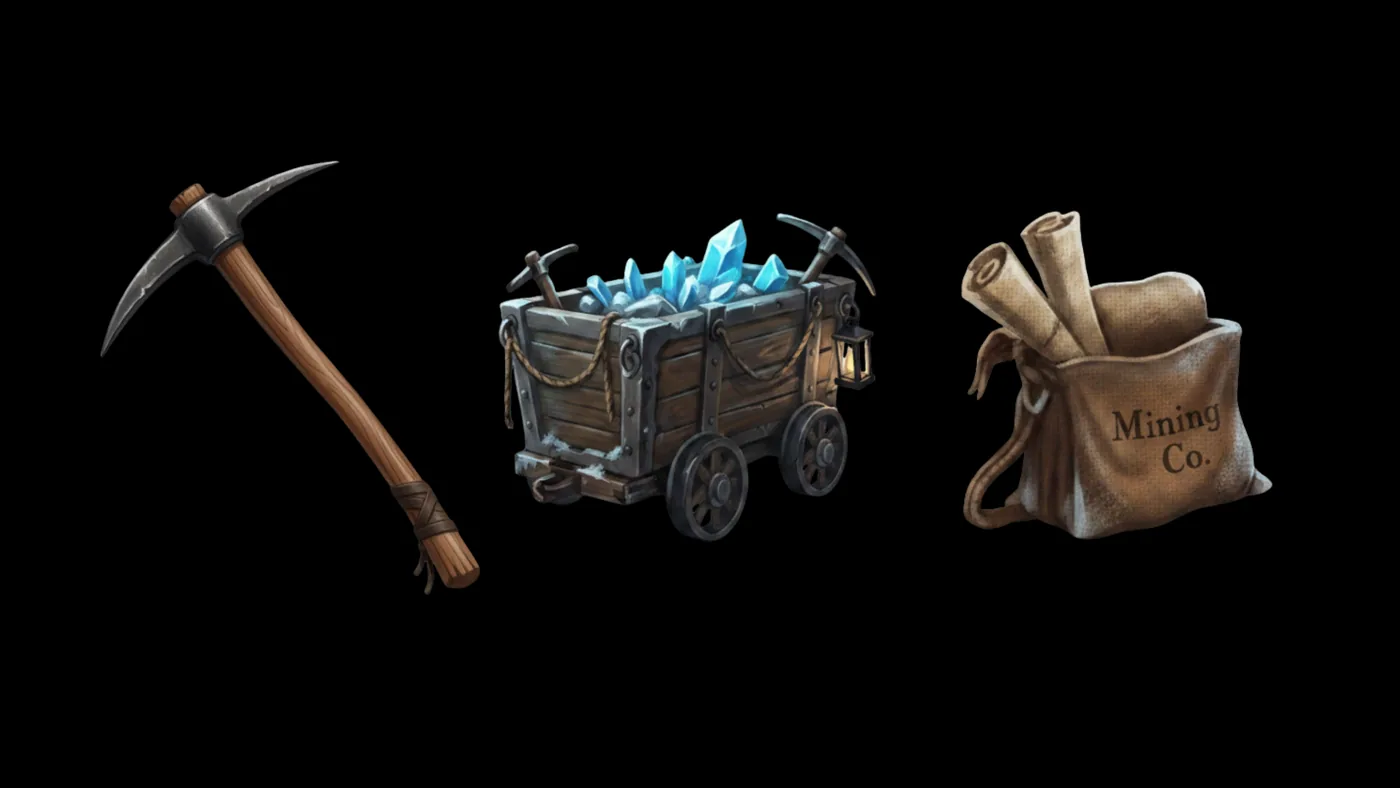
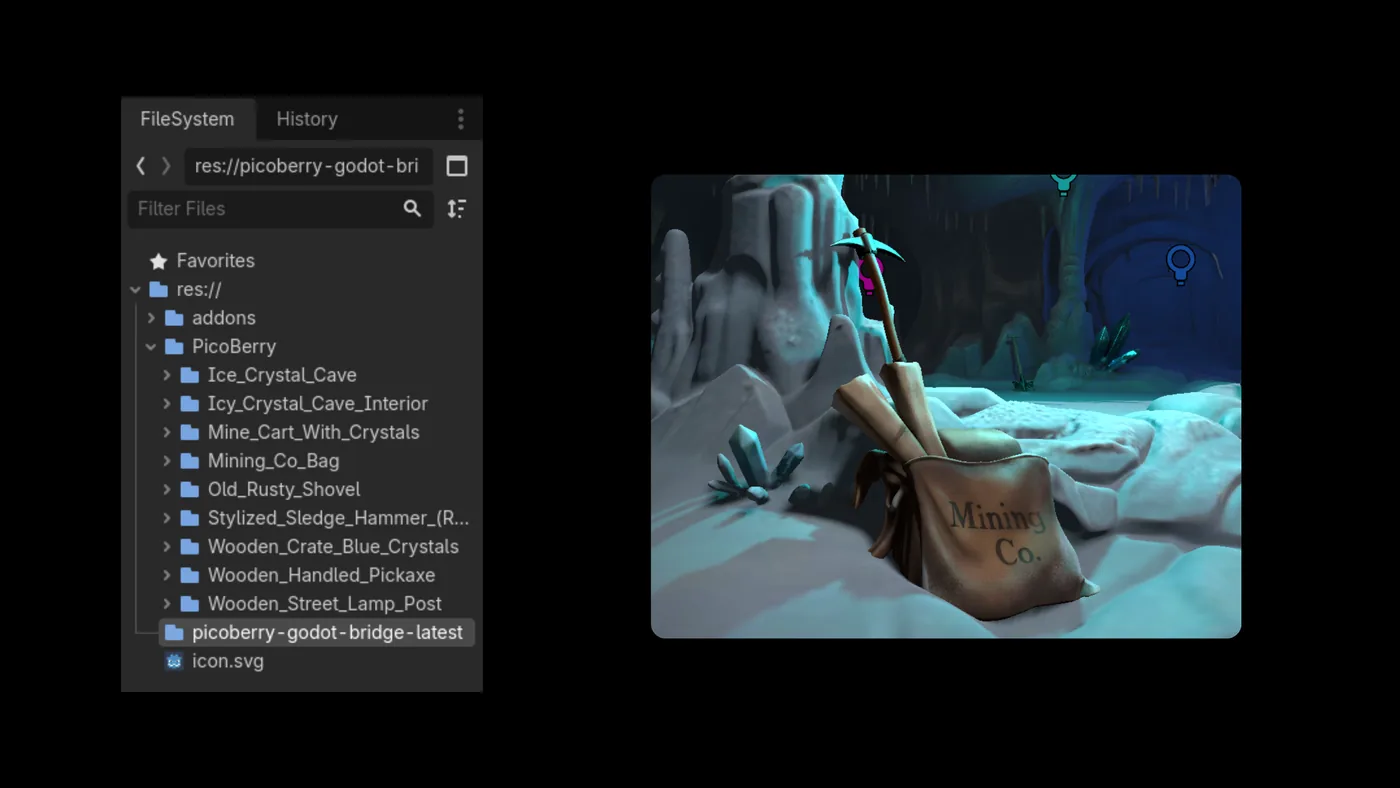
The generation result, the FileSystem and Import docks, and the node in your scene — the actual screens, in order.
Start with the candidate, not a blank scene
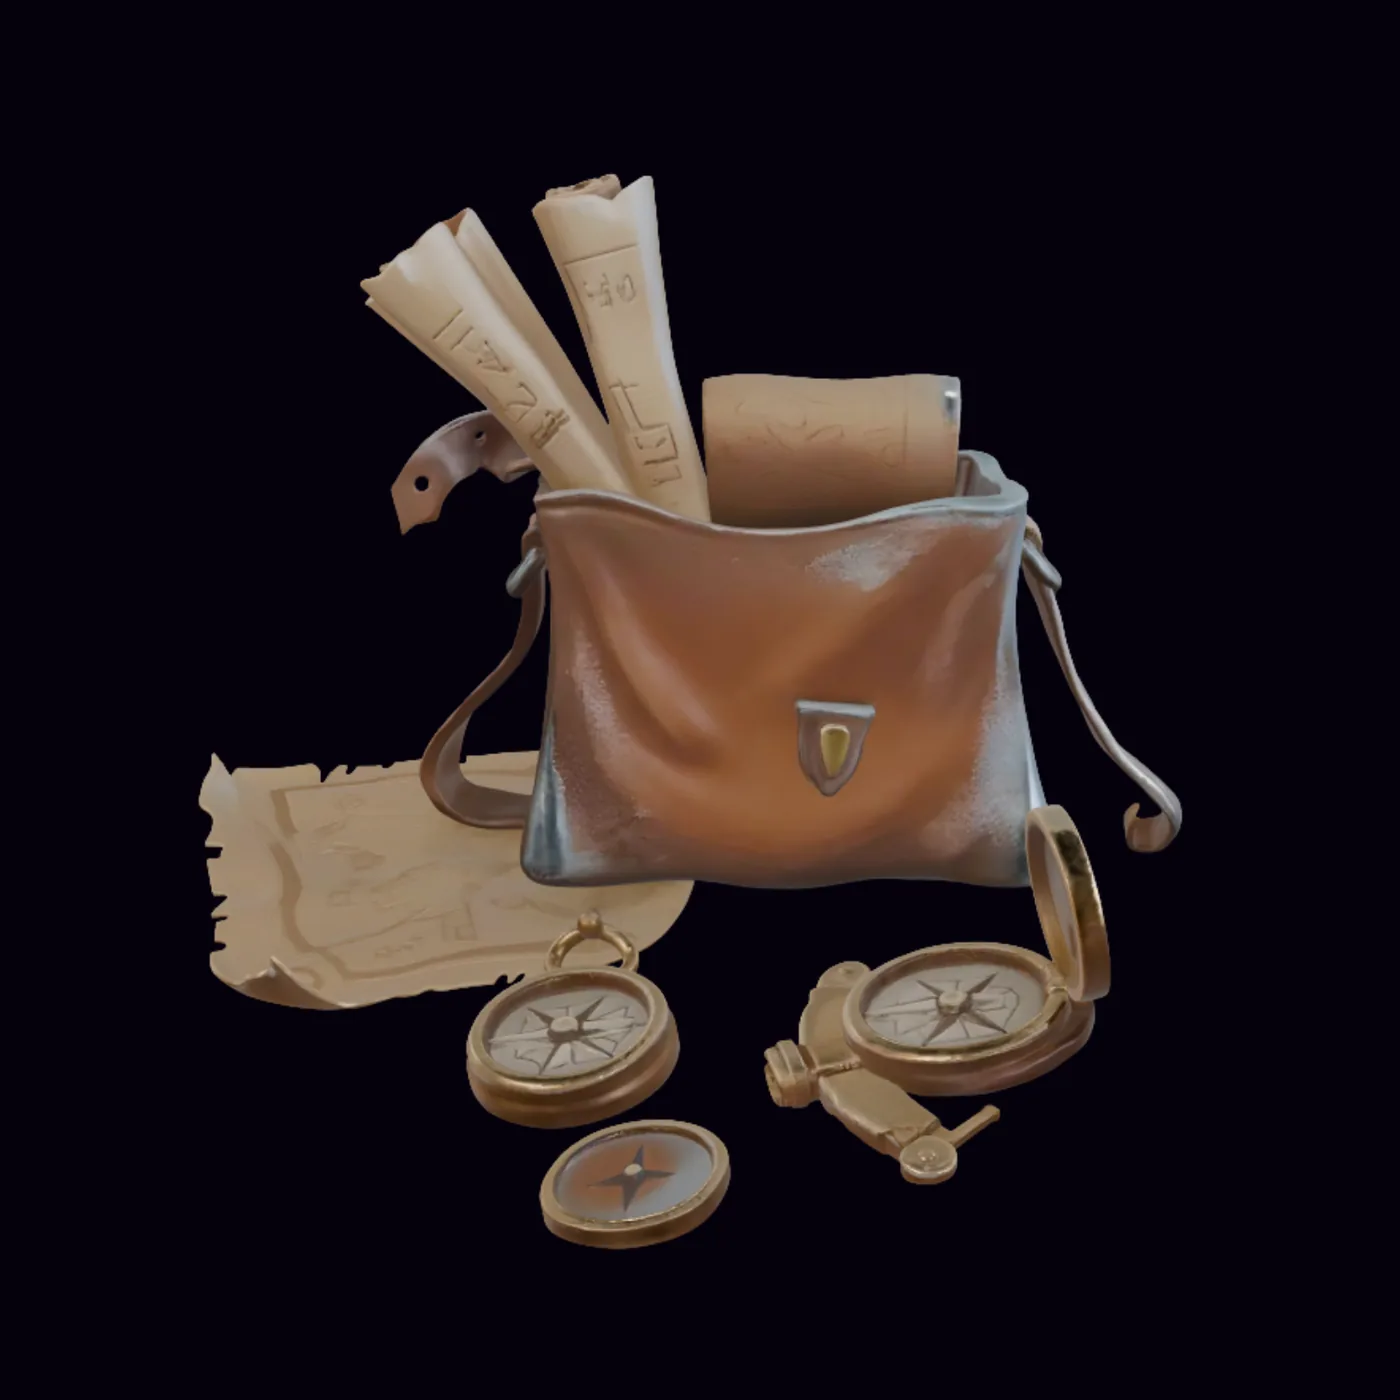
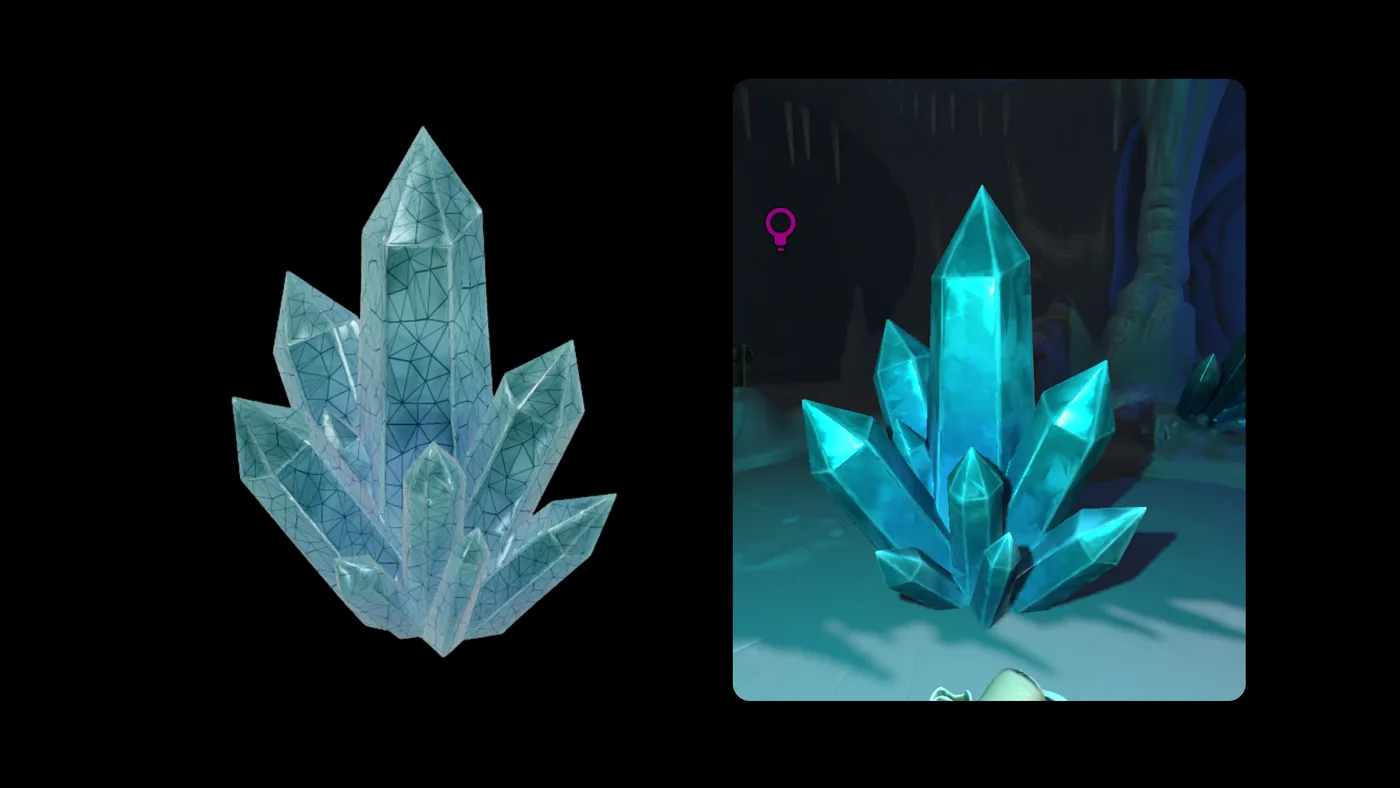
The result from PicoBerry shows exactly what Godot receives — and what still needs review.
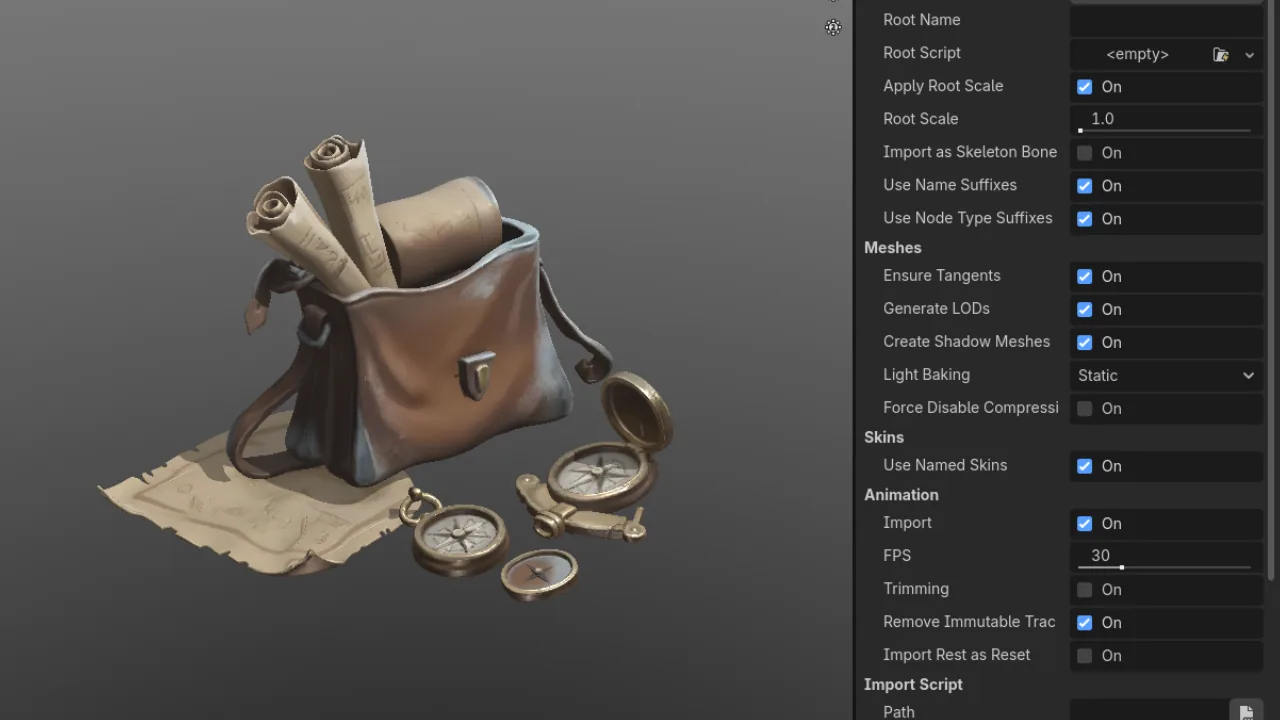
Auto-imported, yours to tune
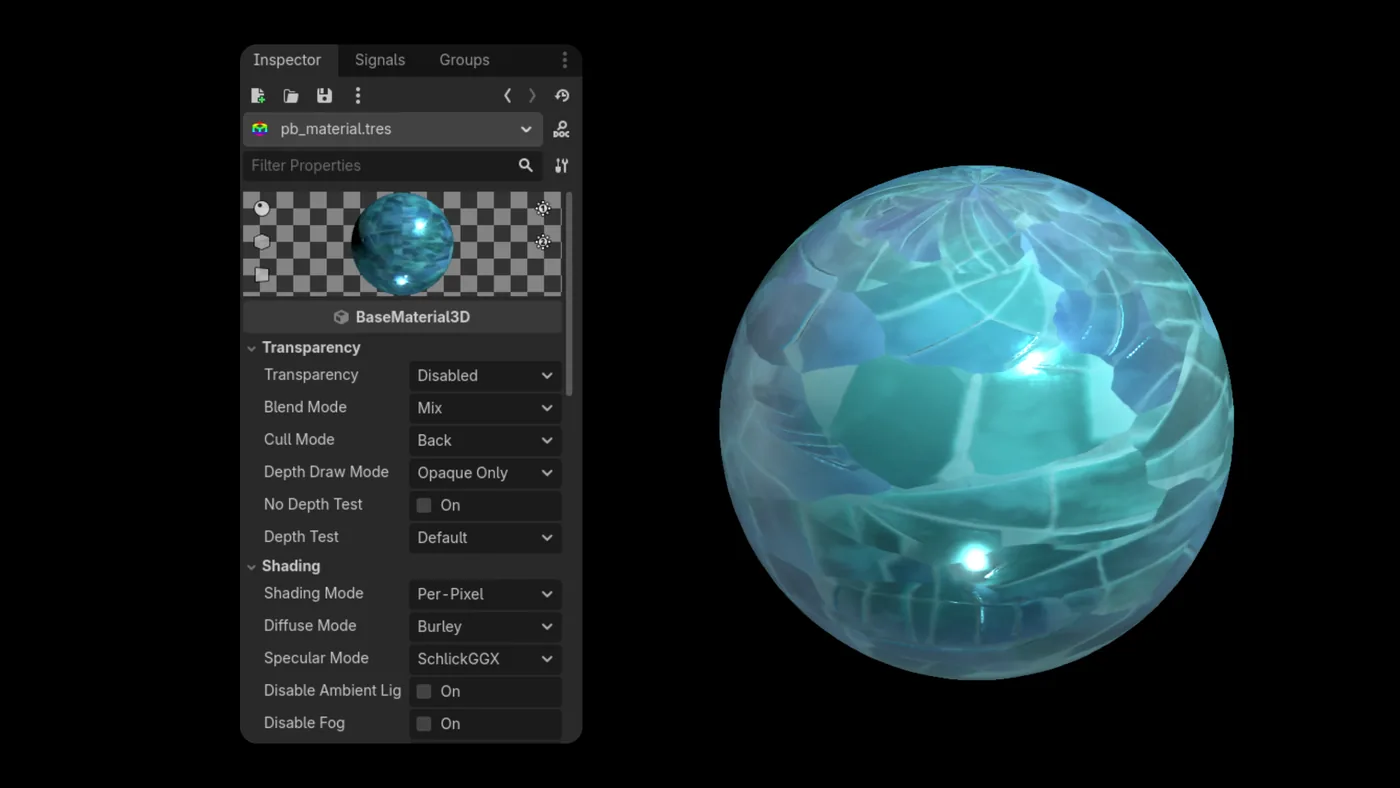
Godot reads the glTF the moment it lands. Set scale, LODs, light baking, and materials from the Import dock — no FBX step in between.
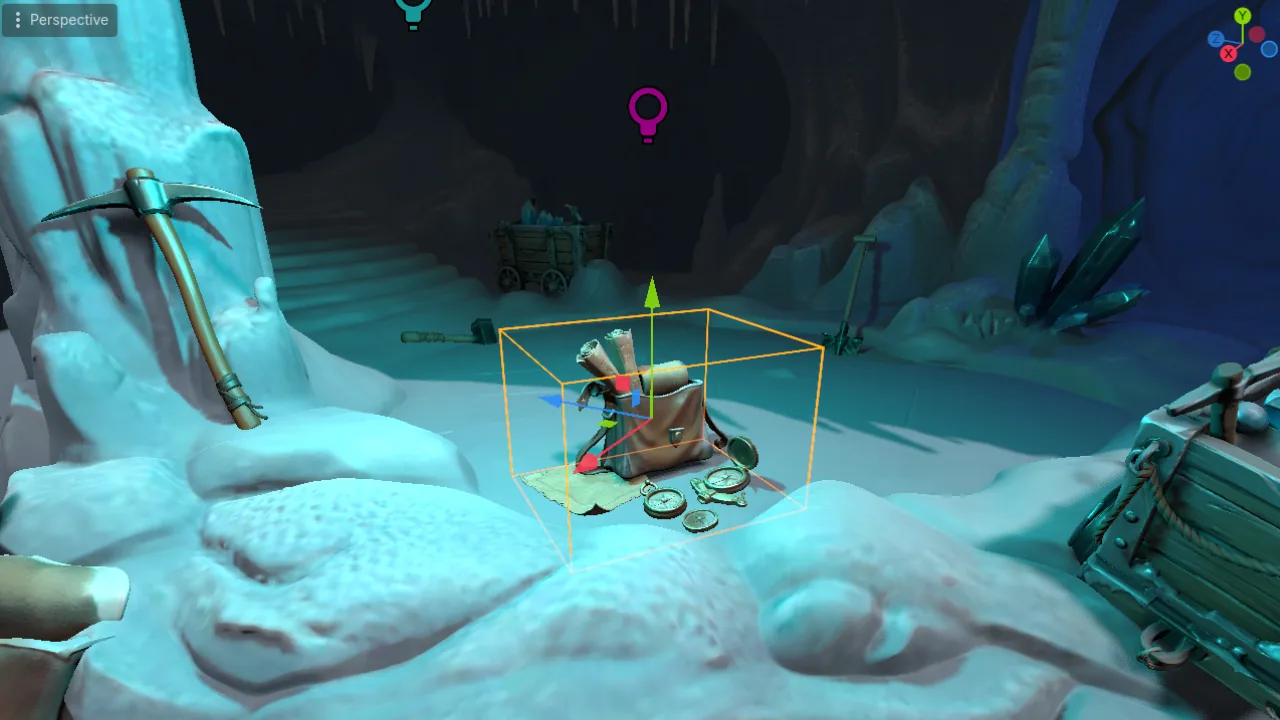
A node in your scene, not a preview
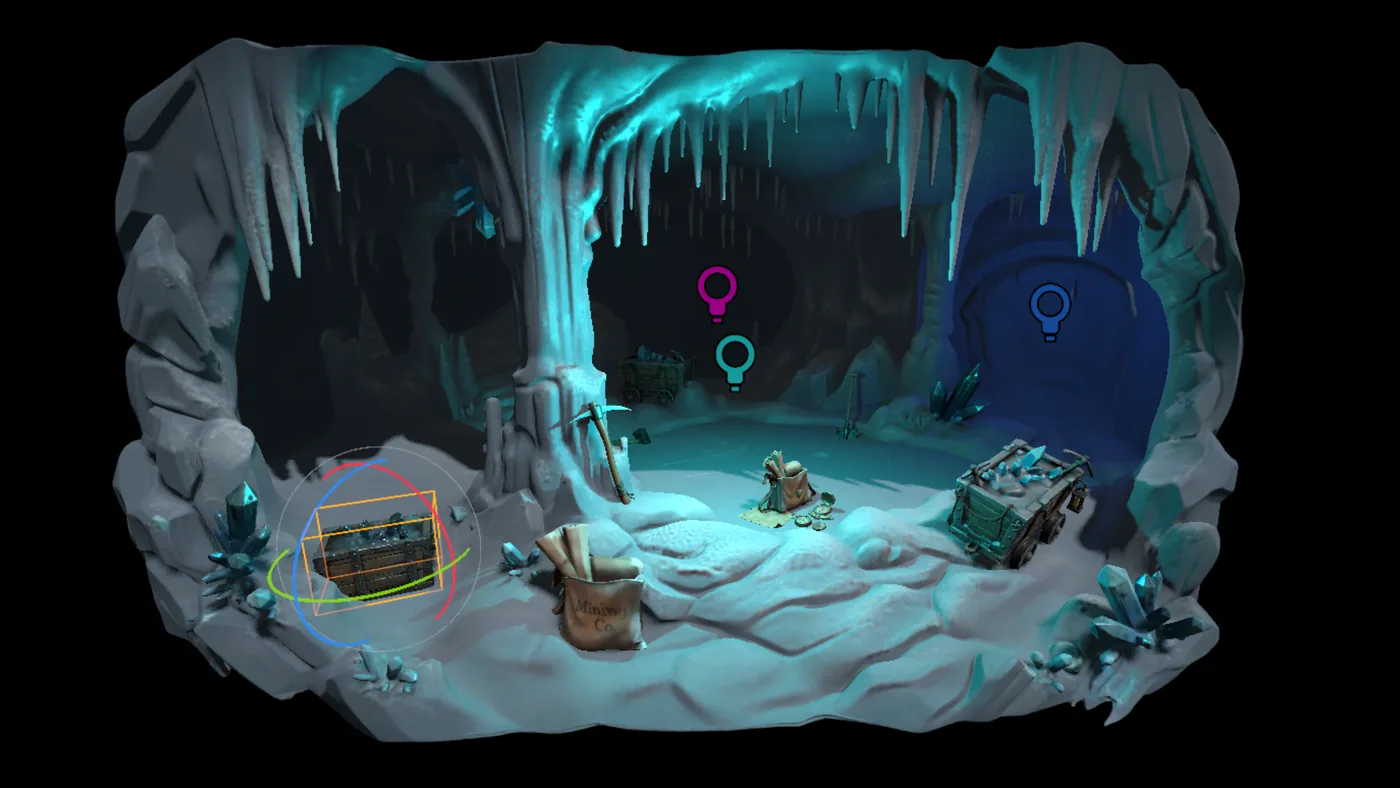
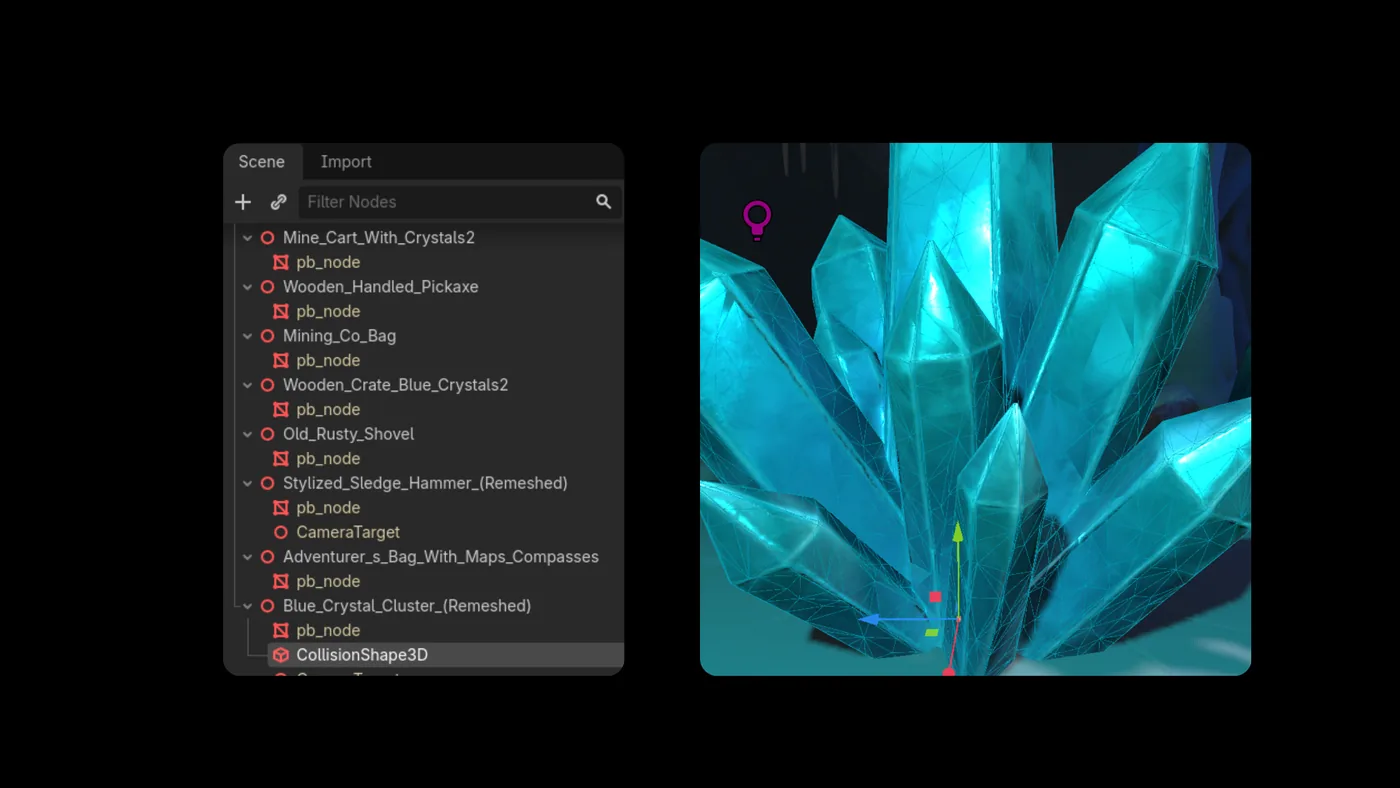
The asset instances as a MeshInstance3D you can move, light, and duplicate — here it drops straight into a lit cave scene beside the rest of the kit.
Two ways in: drag it, or let the addon deliver it
glTF 2.0 is the format Godot recommends, so a plain drag-and-drop always works. The PicoBerry addon removes the export–download–reimport round trip.
PicoBerry addon for Godot
Drop the GLB in res://. Or let the addon deliver it for you.
The simplest path needs nothing: export the GLB from PicoBerry and drop it into res://, and Godot imports it as a scene with mesh, materials, and textures. The optional PicoBerry addon — an EditorPlugin under res://addons/ — goes one step further and pulls a generated asset straight into your project's FileSystem, so you skip the export, download, and re-import round trip. Either way it arrives as an importable scene.
The moment the asset lands in res://
Send from PicoBerry and the generated asset appears in the FileSystem dock, then drops into the open scene — no export, download, or re-import round trip.
From prompt to instanced node in four steps
Generate several, cut them against your art direction, then take the survivor through import, collision, and instancing.
STEP 01
Generate a draft
Describe the prop in text or feed reference images in PicoBerry. For front, side, and back references, pick a model that supports multi-view input.
STEP 02
Cut before you import
Judge silhouette, proportion, and density first. A mesh that is wrong here is cheaper to regenerate than to repair inside Godot.
STEP 03
Drop it in res://
Godot auto-imports the GLB as a scene. In the Import dock set the collision type, material mode, and scale, then reimport.
STEP 04
Instance and wire it up
Add it to your scene or a MeshLibrary and GridMap, give it a StaticBody3D or CharacterBody3D as needed, and export to desktop, mobile, or web.
What Godot will and will not forgive
The faster a scene or a jam build has to fill up, the better this fits. The tighter the physics and the mobile budget, the harder you look.
Best fit
Stylized props, GridMap and MeshLibrary tiles, prototype and game-jam assets, background objects, and mobile or web-scale meshes.
Decide with care
Physics-accurate convex collision, tight mobile vertex budgets, Mixamo or AnimationTree retargeting, hero assets, and SDFGI versus baked lightmaps need deeper review.
Review before use
Check import scale, MeshInstance3D structure, StandardMaterial3D and ORM setup, Trimesh-versus-Convex collision, origin and pivot, renderer fit, and tri count for the target platform.
The Godot workflow in practice
See how a PicoBerry candidate continues into Godot review rather than ending at generation.
Generate in PicoBerry
A generated asset appears with the prompt, image, or reference context that created it.
Import into Godot
The same model in the Import dock and scene tree — a Node3D with a MeshInstance3D, ready for scale and collision setup.
Instance into the scene
The selected asset placed into a scene or a GridMap alongside the rest of the level, ready for collision and a script.
See the setup, not just the result
Before-and-after views, a material pass, and collision-shape choices show what changes between a PicoBerry candidate and a Godot-ready scene.
Frequently asked questions
Can PicoBerry generate 3D models for Godot?
Yes. PicoBerry exports GLB (binary glTF), the format Godot's documentation recommends for 3D scenes. Drag the file into the FileSystem dock under res:// and Godot imports it as a scene — a Node3D root with MeshInstance3D children — with no plugin required. You can also generate with a different engine (Tripo, Hunyuan, or Meshy) and compare results before committing one to the project. Treat the result as a draft and check import scale, materials, collision, and tri count before production.
What file format should I export for Godot?
Use GLB. Godot's documentation lists glTF 2.0 as its recommended 3D scene format — the one with the most thorough support — so a .glb drops straight into res:// and imports as a PackedScene with mesh, materials, and textures. Godot also reads .blend, DAE, OBJ, and FBX (via the built-in ufbx library since 4.3), but glTF is the path with the fewest surprises.
The imported mesh has no collision. How do I add it in Godot?
Generated meshes arrive without hand-authored collision. In the Import dock you can auto-generate a collision shape, or in the scene use Mesh > Create Trimesh Static Body for static set dressing and Create Single Convex Collision Sibling for movable physics bodies. You can also drive it from the source file with -col, -convcol, and -colonly node-name suffixes.
Is the scale correct when I import into Godot?
Usually yes. Godot uses 1 unit = 1 metre and glTF is authored in metres, so a generated asset lines up without the centimetre conversion other engines need. Still verify it against your character and cell size, and correct it once in the Import dock's scale rather than on every placed instance.
Can I use generated characters with Skeleton3D and AnimationPlayer?
A rigged or animated GLB imports with a Skeleton3D and an AnimationPlayer holding the clips. Check the bone names if you plan to retarget with AnimationTree or the Retarget system, confirm the skin is assigned, and review deformation before relying on it in gameplay.
Do generated meshes work with GridMap and MeshLibrary?
Yes. Add the generated meshes to a MeshLibrary resource and paint modular 3D levels with GridMap. Keep the pieces on a consistent cell size and origin so they snap cleanly, and attach collision in the MeshLibrary so painted tiles are solid.
Will a generated asset run on mobile and web builds?
Godot exports to Android, iOS, and HTML5, and generated assets can ship to all three. Use PicoBerry's remesh or low-poly output, pick the Mobile or Compatibility renderer, and watch triangle counts and texture sizes against your target device budget.
Try the engines. Keep the one that fits your scene.
Generate the same prop on Tripo, Hunyuan, and Meshy, remesh the one you keep, and drop it into res:// — then carry on in Godot the way you always have, instancing, colliding, and shipping to desktop, mobile, or web.