Guide · Characters

Best AI 3D model for characters

Heroes, NPCs, enemies: the humanoid characters your game is built around. Great characters start with a clean T-pose image, then a model that rigs and animates well. Here is the workflow and the models to try first.

Try first for charactersPB UltraPB Slim 2then compare onsilhouettetopologyrig

How do you generate a game character that rigs and animates cleanly?

Start from a clean T-pose reference with the arms out and clear of the body — that one choice decides whether the auto-rig lands. Generate the same reference on PB Ultra and PB Slim 2 and judge the silhouette and proportions before any texture. Then look at the wireframe around the shoulders, elbows, hips, and knees: those are the joints that tear when the topology is tangled. Auto-rig the winner in PicoBerry with either the Tripo or the Meshy engine, apply a library animation, and watch the motion before you commit. Export GLB or FBX for your engine.

What matters most for characters

The six criteria from the hub, weighted for characters. These are the three that decide a character the fastest.

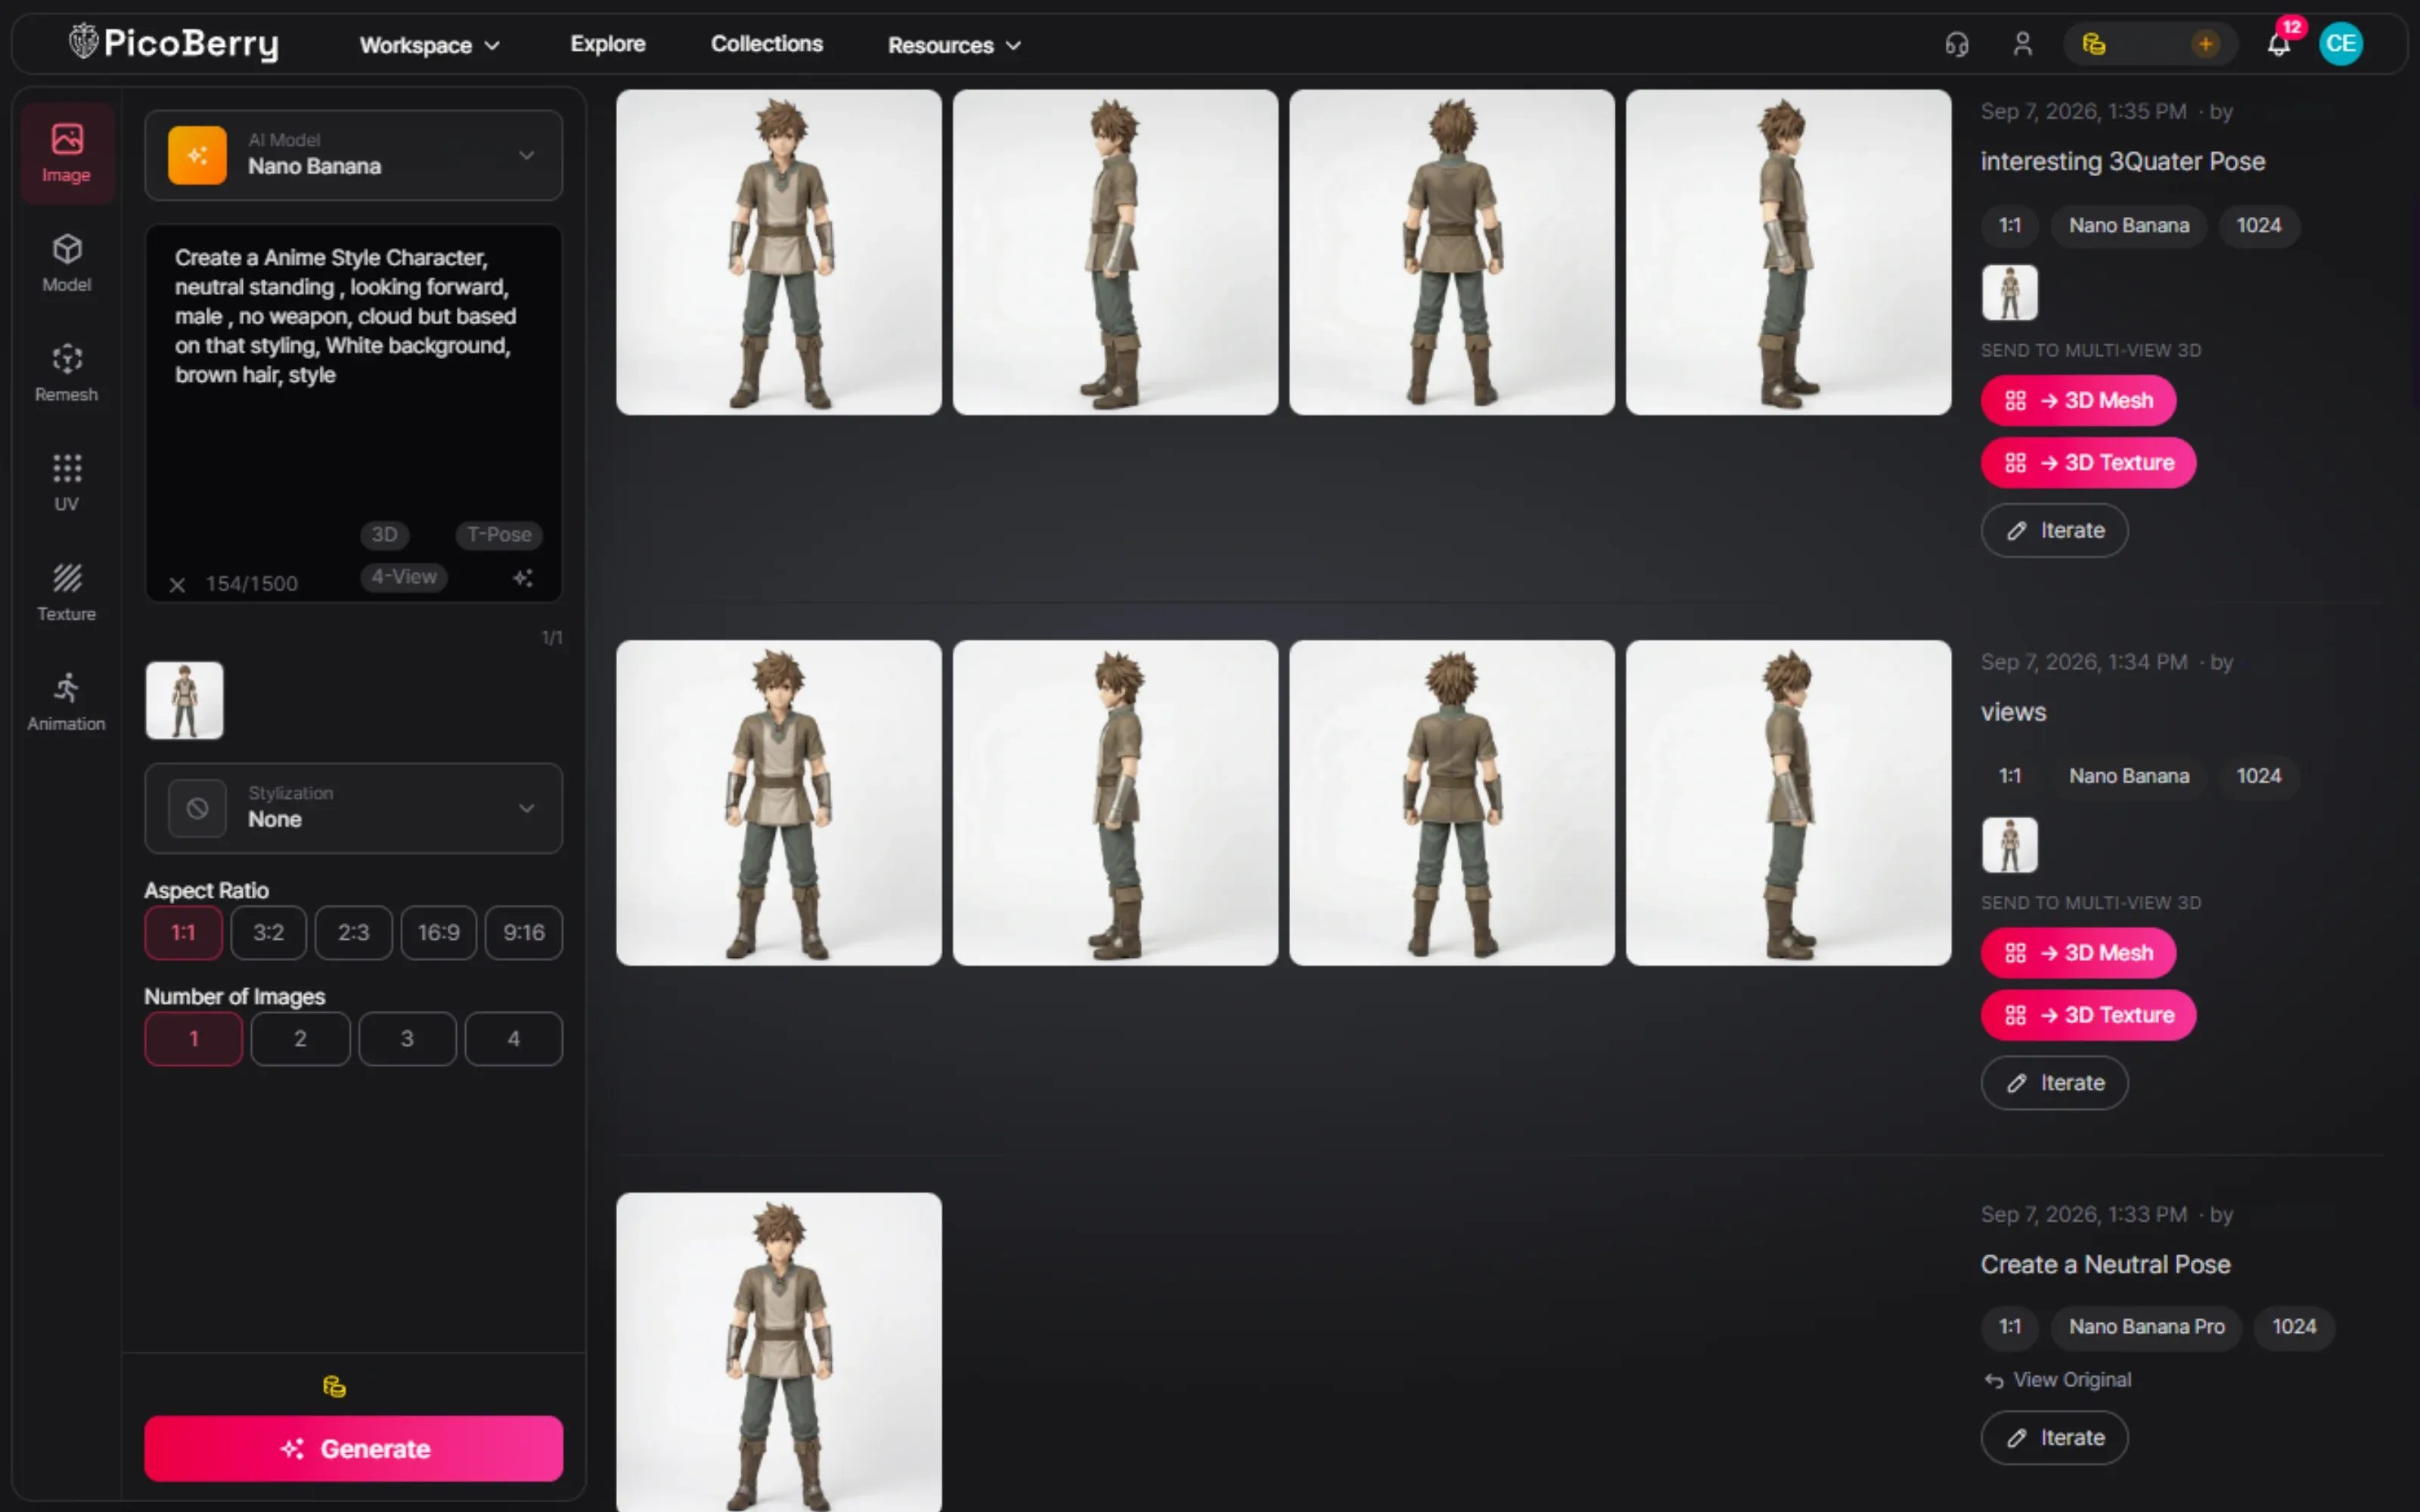
PicoBerry’s image workspace generating an anime male character in consistent front, side, back and three-quarter views, showing a clear silhouette and proportions

Silhouette & proportions

A character reads by shape and proportion. Judge the pose and the silhouette before you zoom in on detail.

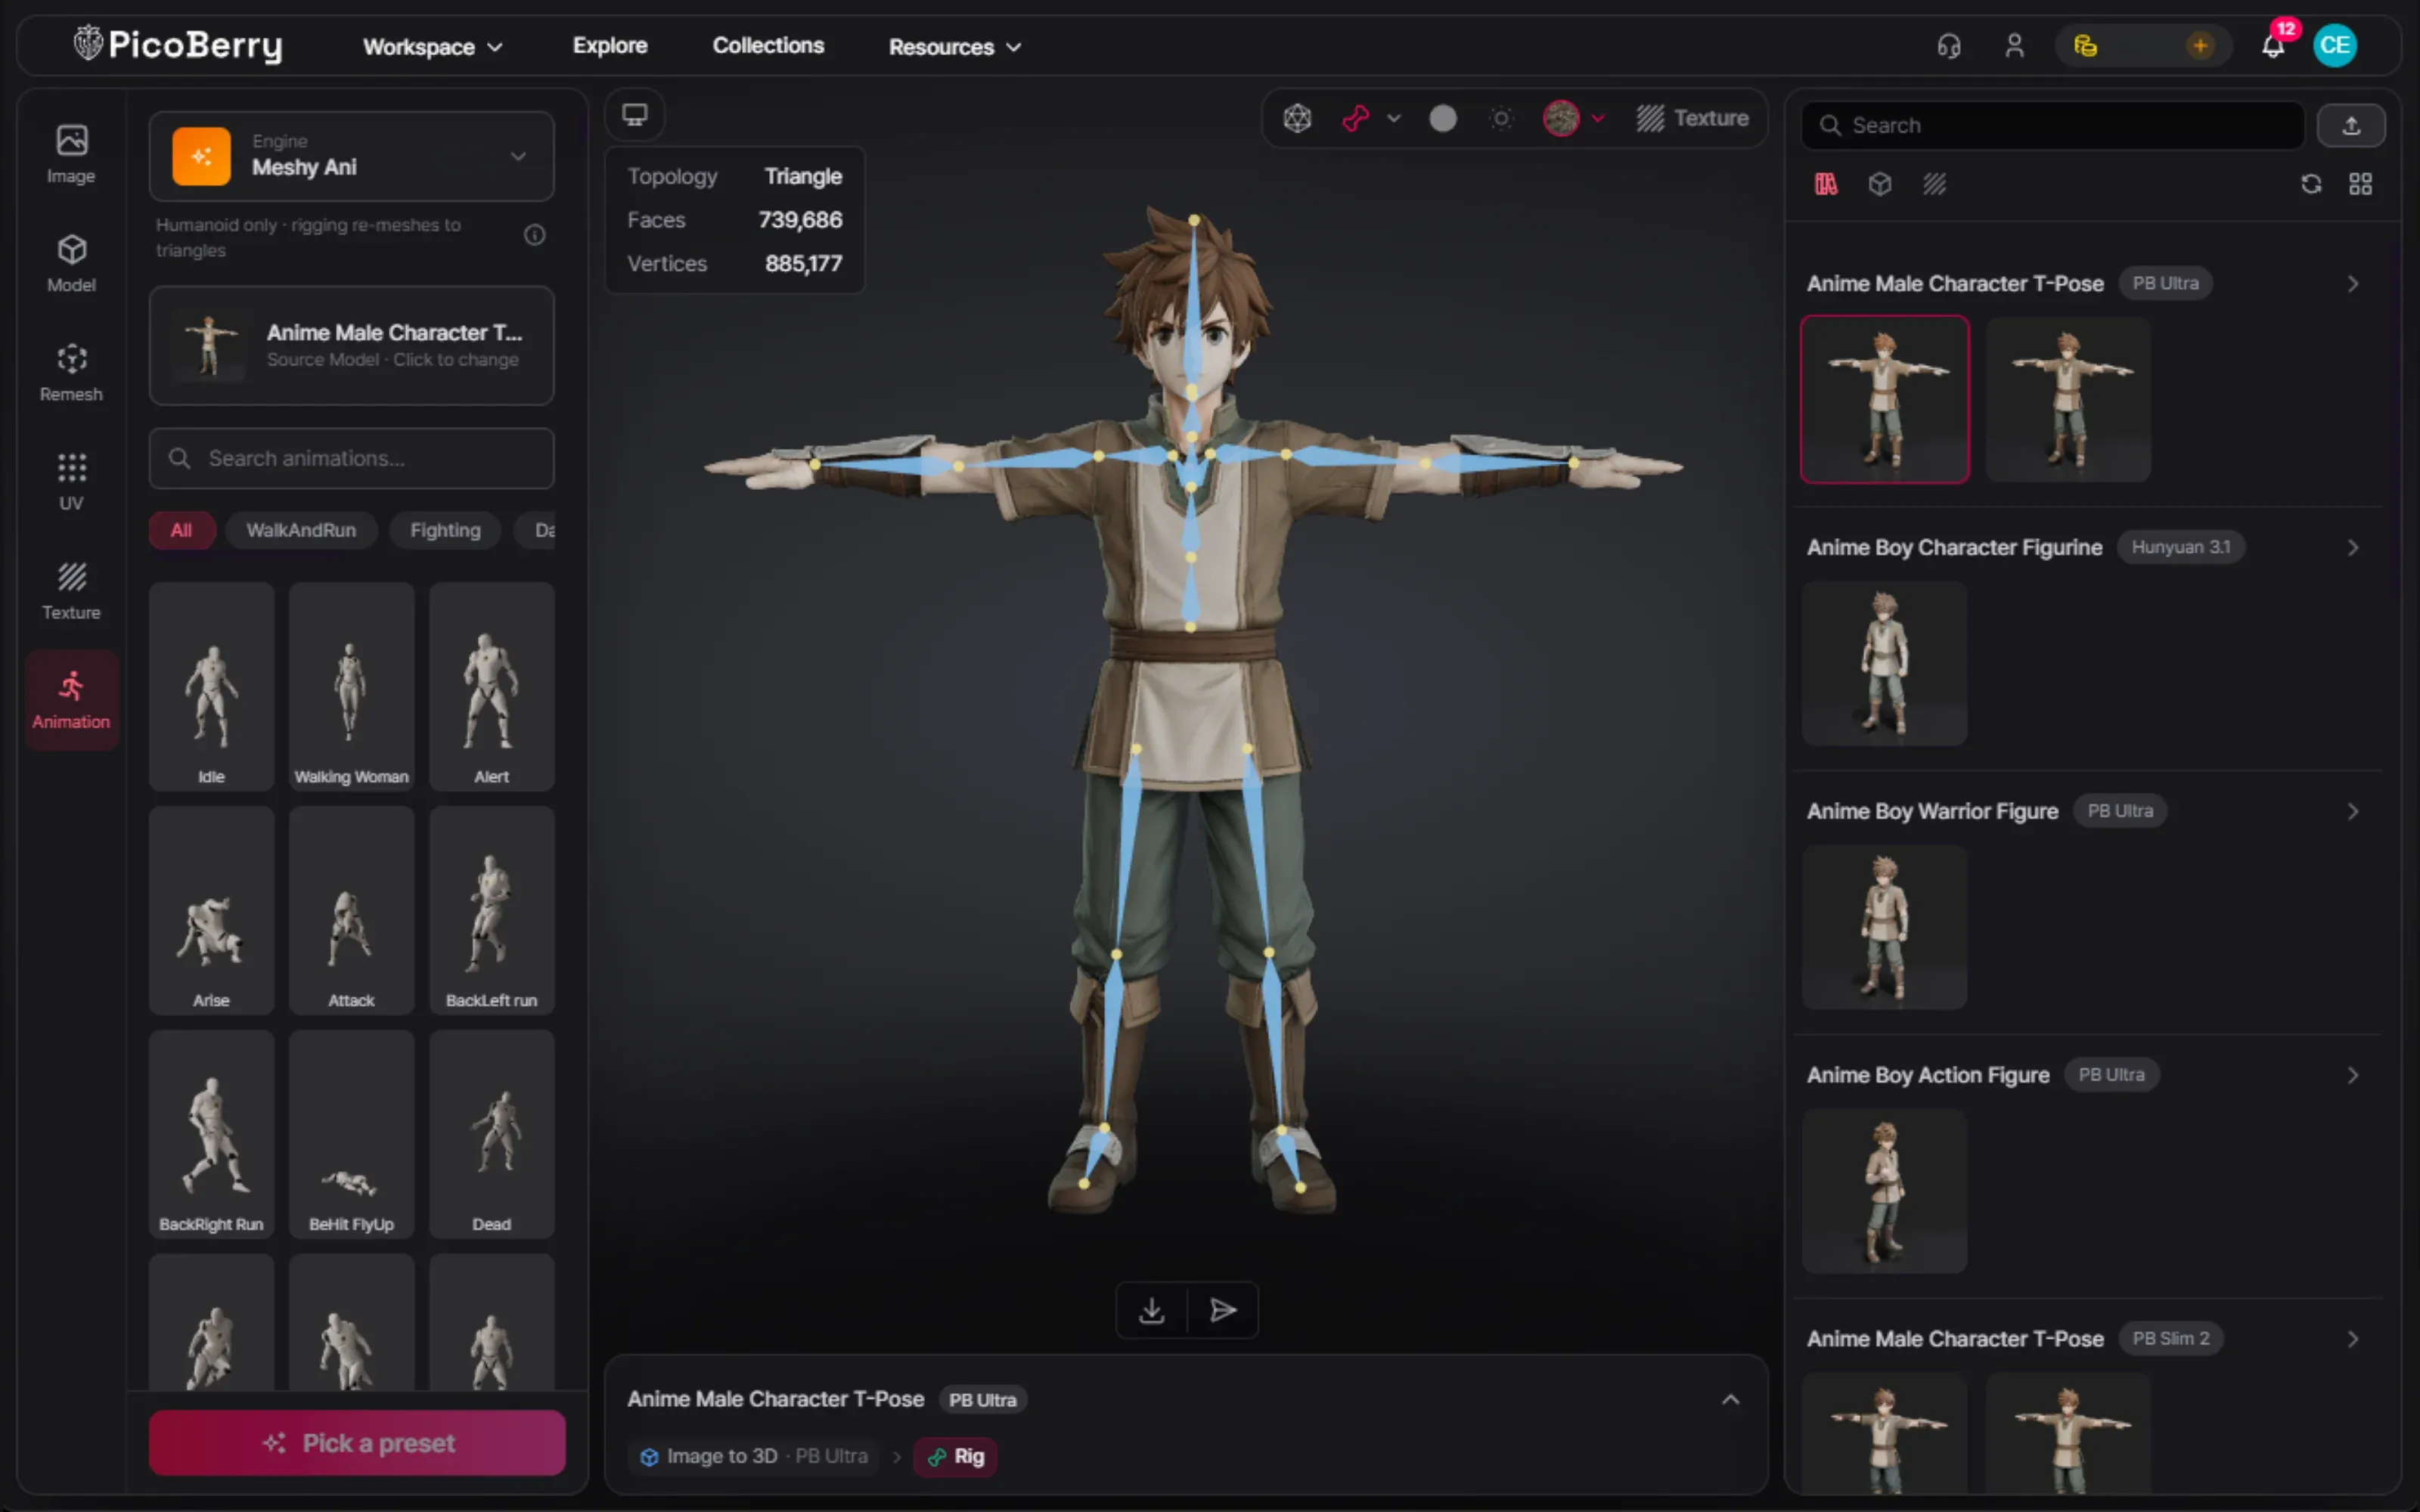
The anime character auto-rigged in PicoBerry with a clean bone skeleton in T-pose, beside the animation library, ready for rigging

Rig-friendly topology

The mesh has to auto-rig and deform cleanly at joints. A dense, tangled blob fights rigging and skinning.

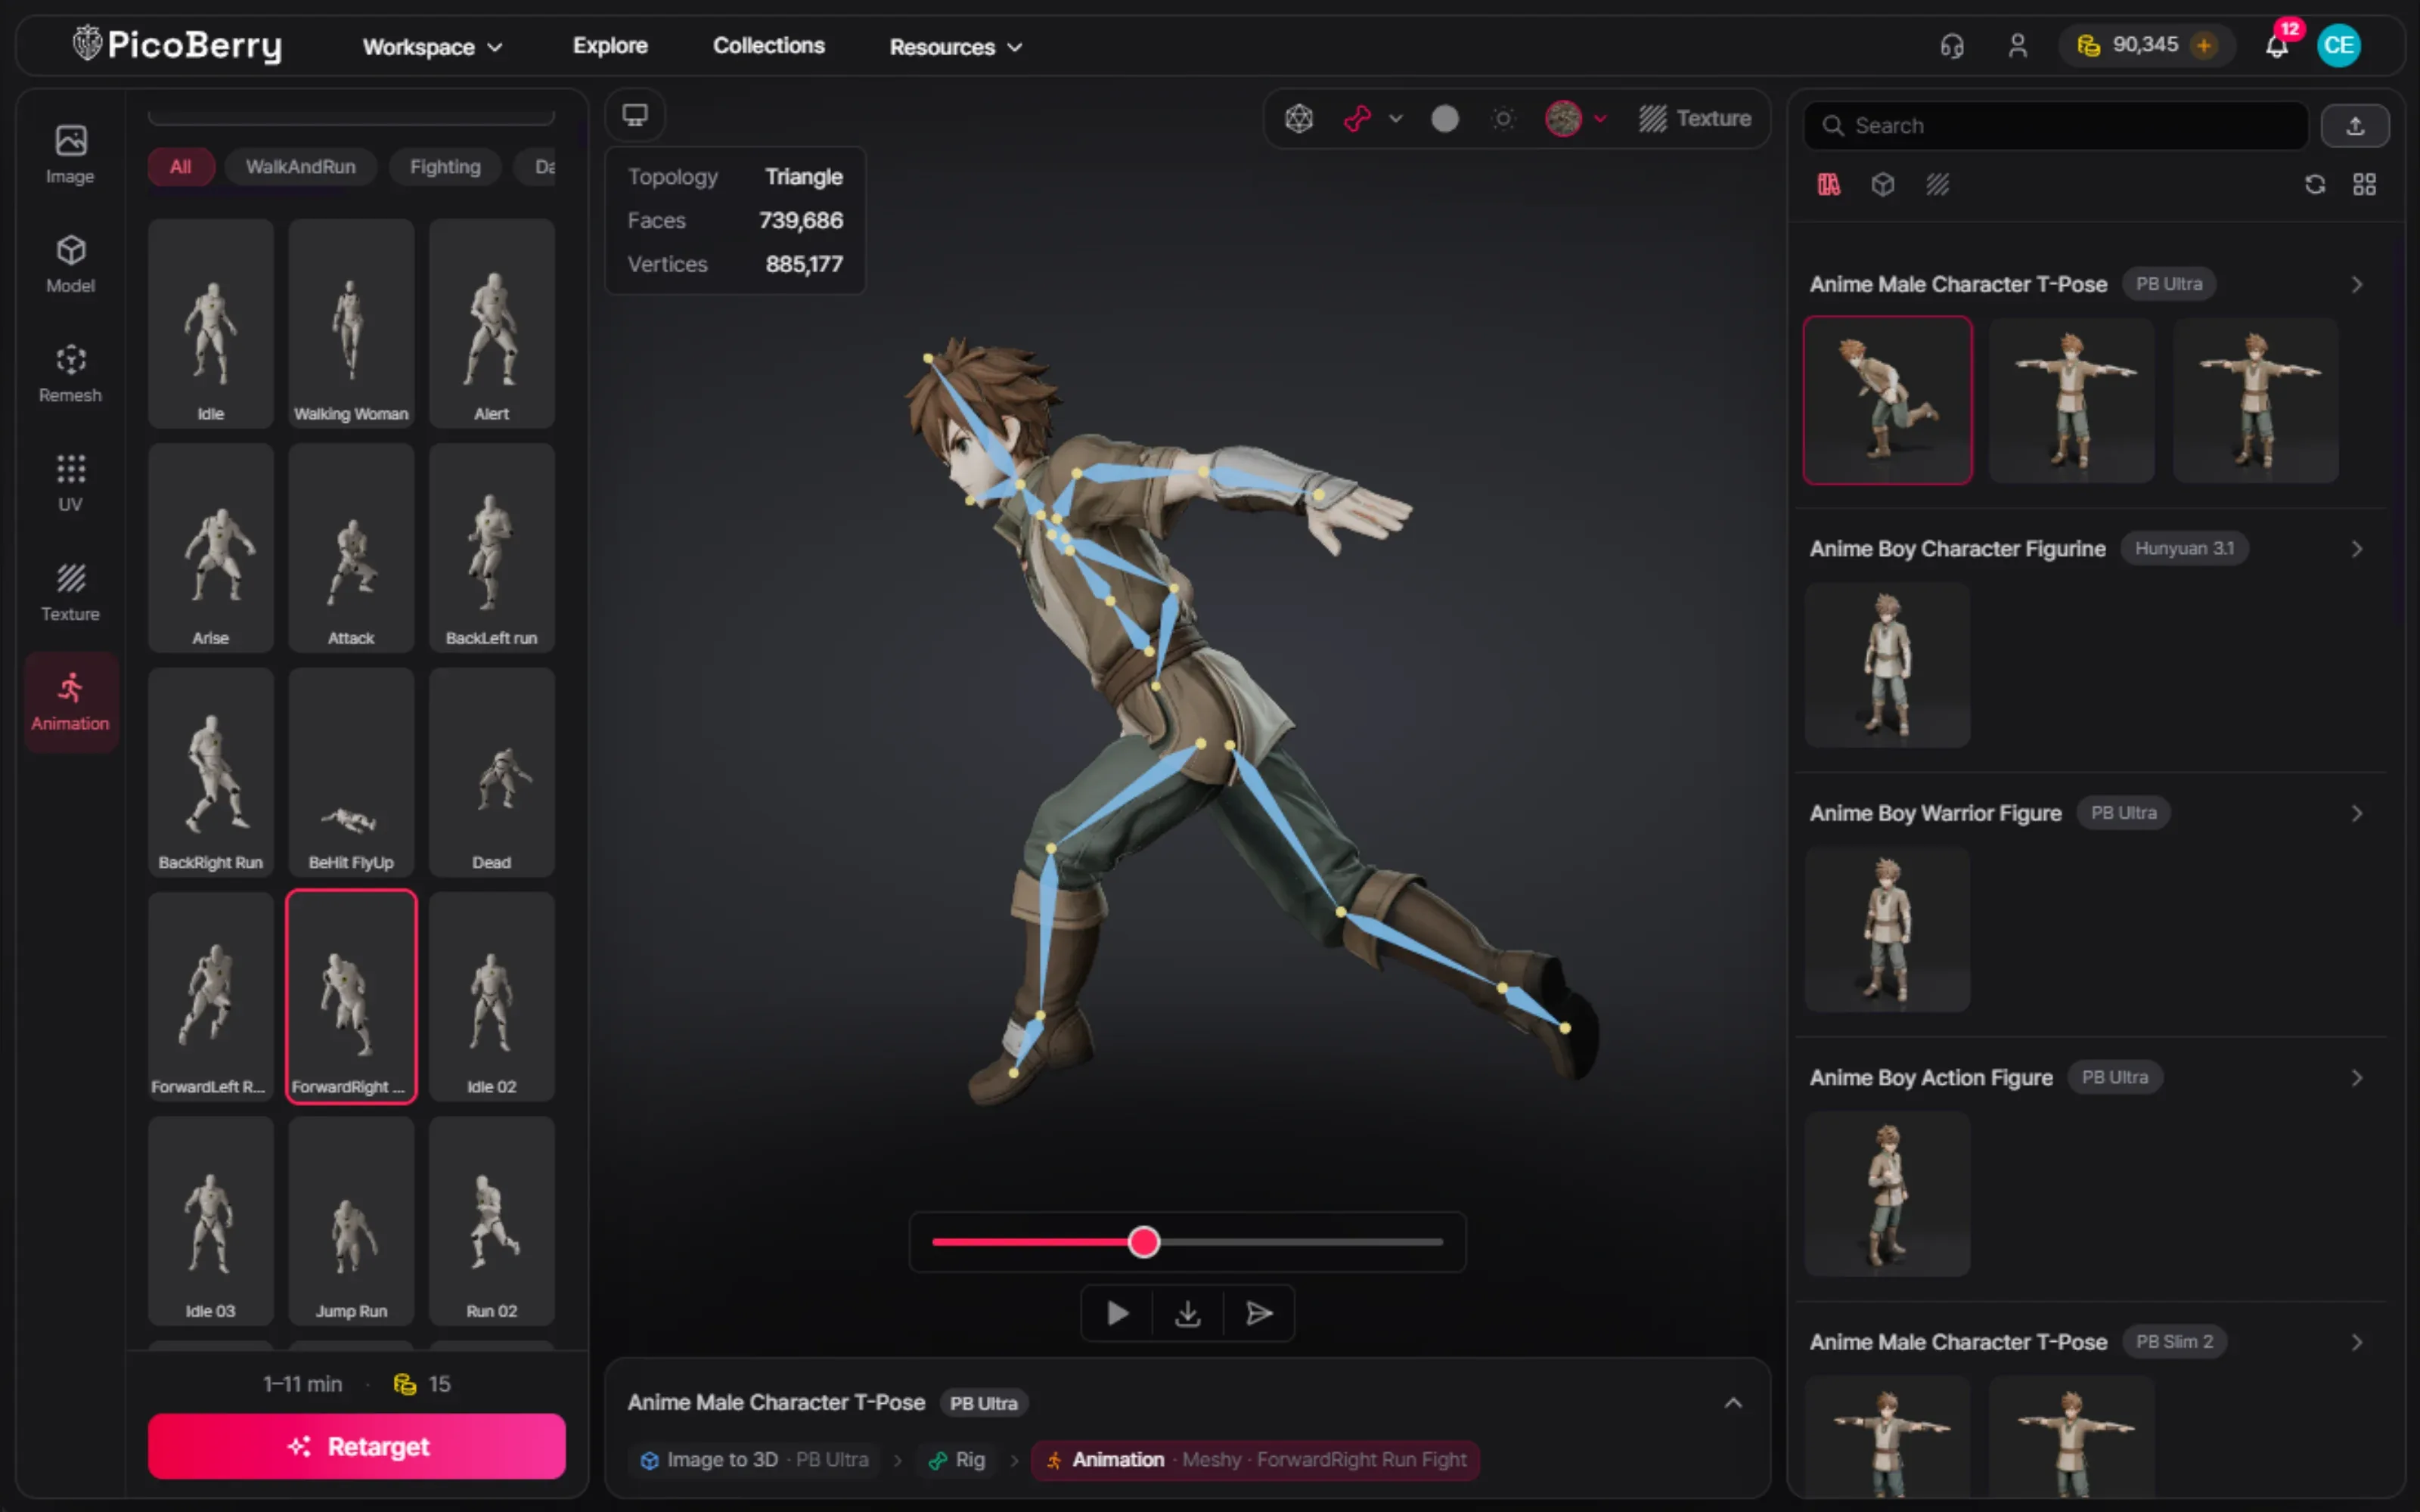
The rigged anime character playing a run animation from PicoBerry’s animation library, with a playback timeline and preset poses

Ready to rig & animate

Start from a clean T-pose so the auto-rig lands and animation retargets cleanly, with arms clear of the body.

Models to try first for characters

Reasonable starting candidates to test, not fixed winners. Run the same T-pose across them and judge the results. The lineup evolves, so check the current model picker in PicoBerry.

Candidate A

PB Ultra

A high-detail model. A strong first try for hero characters where the face, costume, and fine detail need to hold up under a close camera.

Check: the silhouette, proportions, and how the detail reads.

Candidate B

PB Slim 2

A leaner model at a much lower polygon count. A strong first try when you want an optimized character fast. Run it head to head with PB Ultra on the same T-pose.

Check: that the silhouette holds and the topology stays rig-friendly at low poly.

Then rig and animate

Auto-rig in PicoBerry

Once you pick the winner, auto-rig and apply the animation library (Tripo or Meshy engine) in PicoBerry, then export for your engine.

Check: skinning weights and joint deformation before you rely on it.

The same character across models

A like-for-like test: one T-pose, a couple of models, judged on silhouette, topology, and rig-readiness. This is the evidence behind the recommendation above.

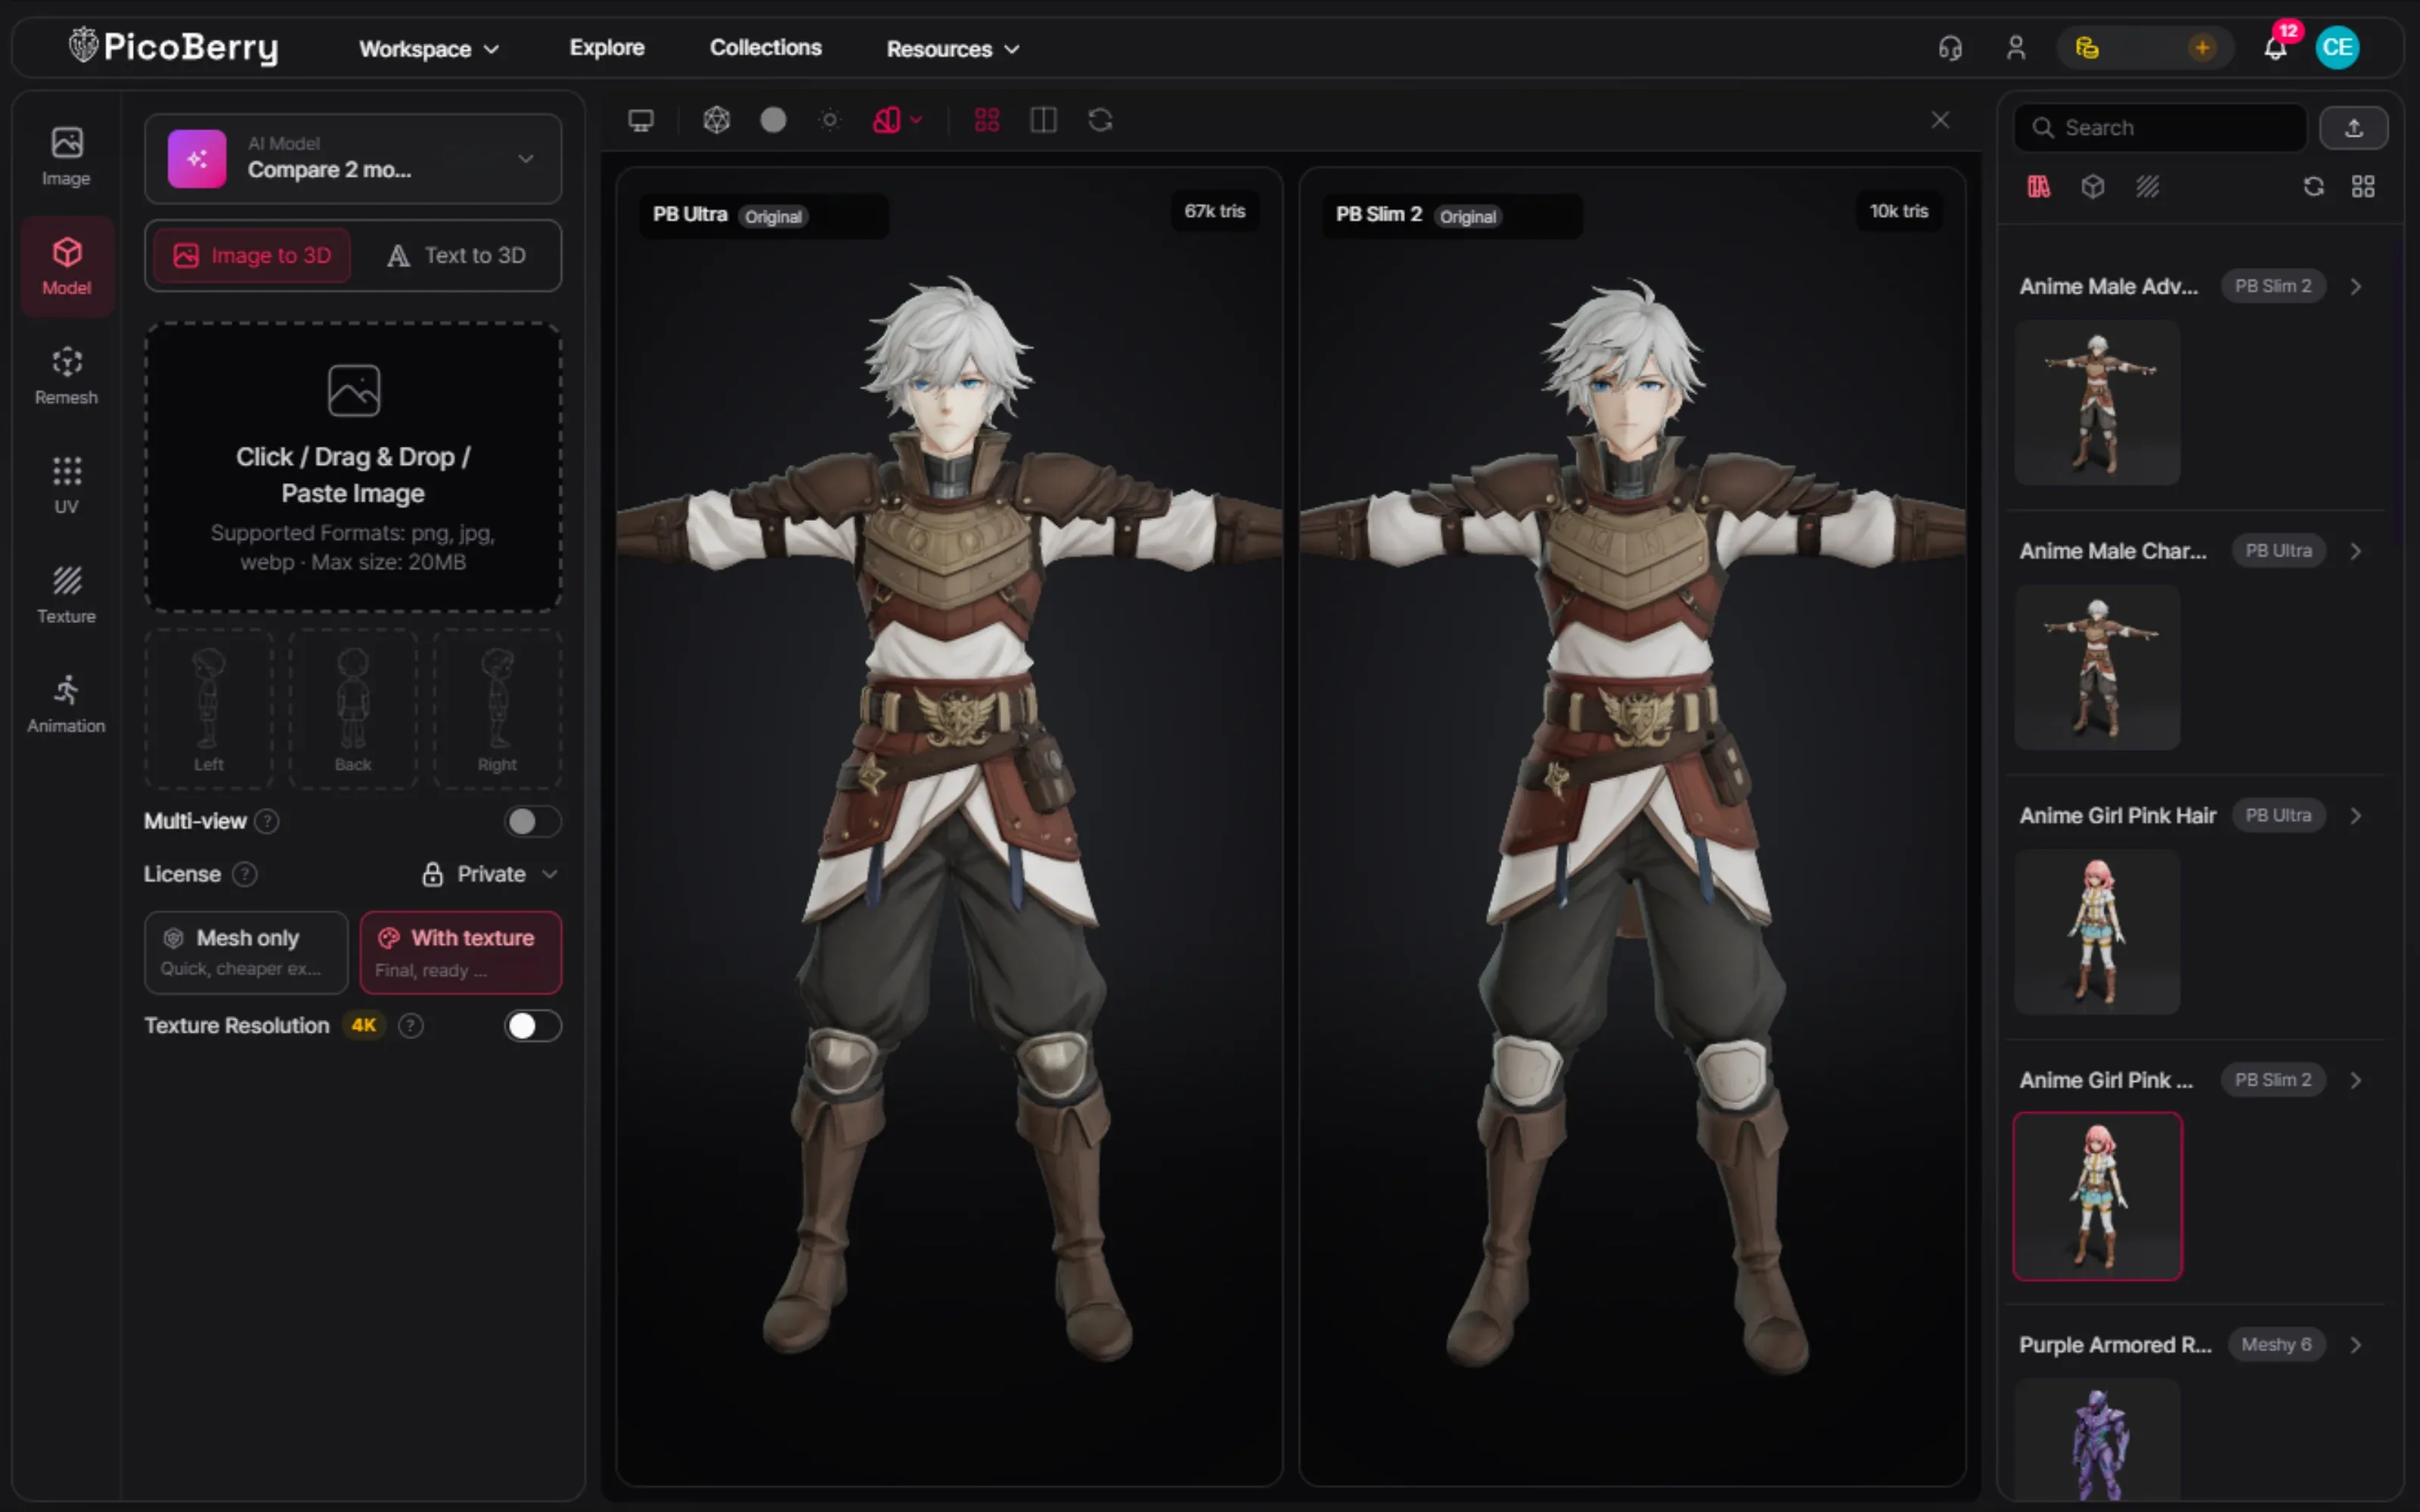
PicoBerry’s compare view showing the same armored anime character in T-pose on PB Ultra at 67k triangles and PB Slim 2 at 10k triangles, side by side

Same T-pose, two models

One character, two candidates, so the difference in silhouette and proportions is visible, not asserted.

Measured: PB Ultra 67k triangles · PB Slim 2 10k triangles — a 6.7× gap, so the question is whether the extra detail survives a remesh to your own budget.
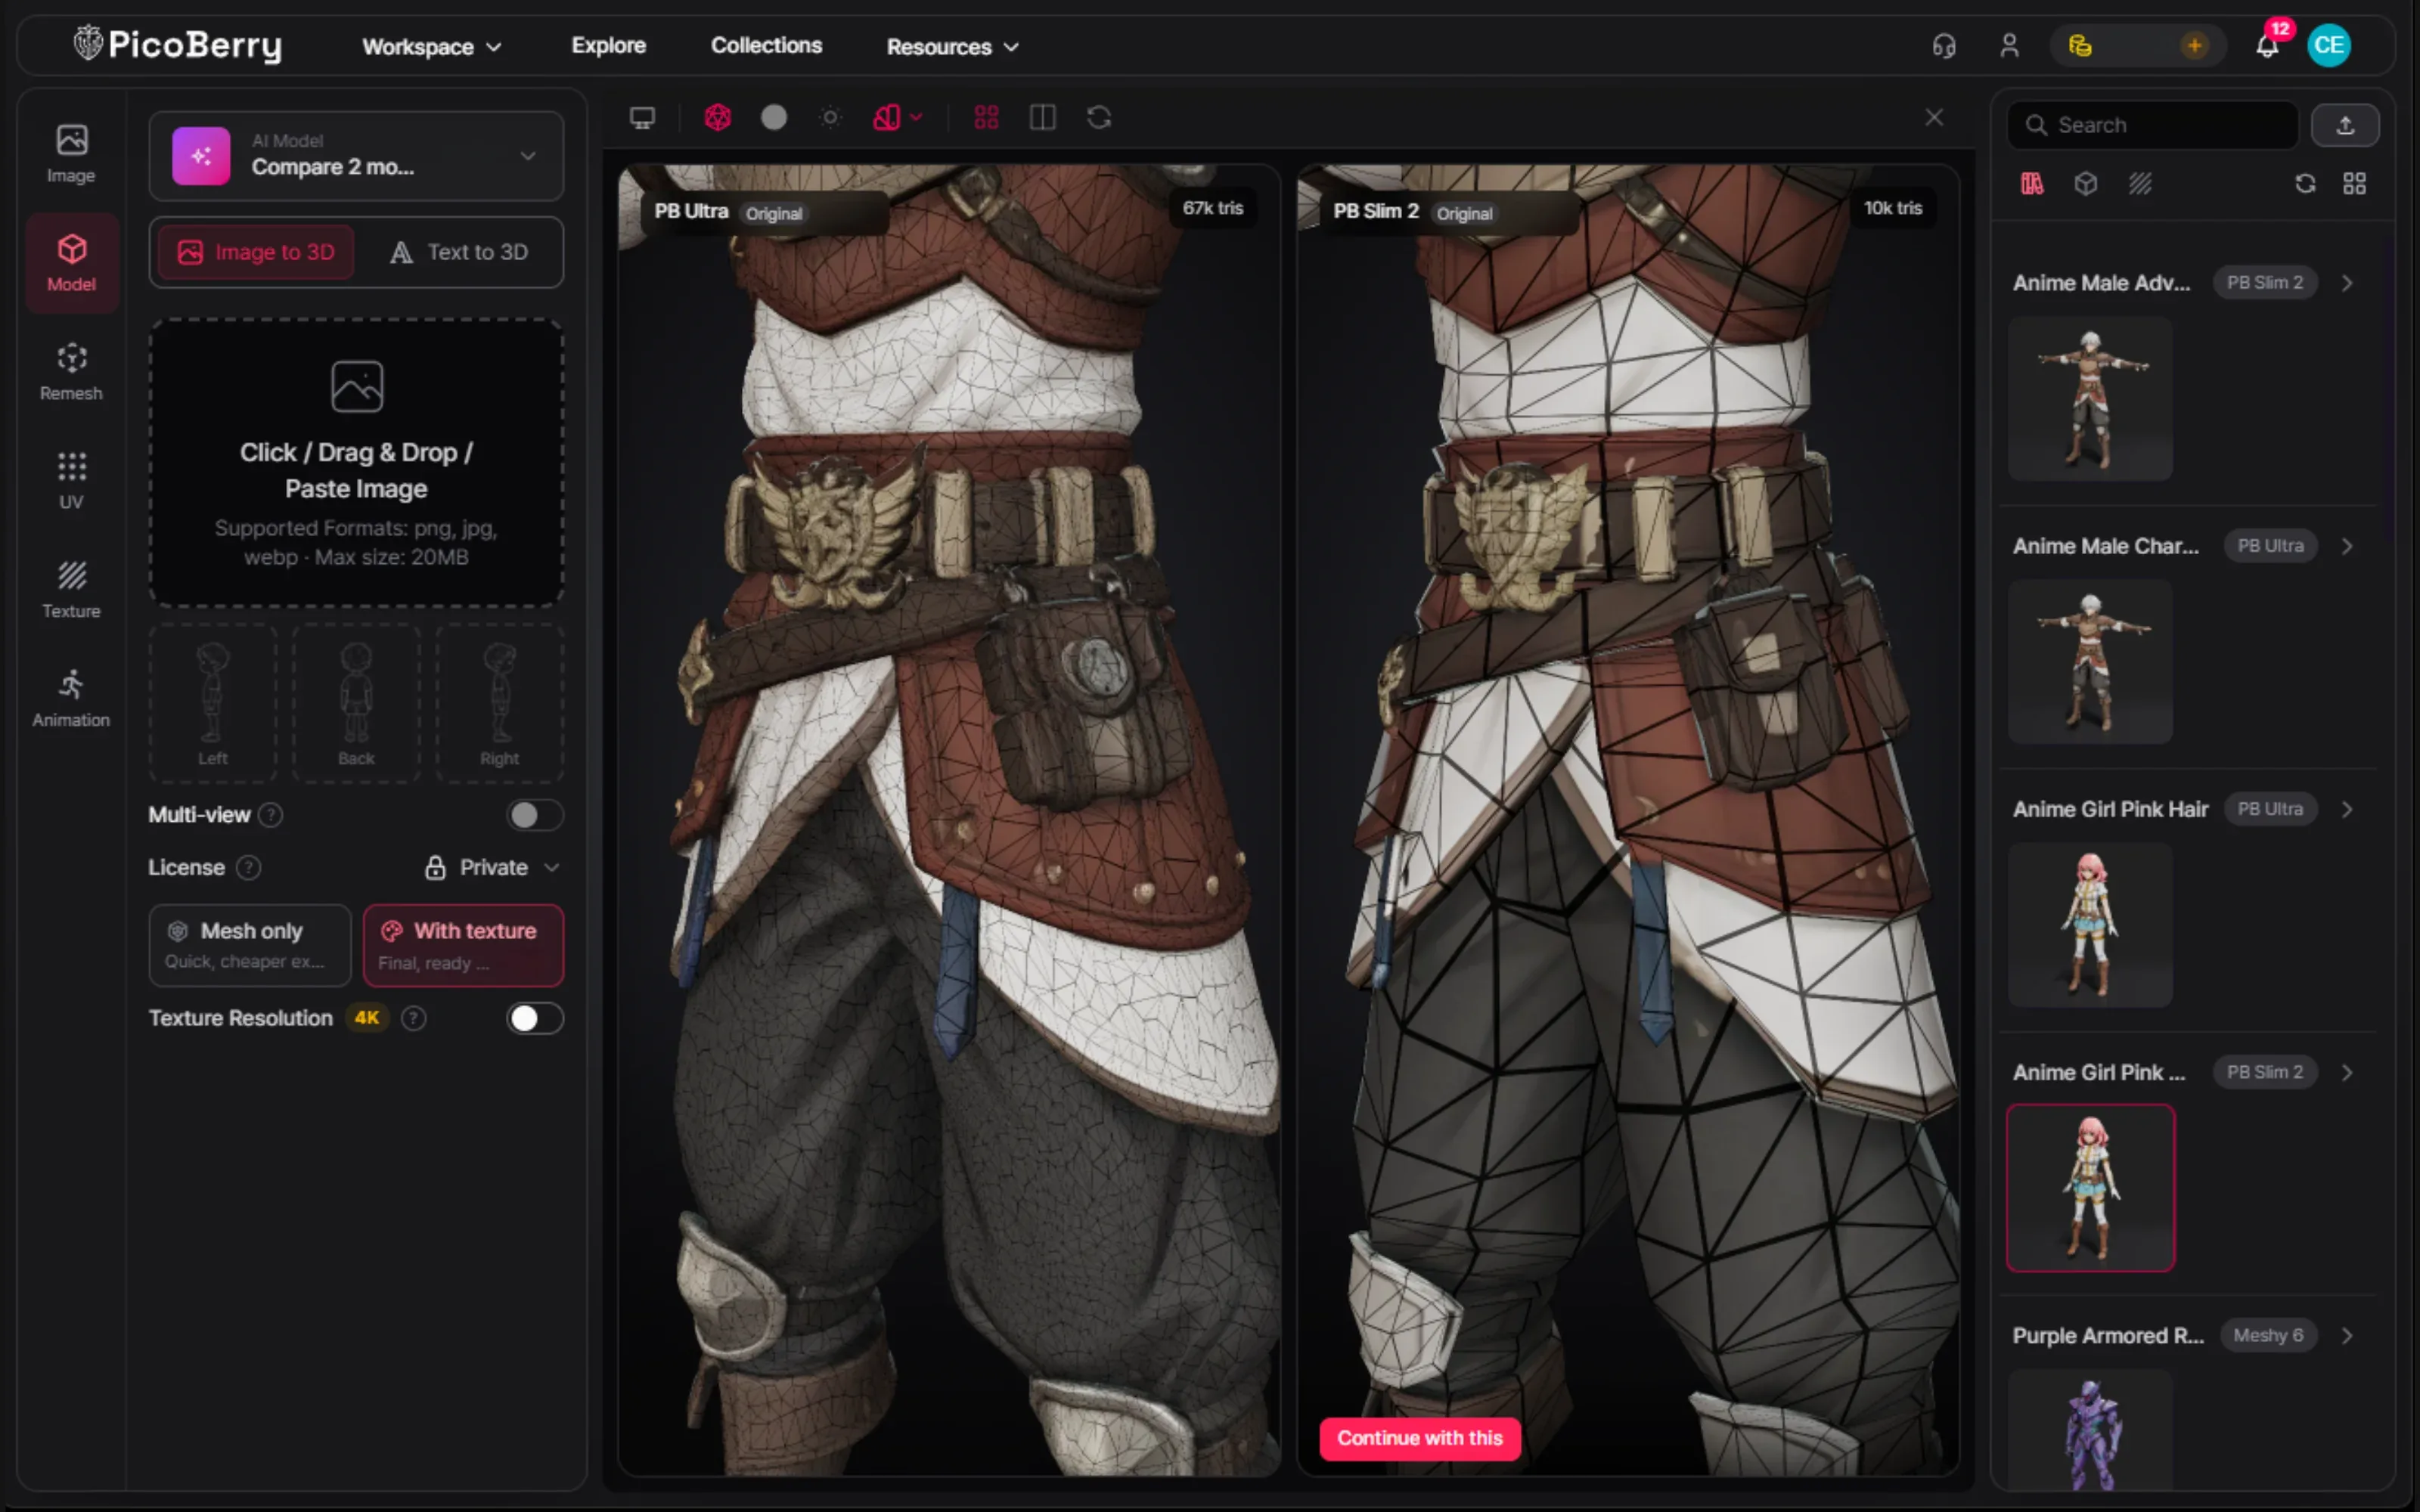
Wireframe close-up of the same character on PB Ultra and PB Slim 2, comparing the denser and leaner topology around the torso and belt

Topology at the shoulders and hips

The wireframes reveal which result will auto-rig and deform cleanly at the joints.

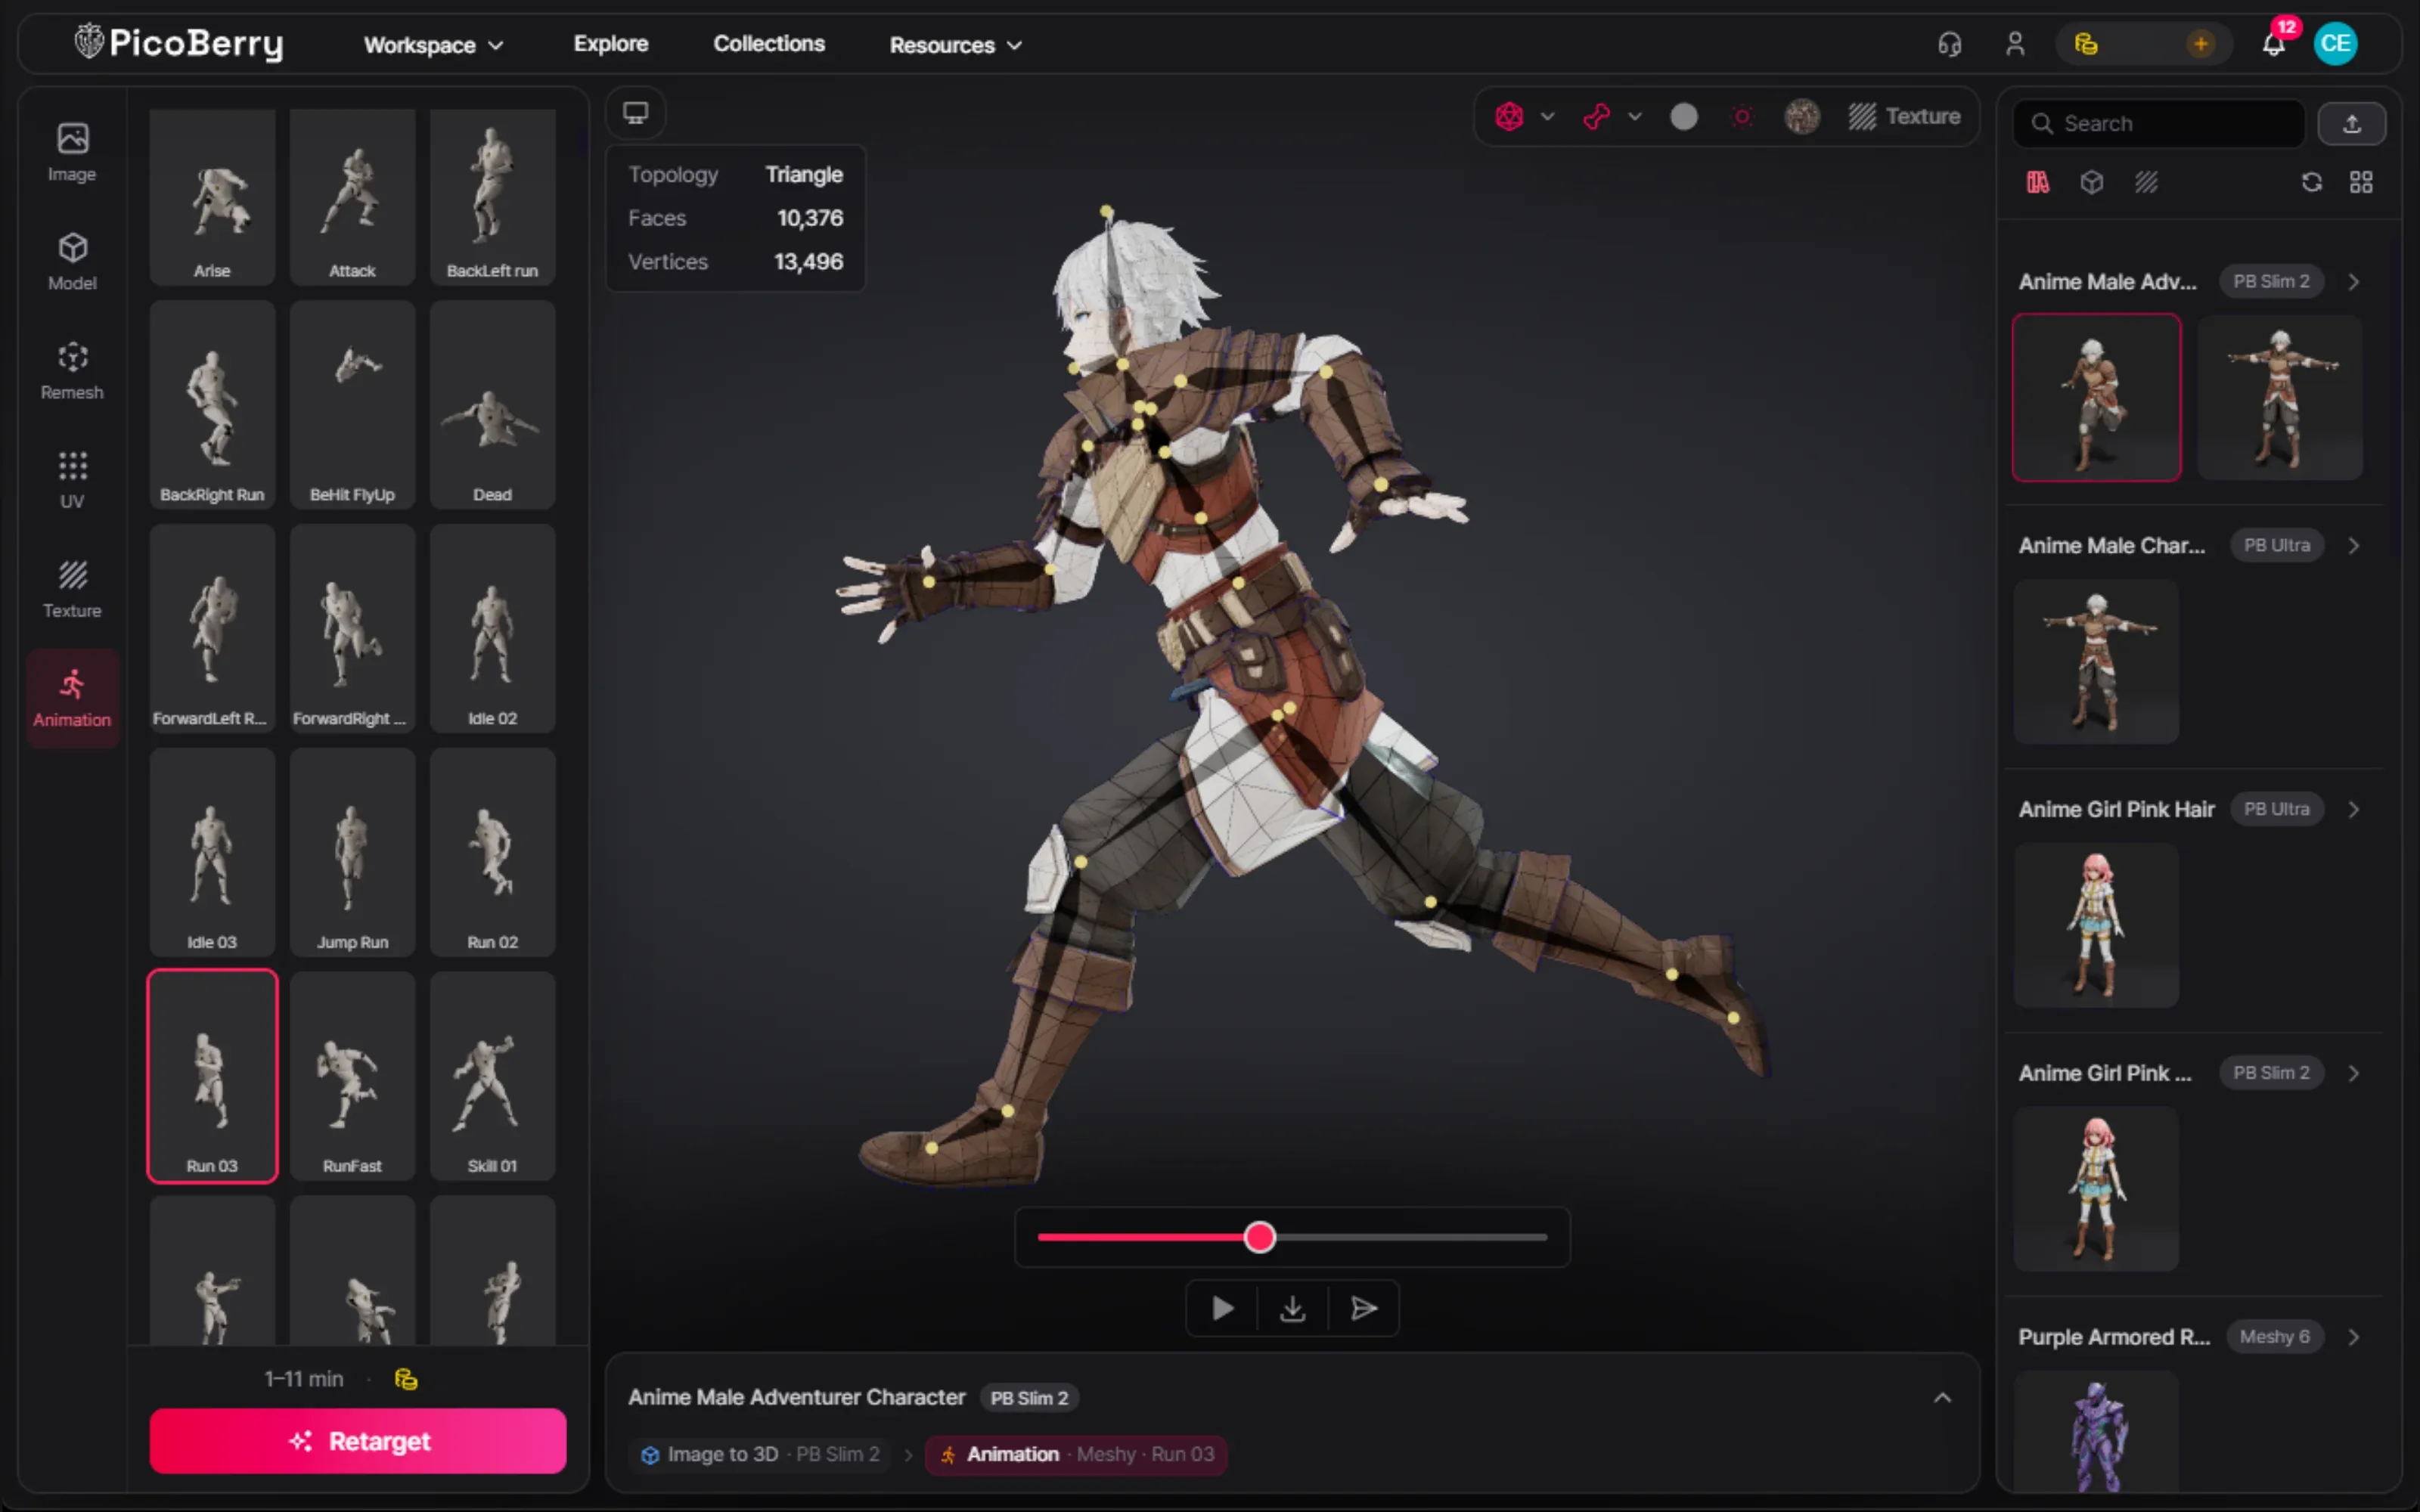
The chosen character auto-rigged in PicoBerry and playing a run animation, with its face and vertex counts and the animation library

Chosen character rigged and animated

The winning candidate auto-rigged, playing a library animation, and ready for your engine.

How to choose for characters, step by step

STEP 01

Start with a clean T-pose image

Generate a T-pose character reference in PicoBerry Image Generation (a 4-view helps), or bring your own. Arms out and clear of the body make rigging far easier.

STEP 02

Generate on PB Ultra and PB Slim 2

Run the same T-pose through both models in PicoBerry, on one credit pool, so the comparison is fair.

STEP 03

Compare silhouette and rig-readiness

Judge proportions and pose first, then the wireframe around the joints. Keep the one that will rig the cleanest.

STEP 04

Rig, animate, export

Auto-rig and apply animations in PicoBerry, remesh if the topology is rough, then export for your engine.

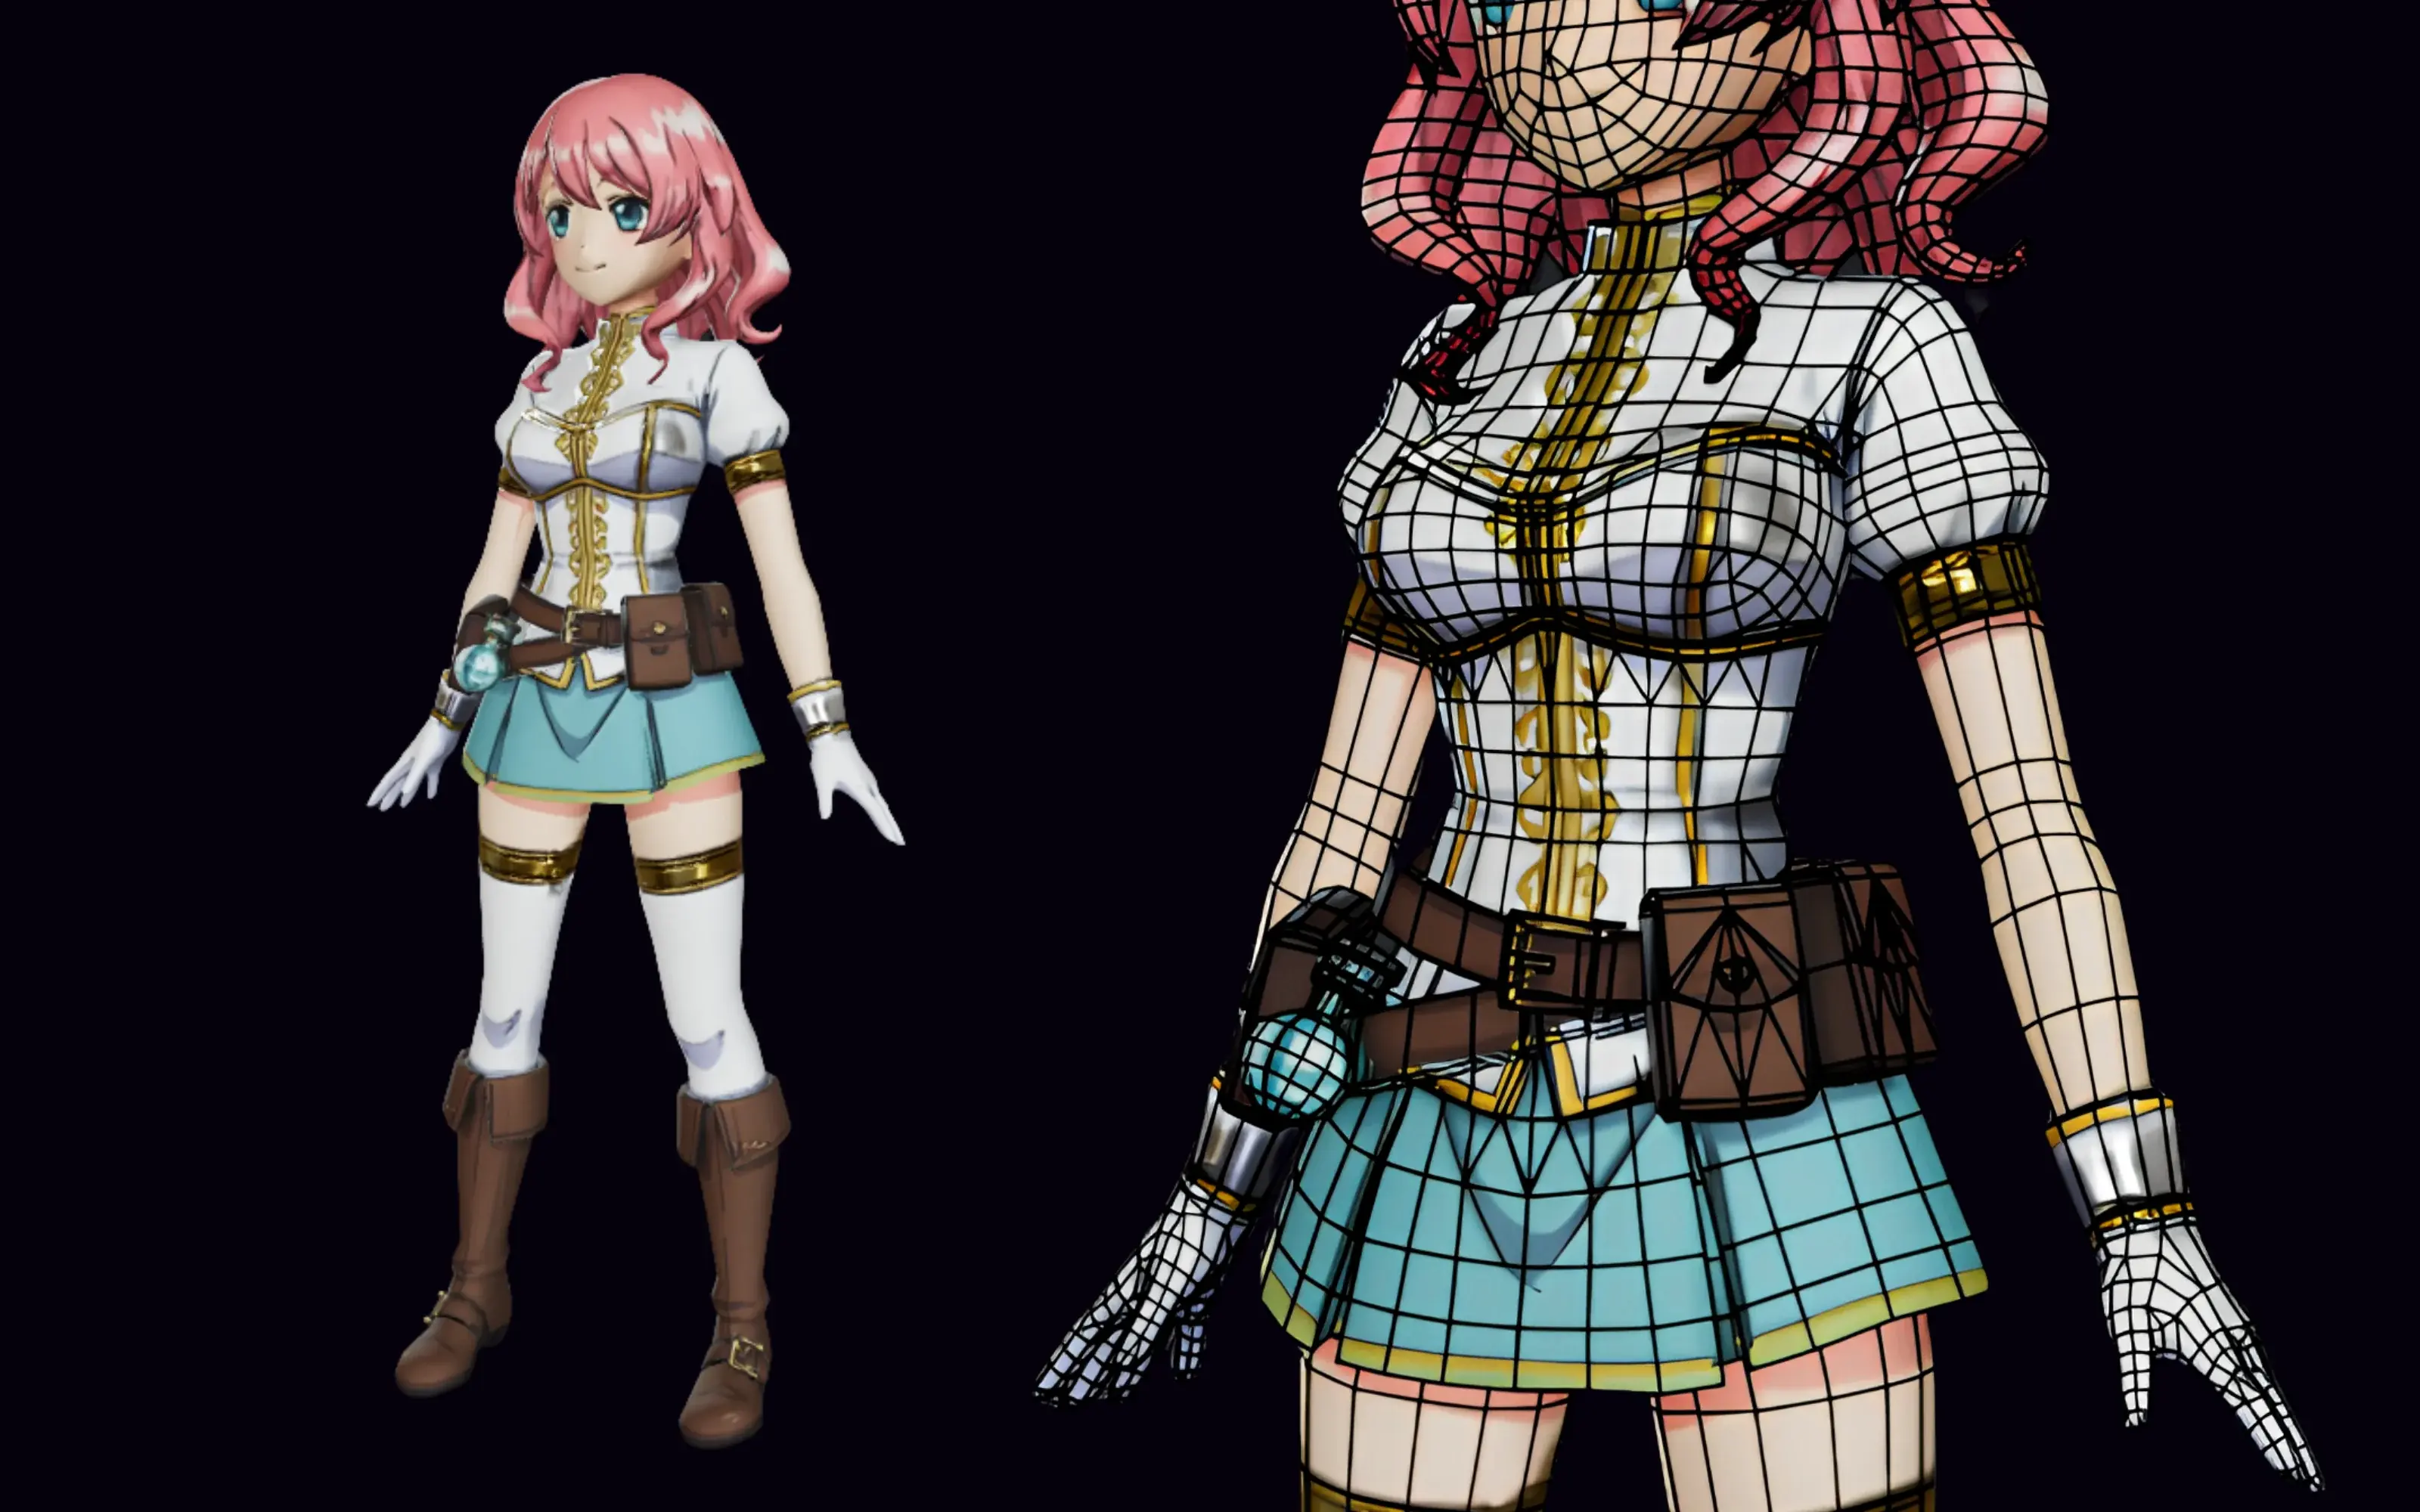
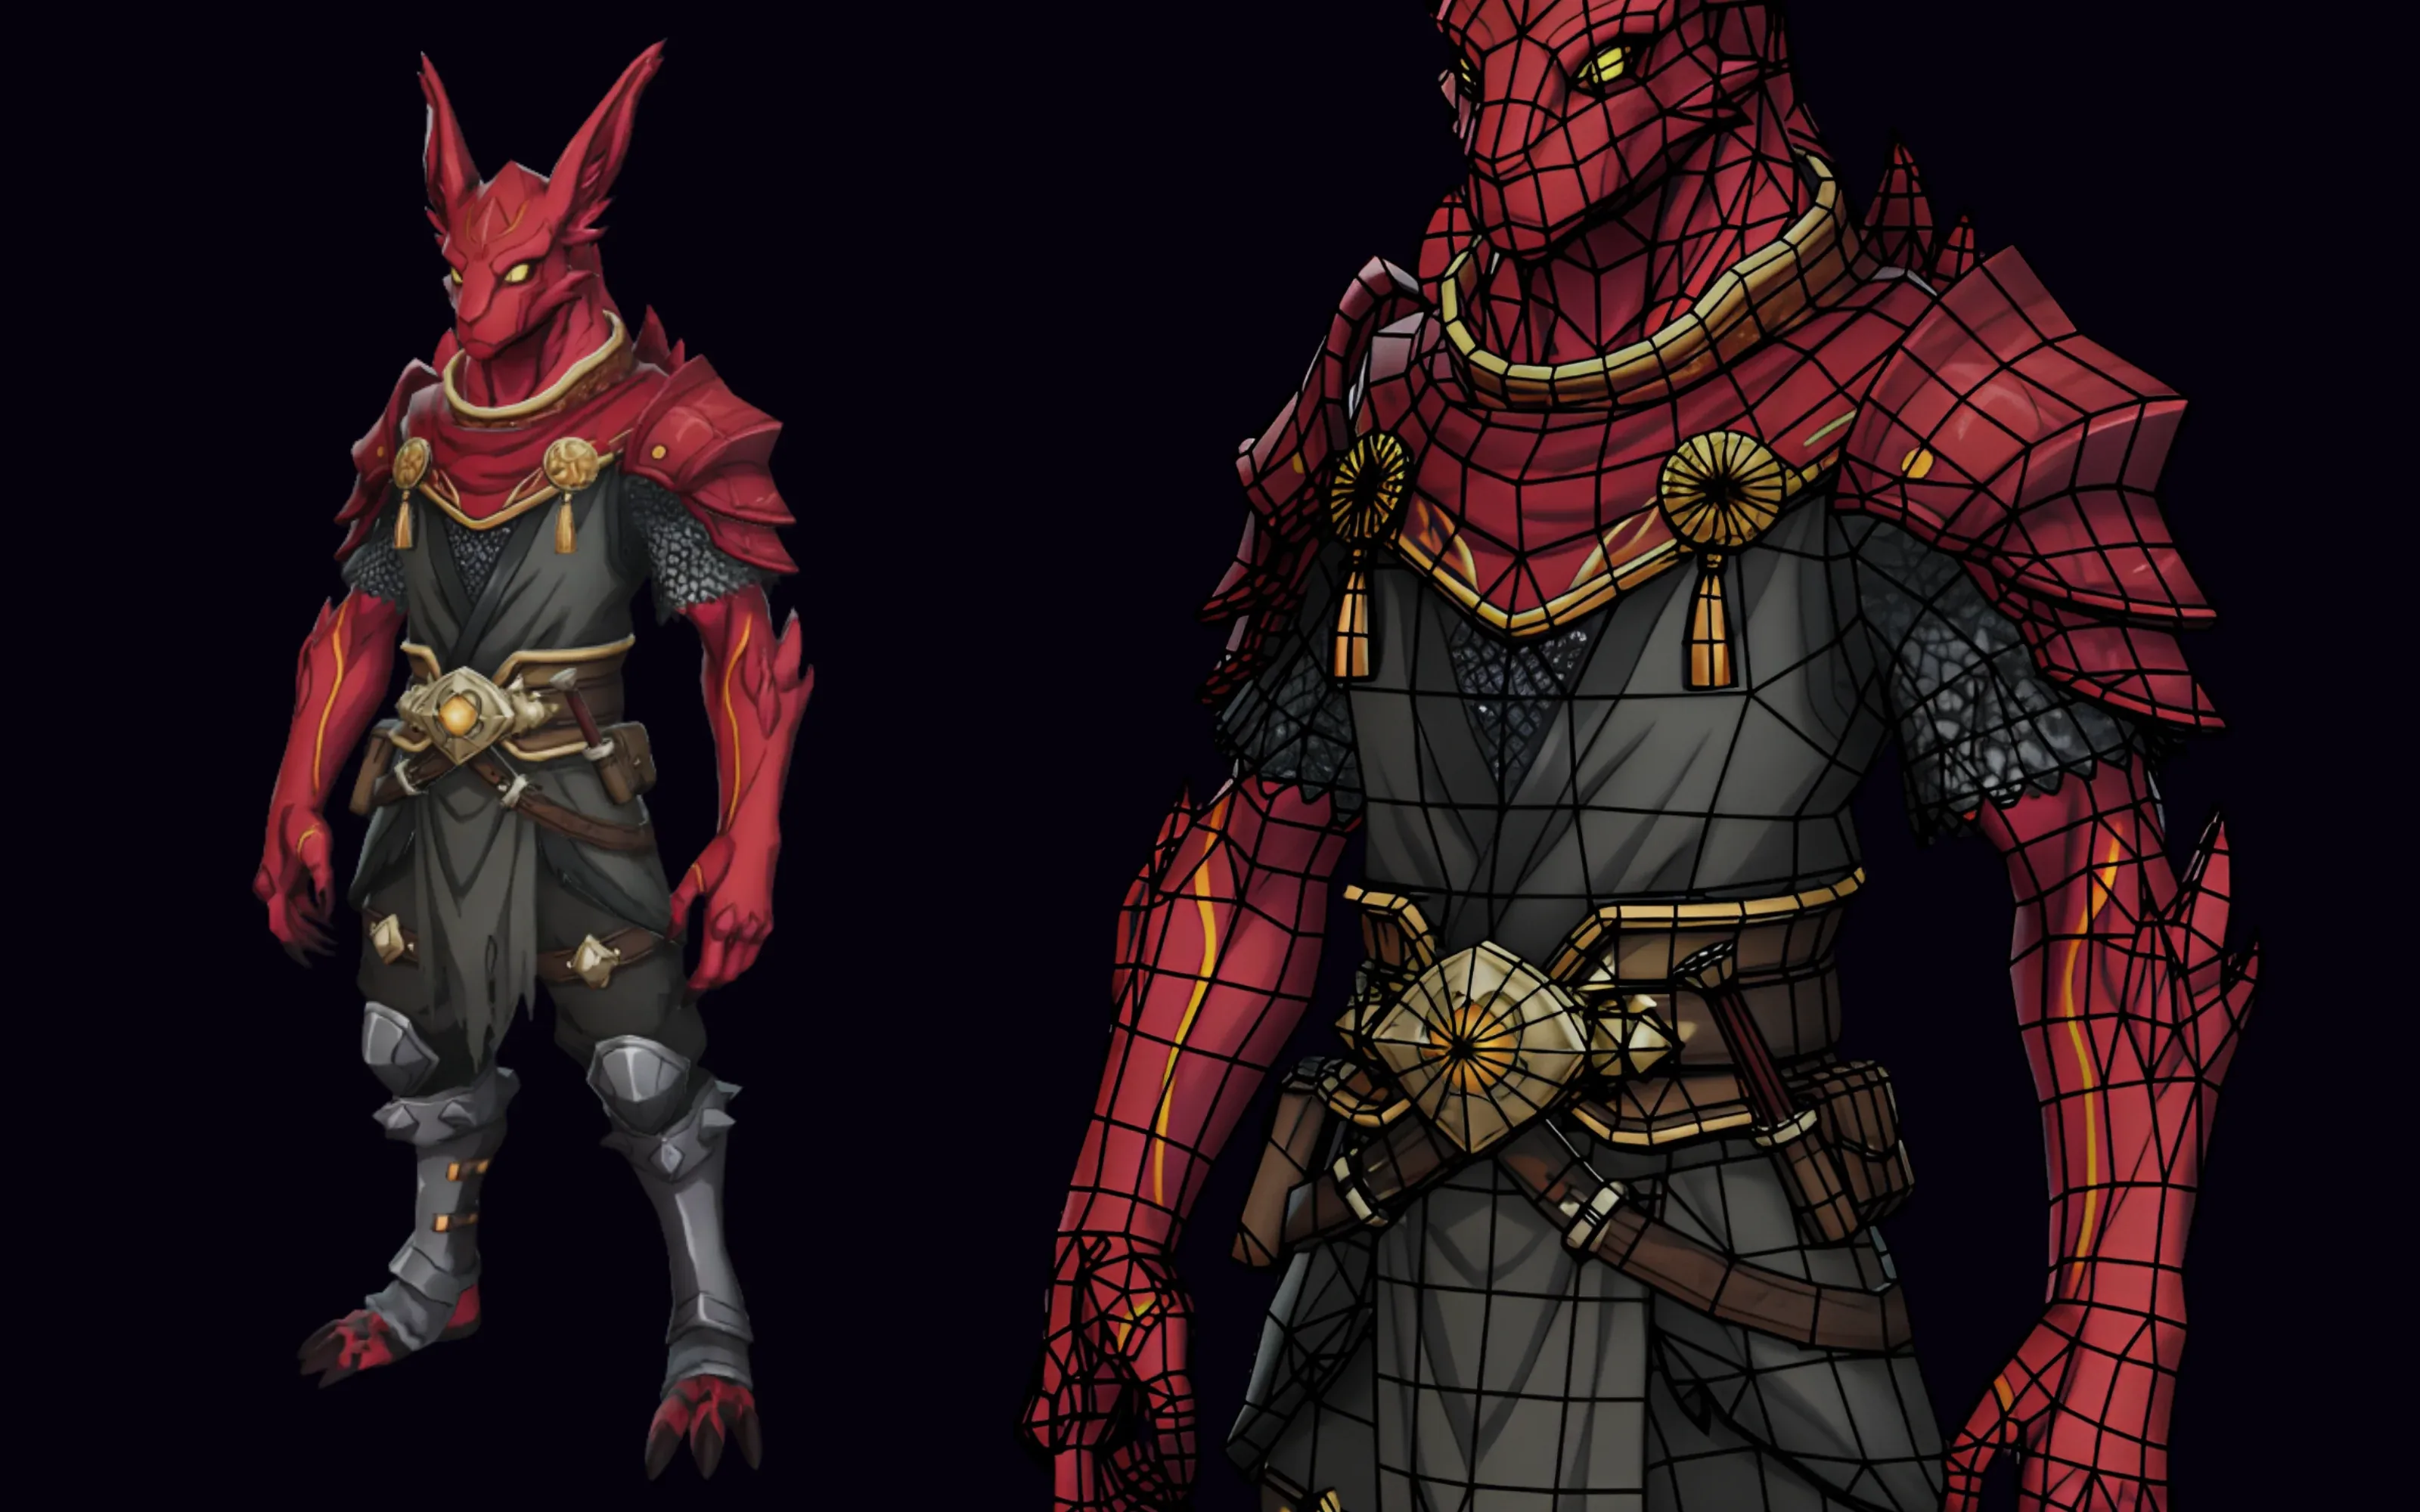
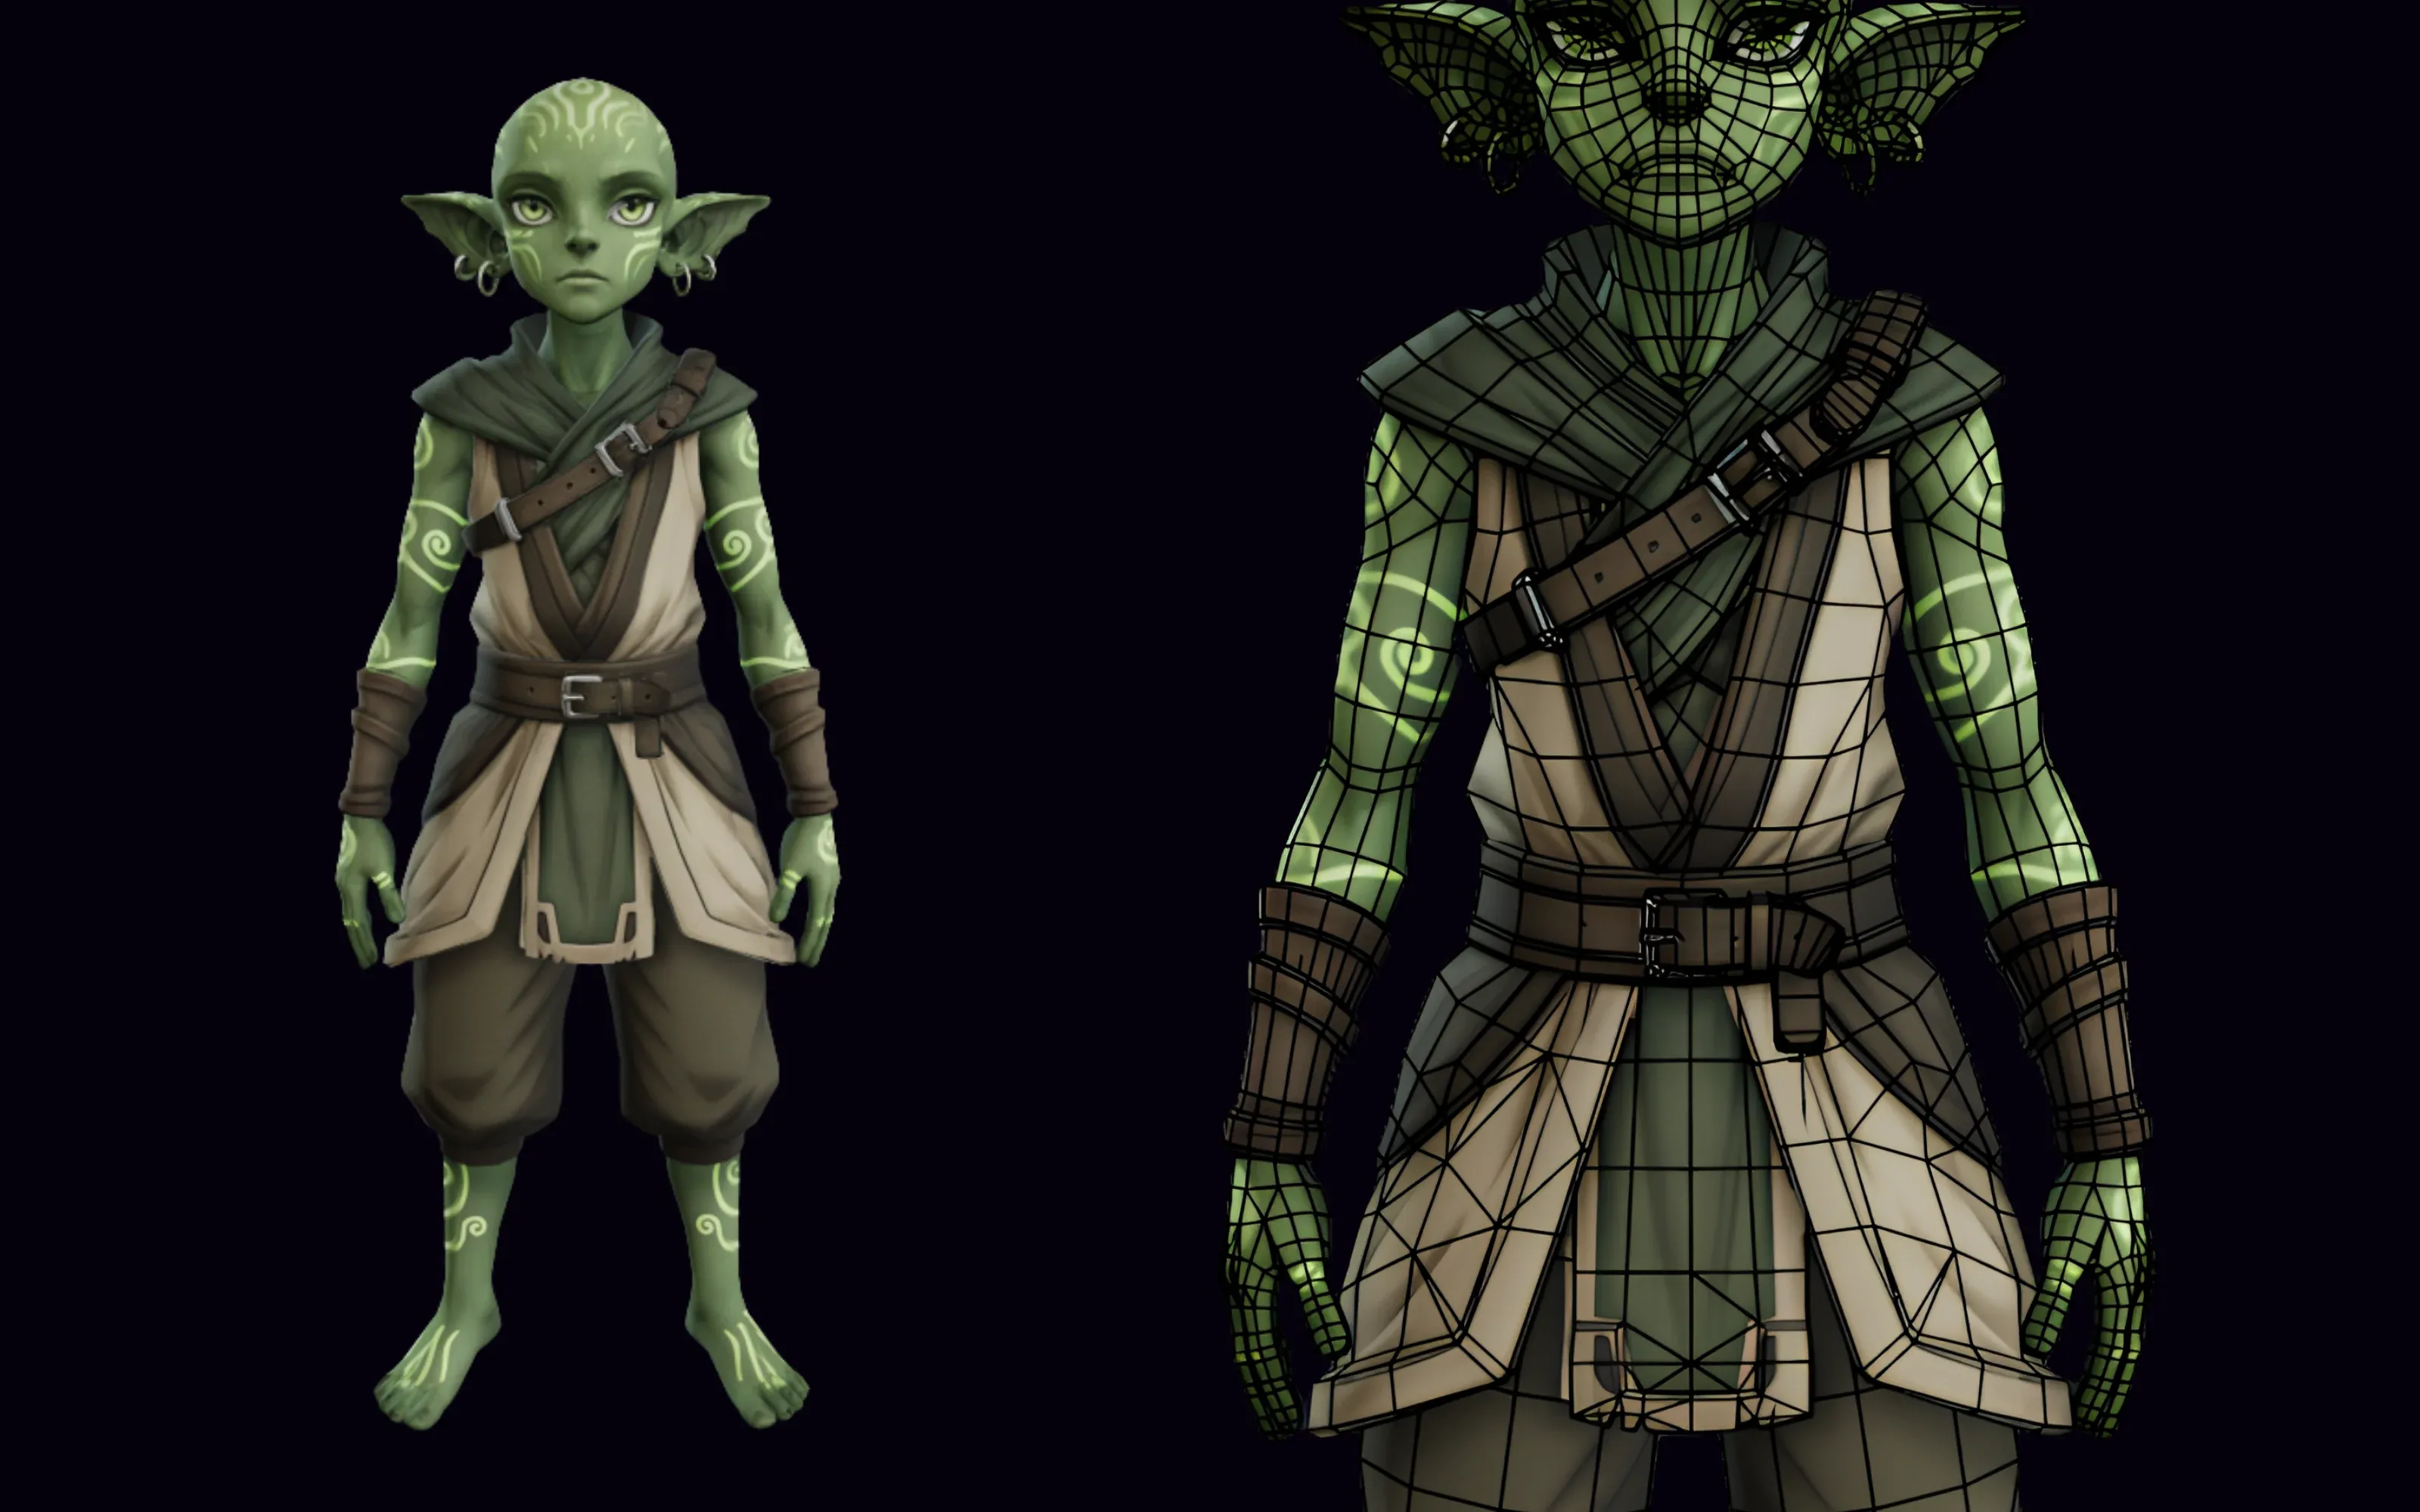
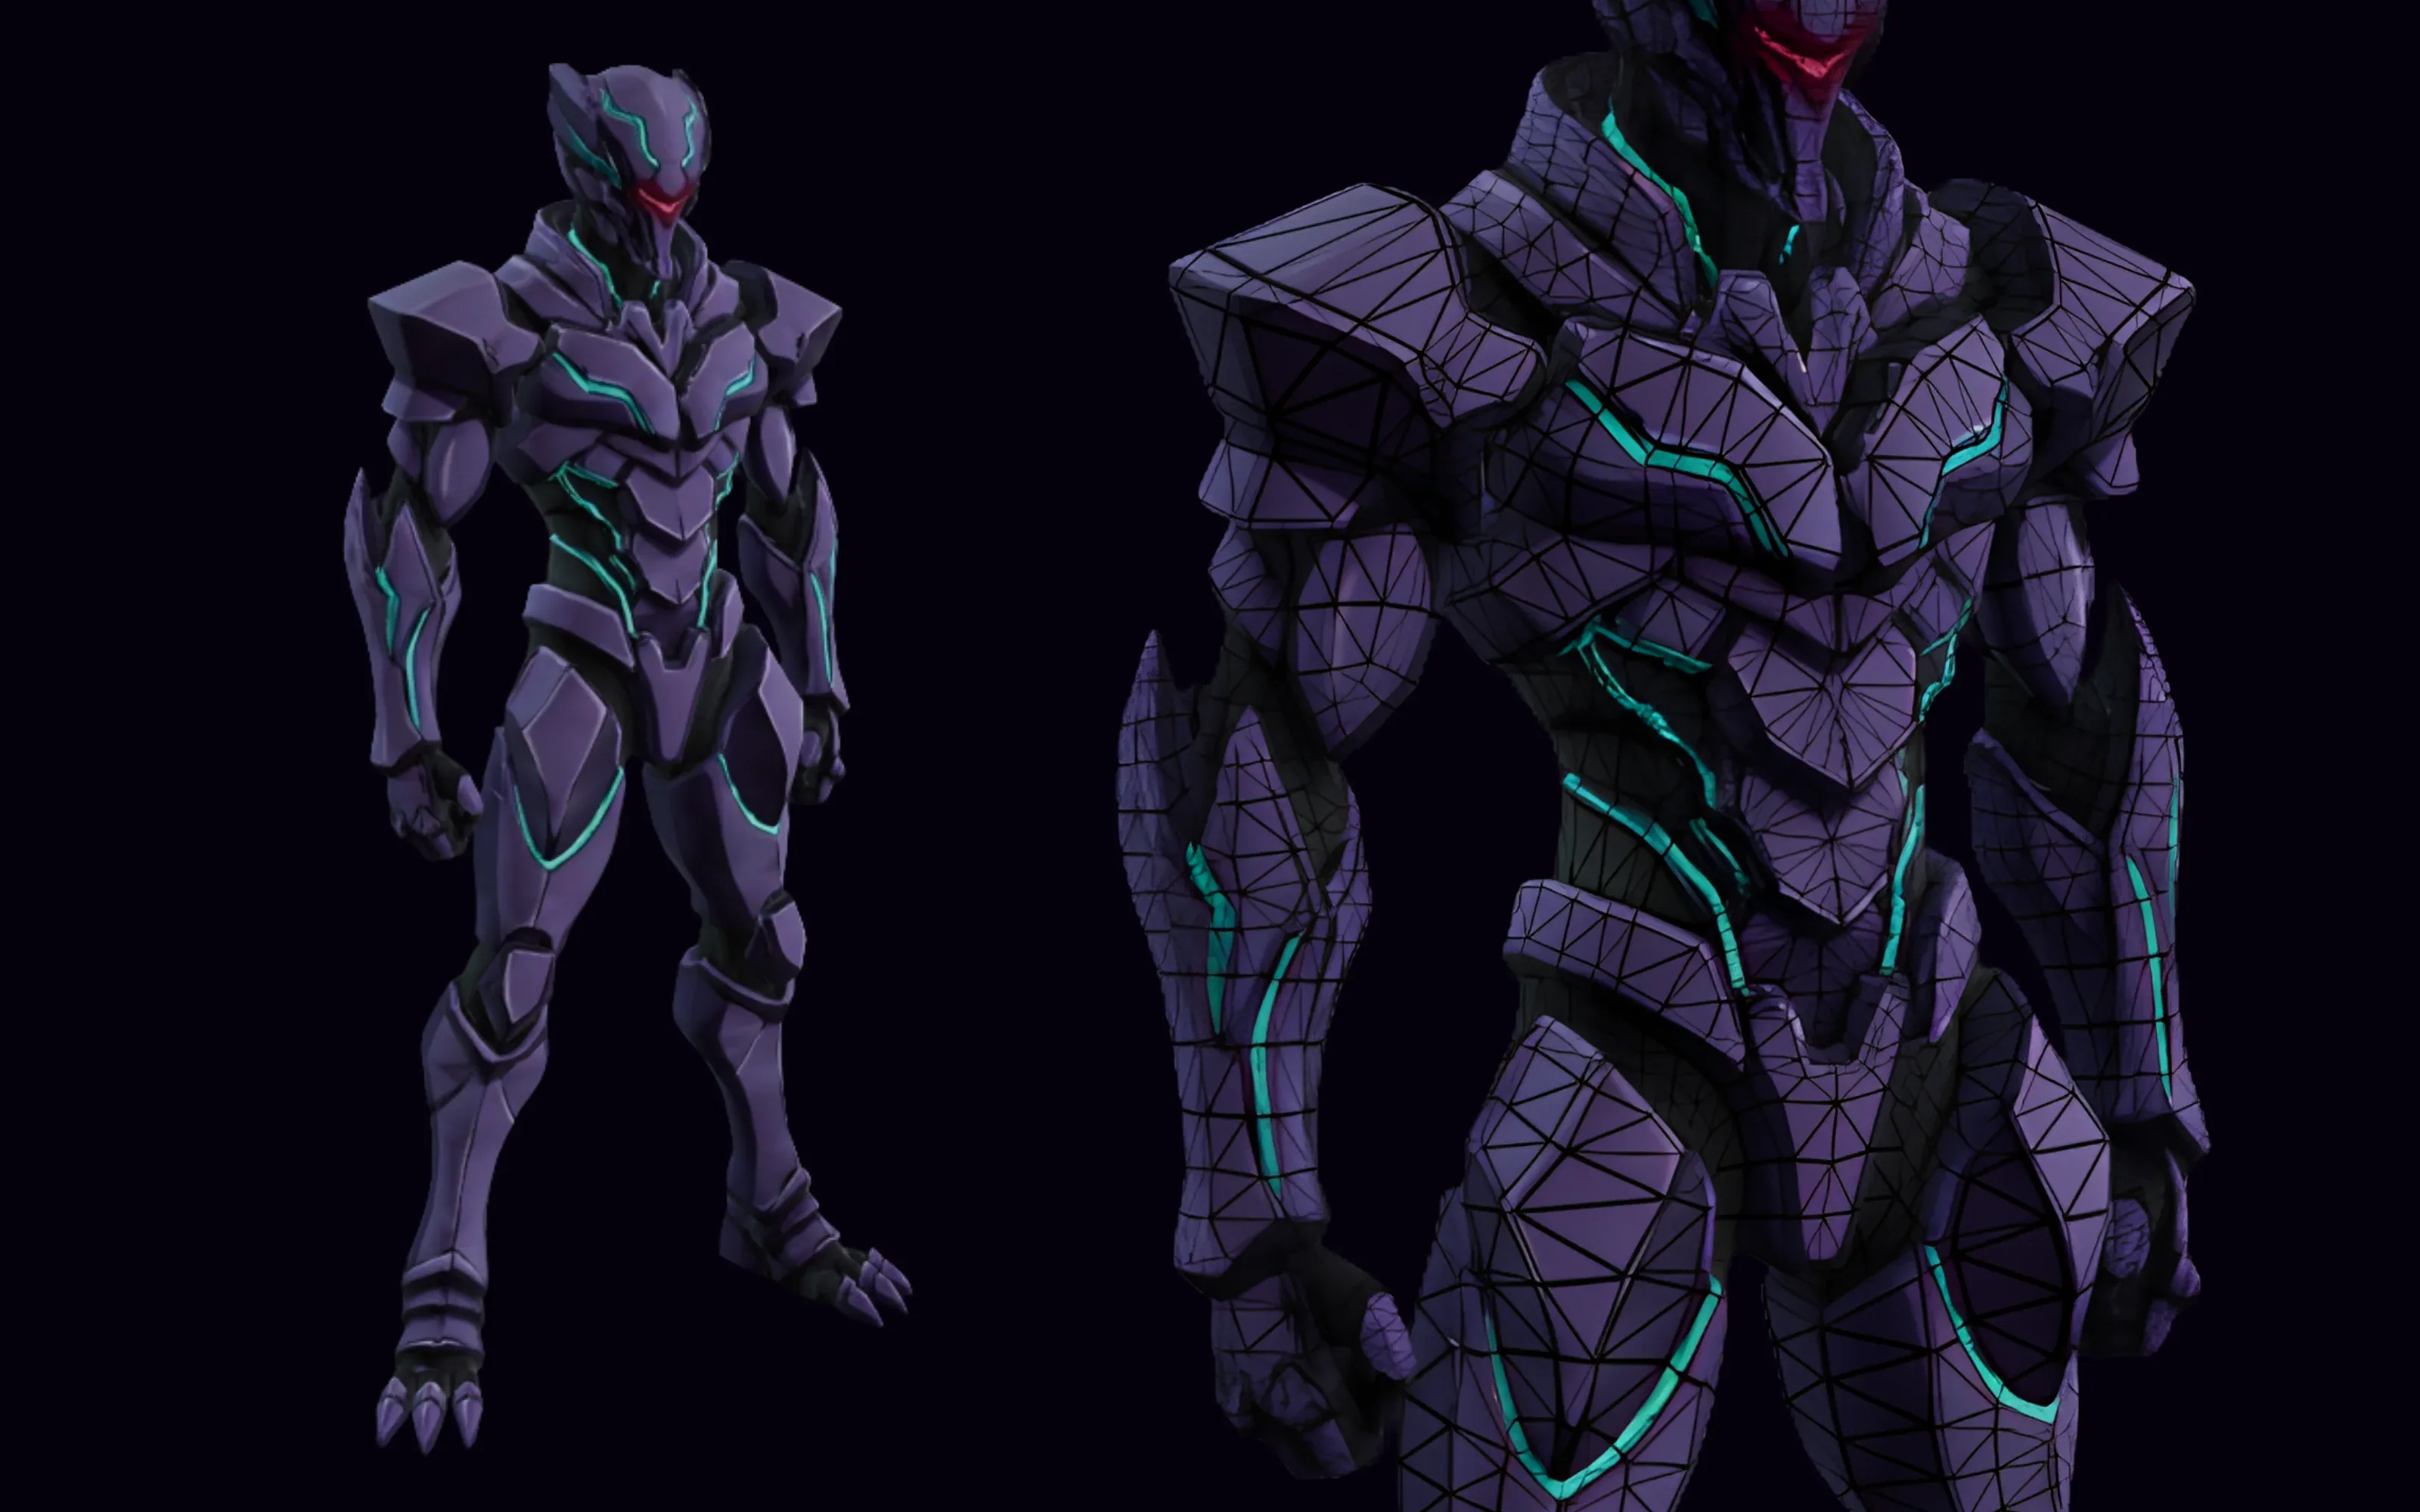
Characters from this workflow

Example renders from the workflow above. Each one still needs a review against your project’s standards — polygon count, UVs, skinning weights, and how the silhouette reads in play.

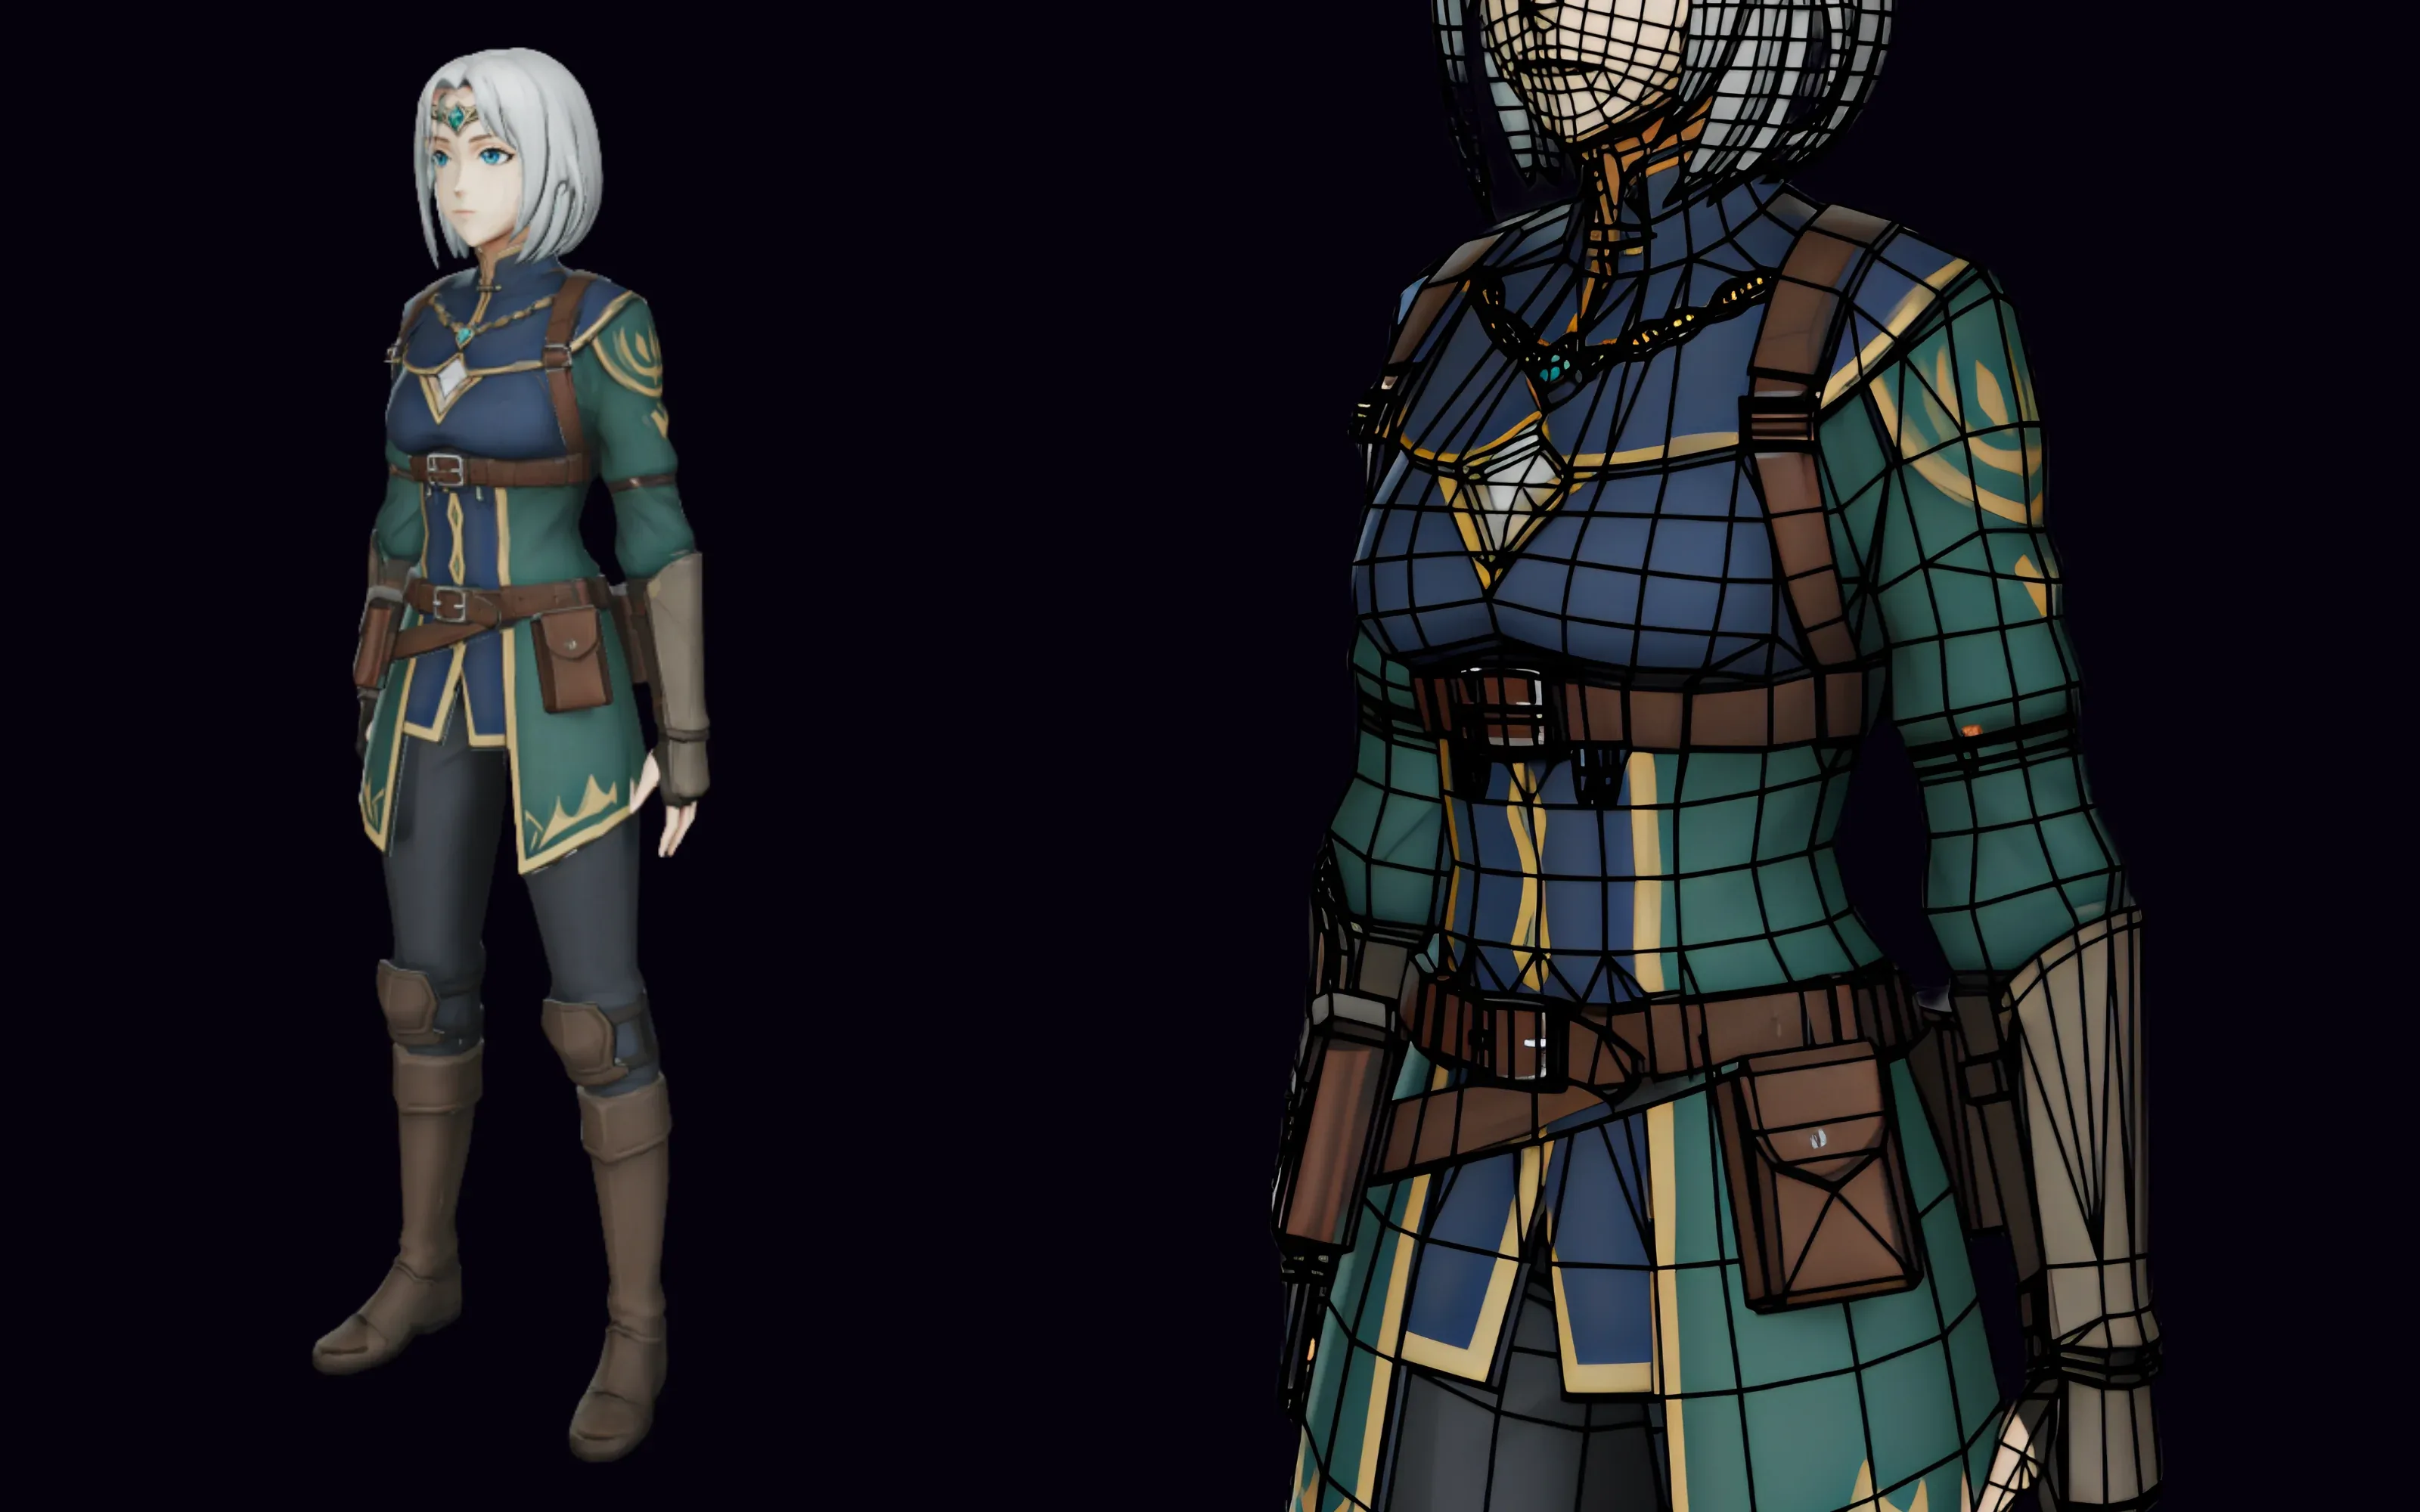
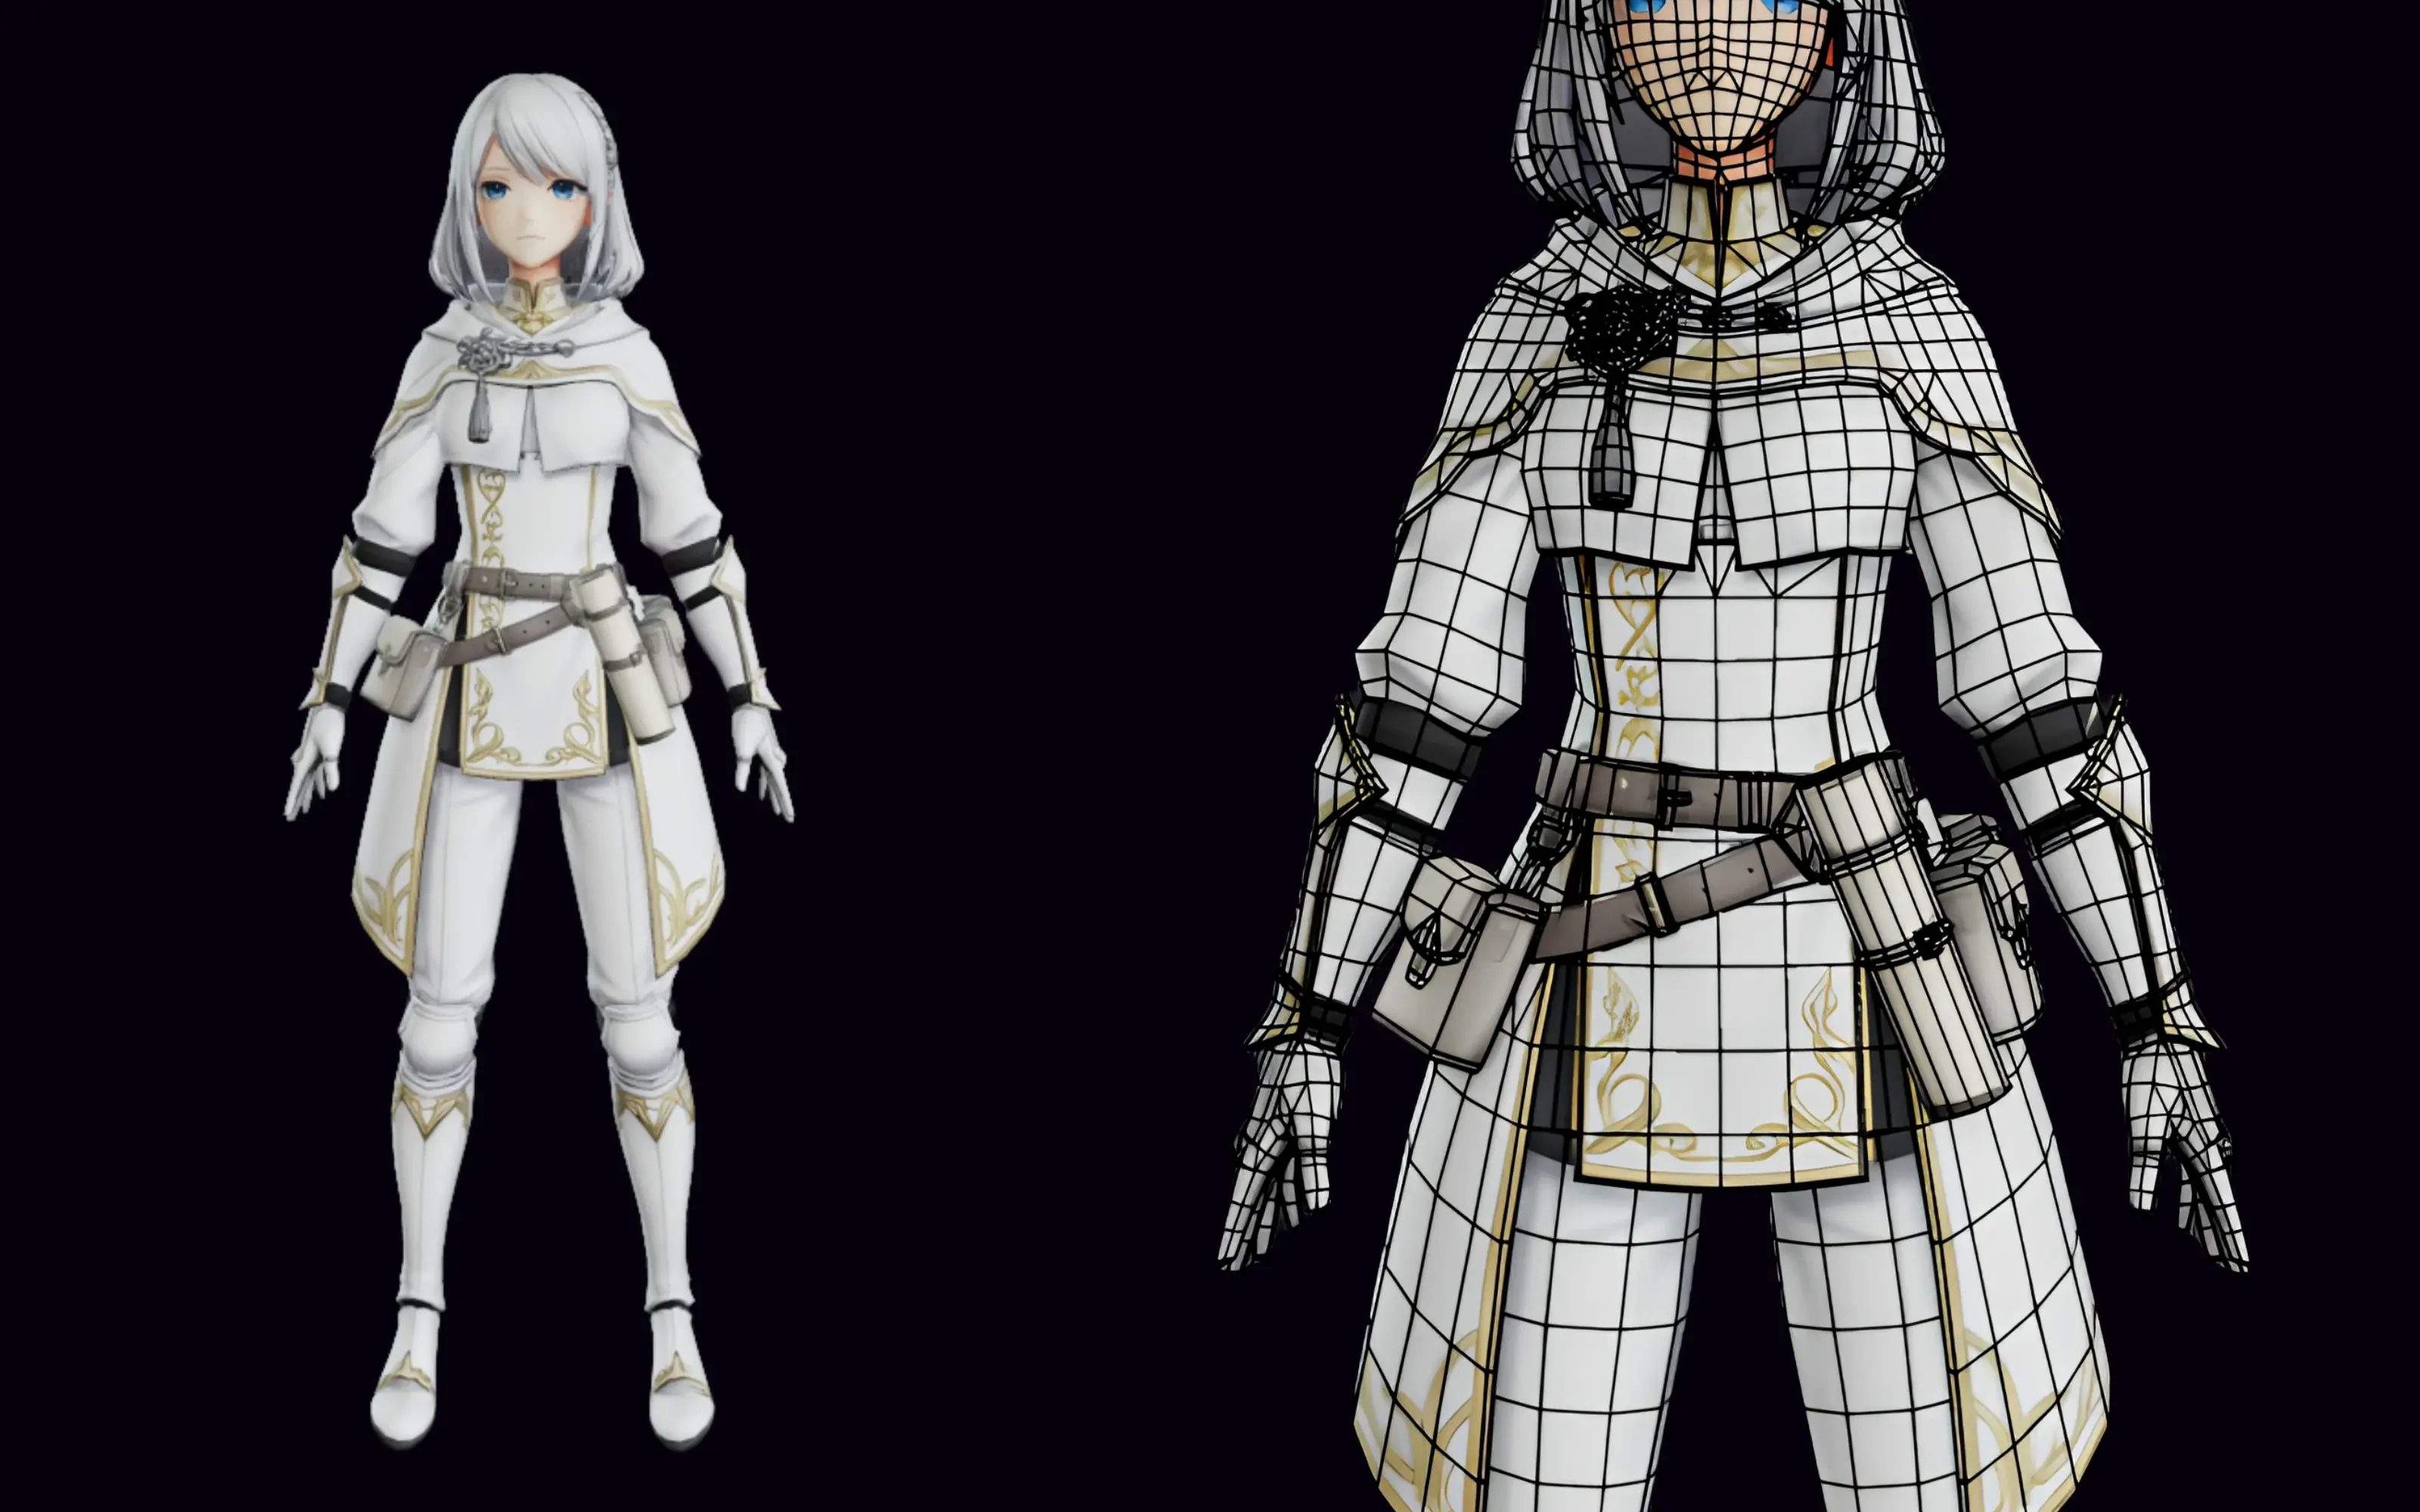
A pink-haired anime girl adventurer character in a white top and teal skirt, shown textured and with its clean rig-ready wireframe topologyA red dragon-kin warrior character in samurai armor, shown textured and with its wireframe topologyA green-skinned humanoid character with glowing tattoos and monk robes, shown textured and with its wireframe topologyA purple sci-fi armored warrior with glowing teal energy lines, shown textured and with its wireframe topologyA silver-haired anime mage character in a green-and-blue tunic with a gem circlet, shown textured and with its wireframe topologyA silver-haired anime cleric character in white-and-gold hooded robes, shown textured and with its wireframe topology

The bottom line for characters

Great characters start with a clean T-pose, then the right model. Generate the reference in PicoBerry Image Generation or bring your own, then try PB Ultra and PB Slim 2 and keep the one with the better silhouette and rig-friendly topology, then auto-rig and animate the winner with the animation library (Tripo or Meshy engine) in PicoBerry.Models change and results depend on your prompt, so treat this as a starting point to test, not a fixed ranking. The full method lives in the hub guide.

Frequently asked questions

What is the best AI 3D model for characters?

There isn’t a fixed best, but PB Ultra and PB Slim 2 are strong first tries for characters. Start from a clean T-pose, test both on the same reference, and keep the one with the better silhouette and more rig-friendly topology, then auto-rig and animate it with the animation library (Tripo or Meshy engine) in PicoBerry.

Do I need a T-pose to generate a character?

It helps a lot. A clean T-pose with arms out gives the auto-rig clear joints and makes animation retargeting far more reliable. You can generate one in PicoBerry Image Generation, and a 4-view reference improves the result further.

Why does my character’s rig fail at the shoulders?

Almost always because the arms were too close to the body in the reference. When the arm and the torso nearly touch, the generated mesh fuses them, and no auto-rig can find a clean shoulder joint in fused geometry. Regenerate from a T-pose with the arms out and clear, or remesh first to separate the surfaces. The same rule applies between the legs and under the chin.

How many polygons should a game character have?

Whatever your platform and your on-screen count allow — there is no universal number, and a figure from another project is not a budget. Decide from your own target: a hero the camera stays on carries far more than a crowd NPC, and a mobile build carries far less than a desktop one. Generate first, then remesh to the number you actually chose and check that the silhouette still holds at that count.

Characters across Models

Generate the same T-pose on a couple of models in PicoBerry, compare silhouette and rig-readiness, then rig and animate the one that fits.